# Study Platform Documentation
## SHiNE-Framework
Welcome to V-SHiNE: Virtual Smart Home with iNtelligent and Explainability Features!
- [Introduction](https://exmartlab.github.io/SHiNE-Framework/index.md): Welcome to V-SHiNE: Virtual Smart Home with iNtelligent and Explainability Features!
### search
- [Search the documentation](https://exmartlab.github.io/SHiNE-Framework/search.md)
### architecture
The V-SHINE Study Platform is a distributed web application designed for conducting smart home simulation research. The architecture employs real-time communication, modular services, and flexible data storage to support interactive research studies.
- [V-SHINE Platform Architecture](https://exmartlab.github.io/SHiNE-Framework/architecture.md): The V-SHINE Study Platform is a distributed web application designed for conducting smart home simulation research. The architecture employs real-time communication, modular services, and flexible data storage to support interactive research studies.
### game-config
To configure the game, both JSON files game.json and explanation.json is required in the folder platform/src/*.
- [Configuration](https://exmartlab.github.io/SHiNE-Framework/game-config.md): To configure the game, both JSON files game.json and explanation.json is required in the folder platform/src/*.
#### database
Introduction
- [Database](https://exmartlab.github.io/SHiNE-Framework/game-config/database.md): Introduction
#### explanation_engine
Inroduction
- [Explanation Engine](https://exmartlab.github.io/SHiNE-Framework/game-config/explanation_engine.md): Inroduction
#### game_schema
The game.json file defines the full structure of a smart home simulation used in our game-based studies. It coordinates all key components that drive user experience, system behavior, and experimental logic.
- [Game Config Schema](https://exmartlab.github.io/SHiNE-Framework/game-config/game_schema.md): The game.json file defines the full structure of a smart home simulation used in our game-based studies. It coordinates all key components that drive user experience, system behavior, and experimental logic.
- [Devices](https://exmartlab.github.io/SHiNE-Framework/game-config/game_schema/devices.md): Introduction
- [Environment](https://exmartlab.github.io/SHiNE-Framework/game-config/game_schema/environment.md): Temporal Configuration of the Simulation Environment:
- [Interacting with Devices](https://exmartlab.github.io/SHiNE-Framework/game-config/game_schema/interaction_types.md): Introduction
- [Rules](https://exmartlab.github.io/SHiNE-Framework/game-config/game_schema/rules.md): Inroduction:
- [Tasks](https://exmartlab.github.io/SHiNE-Framework/game-config/game_schema/tasks.md): Introduction
- [Walls](https://exmartlab.github.io/SHiNE-Framework/game-config/game_schema/walls.md): Introduction
### getting-started
This guide helps you understand the platform architecture and create your first smart home study. After completing the Installation, you're ready to build your first interactive smart home scenario.
- [Getting Started](https://exmartlab.github.io/SHiNE-Framework/getting-started.md): This guide helps you understand the platform architecture and create your first smart home study. After completing the Installation, you're ready to build your first interactive smart home scenario.
### installation
This guide covers the installation requirements and setup process for the V-SHINE Study Platform.
- [Installation](https://exmartlab.github.io/SHiNE-Framework/installation.md): This guide covers the installation requirements and setup process for the V-SHINE Study Platform.
### scenario
This section contains example scenarios demonstrating how to configure and implement smart home simulation studies using the V-SHiNE platform.
- [Scenarios](https://exmartlab.github.io/SHiNE-Framework/scenario.md): This section contains example scenarios demonstrating how to configure and implement smart home simulation studies using the V-SHiNE platform.
#### default-scenario
Introduction
- [Default Scenario](https://exmartlab.github.io/SHiNE-Framework/scenario/default-scenario.md): Introduction
#### scenario-2
Introduction
- [CIRCE Scenario](https://exmartlab.github.io/SHiNE-Framework/scenario/scenario-2.md): Introduction
### testing
The V-SHINE Study Platform employs a comprehensive test suite built with Vitest to ensure reliability across all critical components of the smart home simulation platform.
- [Test Suite Documentation](https://exmartlab.github.io/SHiNE-Framework/testing.md): The V-SHINE Study Platform employs a comprehensive test suite built with Vitest to ensure reliability across all critical components of the smart home simulation platform.
---
# Full Documentation Content
[Skip to main content](#__docusaurus_skipToContent_fallback)
[](https://exmartlab.github.io/SHiNE-Framework/SHiNE-Framework/.md)
[**V-SHINE**](https://exmartlab.github.io/SHiNE-Framework/SHiNE-Framework/.md)[Tutorial](https://exmartlab.github.io/SHiNE-Framework/SHiNE-Framework/.md)
[GitHub](https://github.com/ExmartLab/SHiNE-Framework)
Search
# Search the documentation
Docs
* [Tutorial](https://exmartlab.github.io/SHiNE-Framework/SHiNE-Framework/.md)
Copyright © 2025 V-SHINE
---
# V-SHINE Platform Architecture
The V-SHINE Study Platform is a distributed web application designed for conducting smart home simulation research. The architecture employs real-time communication, modular services, and flexible data storage to support interactive research studies.
## System Overview[](#system-overview "Direct link to System Overview")
The platform consists of four main components working together
```
┌─────────────────────────────────────────────────────────────────────────────────┐
│ V-SHINE Study Platform │
├─────────────────────────────────────────────────────────────────────────────────┤
│ │
│ ┌─────────────────────────┐ ┌─────────────────────────────┐ │
│ │ V-SHINE FRONTEND │◄───Socket.IO───►│ V-SHINE BACKEND │ │
│ │ │ │ │ │
│ │ ┌─────────────────┐ │ │ ┌─────────────────────┐ │ │
│ │ │ React Components│ │ WebSocket │ │ Socket Handlers │ │ │
│ │ │ • Study Page │ │ Events: │ │ • Device Interaction│ │ │
│ │ │ • Task Management│ │ • device-int │ │ • Task Management │ │ │
│ │ │ • Explanations │ │ • game-start │ │ • Explanation Req │ │ │
│ │ └─────────────────┘ │ • task-abort │ │ • Game Events │ │ │
│ │ │ │ │ └─────────────────────┘ │ │
│ │ ┌─────────────────┐ │ │ │ │ │
│ │ │ Phaser 3 Game │ │ │ ┌─────────────────────┐ │ │
│ │ │ • GameScene │ │ │ │ Next.js APIs │ │ │
│ │ │ • Device Objects│────┼─────────────────┼──┤ • /api/create-session │ │
│ │ │ • Room Layout │ │ HTTP Requests │ │ • /api/game-data │ │ │
│ │ │ • Smarty │ │ │ │ • /api/verify-session │ │
│ │ └─────────────────┘ │ │ │ • /api/complete-study │ │
│ └─────────────────────────┘ │ └─────────────────────┘ │ │
│ │ │ │ │
│ │ ▼ │ │
│ │ ┌─────────────────────┐ │ │
│ │ │ MongoDB Driver │ │ │
│ │ │ • Connection Pool │ │ │
│ │ │ • Session Mgmt │ │ │
│ │ └─────────────────────┘ │ │
│ └─────────────┬───────────────┘ │
│ │ │
│ ┌─────────────────────────────────────────────────────────┼───────────────┐ │
│ │ MONGODB DATABASE │ │ │
│ │ ▼ │ │
│ │ ┌──────────┐ ┌──────────┐ ┌──────────┐ ┌──────────┐ ┌──────────┐ │ │
│ │ │sessions │ │ tasks │ │ devices │ │expl. │ │ logs │ │ │
│ │ │• metadata│ │• status │ │• states │ │• content │ │• events │ │ │
│ │ │• socketId│ │• timing │ │• values │ │• ratings │ │• timing │ │ │
│ │ └──────────┘ └──────────┘ └──────────┘ └──────────┘ └──────────┘ │ │
│ └─────────────────────────────────────────────────────────────────────────┘ │
│ │
│ ┌─────────────────────────────────────────────────────────────────────────┐ │
│ │ EXTERNAL EXPLANATION ENGINE (Optional) │ │
│ │ │ │
│ │ ┌─────────────────────────┐ ┌─────────────────────────┐ │ │
│ │ │ REST Interface │◄─────────►│ WebSocket Interface │ │ │
│ │ │ │ │ │ │ │
│ │ │ POST /logger │ │ Socket.IO Client │ │ │
│ │ │ POST /explanation │───────────│ • user_log (emit) │ │ │
│ │ │ │ │ • explanation_receival │ │ │
│ │ │ HTTP Request/Response │ │ (listen) │ │ │
│ │ └─────────────────────────┘ │ │ │ │
│ │ ▲ │ Real-time bidirectional │ │ │
│ │ │ └─────────────────────────┘ │ │
│ │ │ ▲ │ │
│ │ └─────────────────────────────────────┘ │ │
│ │ Backend selects interface │ │
│ │ based on explanation_config.json │ │
│ └─────────────────────────────────────────────────────────────────────────┘ │
└─────────────────────────────────────────────────────────────────────────────────┘
```
## Core Components[](#core-components "Direct link to Core Components")
### 🎮 V-SHINE Frontend[](#-v-shine-frontend "Direct link to 🎮 V-SHINE Frontend")
**Technology Stack**: React 19 + Next.js 15 + Phaser 3 + Socket.IO Client + TypeScript
The frontend combines traditional web UI components with a game engine for interactive smart home simulation.
#### React Layer (`/src/app/study/`)[](#react-layer-srcappstudy "Direct link to react-layer-srcappstudy")
* **Study Page**: Main orchestrator managing WebSocket connections and React state
* **Environment Bar**: Task display and progress tracking
* **Smart Home Sidebar**: Device status and control interface
* **Task Abort Modal**: Task management with user feedback
* **Socket Service**: Centralized WebSocket communication manager
#### Phaser 3 Game Engine (`/src/app/study/game/`)[](#phaser-3-game-engine-srcappstudygame "Direct link to phaser-3-game-engine-srcappstudygame")
* **GameScene.ts**: Main coordinator setting up rooms, devices, and Smarty assistant
* **Device.ts**: Interactive device objects with visual states and click handlers
* **Room.ts**: Spatial boundaries and device containers
* **Smarty.ts**: Virtual assistant avatar for guidance
* **EventsCenter.ts**: Bridge between React and Phaser using event emitters
#### Frontend-Backend Communication[](#frontend-backend-communication "Direct link to Frontend-Backend Communication")
```
// Socket.IO Events - Frontend Emits
{
'device-interaction': { sessionId, device, interaction, value },
'game-start': { sessionId },
'task-abort': { sessionId, taskId, reason },
'explanation_request': { sessionId, deviceId },
'explanation_rating': { sessionId, explanationId, rating }
}
// Socket.IO Events - Frontend Listens
{
'update-interaction': { device, interaction, value, source },
'explanation': { content, rating_options, explanationId },
'game-update': { task_completed, next_task, device_updates }
}
```
### 🔧 V-SHINE Backend[](#-v-shine-backend "Direct link to 🔧 V-SHINE Backend")
**Technology Stack**: Next.js 15 + Socket.IO Server + MongoDB Driver + Node.js
The backend provides both HTTP APIs for session management and real-time Socket.IO handlers for game interactions.
#### Next.js API Routes (`/src/app/api/`)[](#nextjs-api-routes-srcappapi "Direct link to nextjs-api-routes-srcappapi")
* **`/api/create-session`**: Initializes new study session with tasks and device states
* **`/api/game-data`**: Returns game configuration merged with current device states
* **`/api/verify-session`**: Validates active sessions and handles timeouts
* **`/api/complete-study`**: Finalizes study data collection and cleanup
#### Socket.IO Event Handlers (`/src/lib/server/socket/`)[](#socketio-event-handlers-srclibserversocket "Direct link to socketio-event-handlers-srclibserversocket")
* **`deviceInteractionHandler.js`**: Core interaction processing with rule evaluation
* **`gameStartHandler.js`**: Session initialization and environment setup
* **`taskAbortHandler.js`**: Task abortion with reasoning collection
* **`taskTimeoutHandler.js`**: Automatic task timeout handling
* **`explanationRequestHandler.js`**: On-demand explanation delivery
* **`explanationRatingHandler.js`**: User feedback collection for explanations
#### Service Layer (`/src/lib/server/services/`)[](#service-layer-srclibserverservices "Direct link to service-layer-srclibserverservices")
* **`commonServices.js`**: Session validation, task management, rule checking
* **`rulesService.js`**: Automated device behavior and cascading updates
* **`deviceUtils.js`**: Device state management and interaction logging
### 🗄️ MongoDB Database[](#️-mongodb-database "Direct link to 🗄️ MongoDB Database")
**Collections and Data Relationships**:
```
sessions Collection
├── sessionId (unique identifier)
├── startTime, lastActivity (timing data)
├── isCompleted, completionTime (status tracking)
├── customData (participant metadata)
├── socketId (real-time connection tracking)
└── explanationCache (performance optimization)
tasks Collection
├── userSessionId (foreign key to sessions)
├── taskId, task_order (task identification)
├── isCompleted, isAborted, isTimedOut (status flags)
├── startTime, endTime (timing measurements)
├── taskDescription (study instructions)
└── abortionReason (user feedback)
devices Collection
├── userSessionId (foreign key to sessions)
├── deviceId (unique device identifier)
└── deviceInteraction[] (array of interaction states)
├── name (interaction property name)
├── type (boolean, numerical, stateless)
├── value (current state value)
└── timestamp (last modification time)
explanations Collection
├── userSessionId (foreign key to sessions)
├── explanationId (unique identifier)
├── content (explanation text)
├── rating (user feedback: like/dislike/none)
├── triggerContext (interaction that caused explanation)
├── timestamp (generation time)
└── metadata (explanation engine details)
logs Collection
├── userSessionId (foreign key to sessions)
├── eventType (device_interaction, task_event, etc.)
├── eventData (structured event information)
├── timestamp (precise event timing)
└── metadata (additional context data)
```
### 🤖 External Explanation Engine (Optional)[](#-external-explanation-engine-optional "Direct link to 🤖 External Explanation Engine (Optional)")
The platform supports integration with external explanation services to provide AI-generated explanations for user interactions. This is an optional component that can be implemented using various technologies and approaches.
#### Integration Approach[](#integration-approach "Direct link to Integration Approach")
The V-SHINE platform provides a **flexible integration layer** that supports different explanation service implementations through standardized interfaces:
**Dual Communication Support**:
* **WebSocket Interface**: Real-time bidirectional communication with asynchronous explanation delivery
* **REST Interface**: HTTP-based request/response with synchronous explanation delivery
* **Configurable Selection**: Interface choice is independent of explanation trigger mode - both support pull, push, and interactive modes
**Explanation Trigger Modes** (supported by both interfaces):
* **Pull Mode**: Explanations are cached and delivered only when user explicitly requests them
* **Push Mode**: Explanations are delivered immediately when triggered by system events
* **Interactive Mode**: Enables immediate explanations plus user message input for custom explanation requests
**Service Requirements**:
* **Input**: Receives user interaction data (device, action, context) and optional user messages
* **Processing**: Generates explanations using AI/ML models, rule-based systems, or other approaches
* **Output**: Returns structured explanation content with optional rating mechanisms
#### Implementation Flexibility[](#implementation-flexibility "Direct link to Implementation Flexibility")
Explanation services can be implemented using any technology stack:
* **AI/ML Services**: Integration with LLMs, expert systems, or custom models
* **Rule-Based Systems**: Template-driven explanations based on interaction patterns
* **Hybrid Approaches**: Combining multiple explanation generation strategies
* **Cloud Services**: Integration with external AI APIs or services
#### Backend Integration[](#backend-integration "Direct link to Backend Integration")
```
// Factory pattern provides unified interface for any explanation service
const explanationEngine = createExplanationEngine(explanationConfig);
// Standard callback interface regardless of implementation
explanationEngine.sendUserLog(interactionData, (explanation) => {
// Process explanation response
socket.emit('explanation', explanation);
});
```
Example Implementation
The repository includes a sample Python Flask explanation engine as a reference implementation, demonstrating both REST and WebSocket communication patterns. This serves as a starting point for developing custom explanation services.
## Data Flow Patterns[](#data-flow-patterns "Direct link to Data Flow Patterns")
### 🔄 Device Interaction Flow[](#-device-interaction-flow "Direct link to 🔄 Device Interaction Flow")
```
User Click (Phaser) → EventsCenter → React State → Socket.IO Client
│
▼
Backend Socket Handler ← MongoDB Update ← Rule Evaluation ← Session Validation
│
▼
Real-time Broadcast → Frontend State Sync → Phaser Visual Update
```
**Detailed Steps**:
1. **User Interaction**: User clicks device in Phaser game
2. **Event Bridge**: EventsCenter forwards to React components
3. **Socket Emission**: React emits `device-interaction` event
4. **Backend Processing**: Socket handler validates session and processes interaction
5. **Rule Evaluation**: Rules engine checks for automated device responses
6. **Database Update**: Device states and interaction logs saved to MongoDB
7. **Real-time Sync**: Updated states broadcast to all connected clients
8. **Frontend Update**: React state and Phaser visuals reflect new device states
### 📝 Explanation Generation Flow[](#-explanation-generation-flow "Direct link to 📝 Explanation Generation Flow")
```
Trigger Event → Backend Handler → Explanation Engine Selection
│
┌─────────────────┴─────────────────┐
▼ ▼
REST Request WebSocket Event
│ │
▼ ▼
HTTP Response ←──── Service ────→ Socket Event
│ │
└─────────────┬─────────────────────┘
▼
Explanation Callback → Database Storage
│
▼
Frontend Toast Display
```
### 📊 Task Management Flow[](#-task-management-flow "Direct link to 📊 Task Management Flow")
```
Task Start Event → Task Begin Logging → Frontend Task Display
│
▼
User Interactions → Goal Checking → Task Completion Detection
│
┌───────────────────────────┴──────────────────────────┐
▼ ▼
Task Completed Task Aborted/Timeout
│ │
▼ ▼
Next Task Setup → Device State Reset → Frontend Update Abort Reason Logging
```
**Detailed Steps**:
1. **Task Initialization**: Game start triggers first task activation
2. **User Progress**: Device interactions checked against task goals
3. **Completion Detection**: Backend validates when task objectives are met
4. **State Transition**: Current task marked complete, next task activated
5. **Device Reset**: Device states updated for new task requirements
6. **Frontend Sync**: Task progress and device states updated in real-time
### 🚀 Session Lifecycle[](#-session-lifecycle "Direct link to 🚀 Session Lifecycle")
```
HTTP: POST /api/create-session → Session + Tasks + Devices Created in MongoDB
│
▼
HTTP: GET /api/game-data → Game Config + Current Device States Merged
│
▼
Frontend: Socket.IO Connection → Real-time Event Handlers Registered
│
▼
Socket: game-start Event → Study Session Begins → Task Timer Starts
│
▼
Real-time Interactions → Device Events → Task Progress → Rule Evaluation
│
▼
HTTP: POST /api/complete-study → Final Data Collection → Session Cleanup
```
**Detailed Steps**:
1. **Session Creation**: API creates session record with associated tasks and initial device states
2. **Configuration Loading**: Frontend requests merged game config with current device states
3. **Socket Connection**: Real-time communication established for interactive gameplay
4. **Study Start**: User begins study, first task activated with timer
5. **Interactive Phase**: Device interactions, explanations, task progression
6. **Study Completion**: Final API call collects completion data and marks session finished
## Architecture Patterns[](#architecture-patterns "Direct link to Architecture Patterns")
### 🎯 Event-Driven Communication[](#-event-driven-communication "Direct link to 🎯 Event-Driven Communication")
* **Socket.IO**: Real-time bidirectional communication between frontend and backend
* **EventsCenter**: Decoupled communication between React and Phaser components
* **Callback Patterns**: Asynchronous explanation engine integration
### ⚙️ Configuration-Driven Design[](#️-configuration-driven-design "Direct link to ⚙️ Configuration-Driven Design")
* **JSON Configuration**: `game.json` and `explanation.json` define study parameters
* **Dynamic State Merging**: Game configuration merged with real-time device states
* **Flexible Rule System**: JSON-defined automated behaviors and device responses
### 🏗️ Modular Service Architecture[](#️-modular-service-architecture "Direct link to 🏗️ Modular Service Architecture")
* **Specialized Handlers**: Dedicated socket handlers for different event types
* **Shared Services**: Common operations abstracted into reusable services
* **Factory Patterns**: Plugin-style explanation engine selection
### 🔄 State Synchronization[](#-state-synchronization "Direct link to 🔄 State Synchronization")
* **Single Source of Truth**: MongoDB serves as authoritative state store
* **Real-time Updates**: Socket.IO ensures frontend reflects backend state changes
* **Session Isolation**: Each user session maintains independent device states
## Security and Performance[](#security-and-performance "Direct link to Security and Performance")
### 🔐 Security Measures[](#-security-measures "Direct link to 🔐 Security Measures")
* **Session Validation**: All socket events validate active sessions
* **Input Sanitization**: User inputs validated against JSON schemas
* **Connection Management**: Socket IDs tracked for secure communication
### ⚡ Performance Optimizations[](#-performance-optimizations "Direct link to ⚡ Performance Optimizations")
* **MongoDB Connection Pooling**: Efficient database connection management
* **Explanation Caching**: Generated explanations cached to avoid regeneration
* **Real-time Optimization**: Socket.IO rooms for efficient event broadcasting
* **Static Asset Caching**: Next.js optimization for game assets and configurations
Architecture Benefits
This architecture provides:
* **Scalability**: Modular design supports multiple concurrent research sessions
* **Flexibility**: Configuration-driven approach allows easy study customization
* **Reliability**: Event-driven patterns with comprehensive error handling
* **Research Focus**: Comprehensive logging and data collection for analysis
---
# Configuration
To configure the game, both JSON files `game.json` and `explanation.json` is required in the folder `platform/src/*`.
Both files configure the game, such as task, environment, room layout, rules and the underlying explanation engine. Currently, both files are present, so they can be modified easily to your needs.
For an overview of the configuration, consider reading the subpages of this section for a detailed explanation of their function.
---
# Database
## Introduction[](#introduction "Direct link to Introduction")
Our framework uses a **MongoDB** database with five collections that are created upon session start and during gameplay logging.
| Collection Name | Description |
| ----------------------------- | -------------------------------------------------------------------------------------- |
| [devices](#devices) | Stores user device variables and their current states per session and device |
| [explanations](#explanations) | Stores generated explanations along with user ratings and interaction metadata |
| [logs](#logs) | Stores detailed logs of user interactions with the system during gameplay |
| [sessions](#sessions) | Stores general session information including identifiers, timestamps, and user context |
| [tasks](#tasks) | Stores user progress and performance on gameplay tasks |
## Devices[](#devices "Direct link to Devices")
The 'devices' collection stores device states and properties for each user in the form of JSON objects. Each object corresponds to a particular device in the smart environment for a specific session.
**Fields**
* **\_id**: Internal MongoDB Object ID.
* **userSessionId**: References the session this device belongs to (sessions.sessionId).
* **deviceId**: Unique ID of the device, matches the id field in game.json.
* **deviceInteraction**: Array of objects describing the current interaction state (see [Interacting with Devices](https://exmartlab.github.io/SHiNE-Framework/SHiNE-Framework/game-config/game_schema/interaction_types.md)) of the device.
Each element in deviceInteraction includes:
* name: Name of the interaction variable (e.g., “Power”, “Temperature”)
* type: Interaction type (e.g., "Boolean\_Action")
* value: Current value of the device parameter
**Example**
```
{
"_id": {
"$oid": "6890802b170e8ab76cd90c50"
},
"userSessionId": "a9297ea7-8f3a-4fcd-abd3-ae3bed267494",
"deviceId": "deep_fryer",
"deviceInteraction": [
{
"name": "Power",
"type": "Boolean_Action",
"value": false
},
{
"name": "Temperature",
"type": "Numerical_Action",
"value": 0
}
]
}
```
* `userSessionId`: User Session ID, references `sessions.sessionId`
* `deviceId`: Device ID, matches device `id` in `game.json`
* `deviceInteraction`: Array of JSON objects for each device interaction, containing the interaction name, type, and current value
## Logs[](#logs "Direct link to Logs")
The logs collection stores all user-generated actions and system events during gameplay. Each entry records a single event along with a timestamp, session reference, and context-specific metadata.
**Fields**
* **\_id**: Internal MongoDB Object ID.
* **type**: Type of the logged event (see [Log Types](#log-types) below).
* **metadata**: Event-specific metadata (e.g., task ID, rule ID, device ID).
* **timestamp**: Unix timestamp of when the event occurred.
* **userSessionId**: References the session in which the event occurred (sessions.sessionId).
**Example**
```
{
"_id": {
"$oid": "6890802e170e8ab76cd90c55"
},
"type": "TASK_BEGIN",
"metadata": {
"task_id": "deep_fryer"
},
"timestamp": 1754300462,
"userSessionId": "a9297ea7-8f3a-4fcd-abd3-ae3bed267494"
}
```
* `type`: Log type, see [Log Types](#log-types) section below
* `metadata`: Metadata for relevant log types, such as task ID
* `timestamp`: Unix timestamp of log creation
* `userSessionId`: User Session ID, references `sessions.sessionId`
### Log Types[](#log-types "Direct link to Log Types")
Each log entry’s type field corresponds to one of the following predefined event types, handled by the platform’s Logger class.
| Log Type | Description | Metadata Fields |
| ----------------------------------------------- | -------------------------------------------------------------- | -------------------------------------- |
| [RULE\_TRIGGER](#rule_trigger) | Triggered when a smart home automation rule activates | `rule_id`, `rule_action` |
| [TASK\_BEGIN](#task_begin) | User starts a new task | `task_id` |
| [TASK\_COMPLETED](#task_completed) | User successfully completes a task | `task_id` |
| [TASK\_TIMEOUT](#task_timeout) | Task duration exceeded the allowed time limit | `task_id` |
| [ABORT\_TASK](#abort_task) | Task was aborted manually or by the system | `task_id`, `abort_reason` |
| [DEVICE\_INTERACTION](#device_interaction) | User interacts with a device (e.g., toggling, adjusting value) | Device-specific metadata |
| [WALL\_SWITCH](#wall_switch) | User switches view to a different wall within the same room | `room`, `wall` |
| [ENTER\_DEVICE\_CLOSEUP](#enter_device_closeup) | User enters close-up view of a device | `device` |
| [EXIT\_DEVICE\_CLOSEUP](#exit_device_closeup) | User exits close-up view of a device | `device` |
| [ROOM\_SWITCH](#room_switch) | User moves from one room to another | `destination_room`, `destination_wall` |
#### RULE\_TRIGGER[](#rule_trigger "Direct link to RULE_TRIGGER")
Logged when automated rules are triggered in the smart home environment.
Metadata:
* `rule_id`: ID of the triggered rule
* `rule_action`: Action performed by the rule
#### TASK\_BEGIN[](#task_begin "Direct link to TASK_BEGIN")
Logged when a user starts a new task.
Metadata:
* `task_id`: ID of the task being started
#### TASK\_COMPLETED[](#task_completed "Direct link to TASK_COMPLETED")
Logged when a user successfully completes a task.
Metadata:
* `task_id`: ID of the completed task
#### TASK\_TIMEOUT[](#task_timeout "Direct link to TASK_TIMEOUT")
Logged when a task exceeds its time limit.
Metadata:
* `task_id`: ID of the task that timed out
#### ABORT\_TASK[](#abort_task "Direct link to ABORT_TASK")
Logged when a user or system aborts a task.
Metadata:
* `task_id`: ID of the aborted task
* `abort_reason`: Reason for task abortion
#### DEVICE\_INTERACTION[](#device_interaction "Direct link to DEVICE_INTERACTION")
Logged when a user interacts with smart home devices.
Metadata:
* Device-specific interaction data (varies by device type and interaction)
#### WALL\_SWITCH[](#wall_switch "Direct link to WALL_SWITCH")
Logged when user switches between walls in a room.
Metadata:
* `room`: Name of the room
* `wall`: Wall identifier being switched to
#### ENTER\_DEVICE\_CLOSEUP[](#enter_device_closeup "Direct link to ENTER_DEVICE_CLOSEUP")
Logged when user enters device closeup/interaction mode.
Metadata:
* `device`: Device identifier being accessed
#### EXIT\_DEVICE\_CLOSEUP[](#exit_device_closeup "Direct link to EXIT_DEVICE_CLOSEUP")
Logged when user exits device closeup mode.
Metadata:
* `device`: Device identifier being exited
#### ROOM\_SWITCH[](#room_switch "Direct link to ROOM_SWITCH")
Logged when user navigates between different rooms via doors.
Metadata:
* `destination_room`: Target room being navigated to
* `destination_wall`: Target wall within the destination room
## Sessions[](#sessions "Direct link to Sessions")
The 'sessions' collection stores general metadata about a user’s study session, including timing, client settings, custom parameters, and socket connections.
**Fields**
* **\_id**: Internal MongoDB Object ID.
* **sessionId**: Unique identifier for the session.
* **startTime**: Timestamp marking when the session began.
* **lastActivity**: Timestamp of the most recent interaction in the session.
* **userAgent**: User’s browser and system information string.
* **screenSize**: Screen dimensions used by the participant.
* width: Screen width in pixels
* height: Screen height in pixels
* **isCompleted**: Boolean indicating whether the session was successfully completed.
* **completionTime**: Timestamp of session completion (if applicable).
* **customData**: User-specific metadata, passed through the URL as base64-encoded data when launching the study. Includes fields like:
* Condition: Experimental condition assigned
* Technical\_Interest: Self-reported interest in technology
* User\_Name: Name or label of participant (if provided)
* **explanation\_cache**: Cached explanation object, used only in on-demand explanation mode.
* **socketId**: Latest Socket.io connection ID for real-time communication.
**Example**
```
{
"_id": {
"$oid": "6890802b170e8ab76cd90c4c"
},
"sessionId": "a9297ea7-8f3a-4fcd-abd3-ae3bed267494",
"startTime": {
"$date": "2025-08-04T09:40:59.417Z"
},
"lastActivity": {
"$date": "2025-08-04T09:40:59.417Z"
},
"userAgent": "Mozilla/5.0 (Windows NT 10.0; Win64; x64) AppleWebKit/537.36 (KHTML, like Gecko) Chrome/138.0.0.0 Safari/537.36",
"screenSize": {
"width": 1280,
"height": 665
},
"isCompleted": true,
"completionTime": {
"$date": "2025-08-04T09:44:09.273Z"
},
"customData": {
"Condition": 2,
"Technical_Interest": "interested",
"User_Name": "John"
},
"explanation_cache": null,
"socketId": "ODKC-GRRXqG6JI_CAAAD"
}
```
## Tasks[](#tasks "Direct link to Tasks")
The 'tasks' collection stores information about each user’s progress for individual tasks in a gameplay session. Similar to devices, there may be multiple entries per user session—one per task.
**Fields**
* **\_id**: Internal MongoDB Object ID.
* **userSessionId**: References the session during which the task was executed (sessions.sessionId).
* **taskId**: Unique task identifier, matches id field in game.json.
* **task\_order**: Order in which the task appears in the gameplay sequence (starting from 0).
* **taskDescription**: Human-readable task prompt shown to the user.
* **isCompleted**: true if the user completed the task successfully.
* **isAborted**: true if the task was aborted (e.g., by user or system).
* **isTimedOut**: true if the task exceeded its time limit.
* **completionTime**: Timestamp of successful completion (if any).
* **abortedReason**: Explanation for abortion (if any).
* **startTime**: Timestamp of when the task began.
* **endTime**: Timestamp of when the task ended (regardless of outcome).
* **interactionTimes**: Number of user interactions during the task.
* **duration**: Time taken to complete or exit the task, in seconds.
**Example**
```
{
"_id": {
"$oid": "6890802b170e8ab76cd90c4d"
},
"userSessionId": "a9297ea7-8f3a-4fcd-abd3-ae3bed267494",
"taskId": "deep_fryer",
"task_order": 0,
"taskDescription": "Turn on the deep fryer",
"isCompleted": false,
"isAborted": false,
"isTimedOut": true,
"completionTime": null,
"abortedReason": null,
"startTime": {
"$date": "2025-08-04T09:40:59.420Z"
},
"endTime": {
"$date": "2025-08-04T09:43:00.414Z"
},
"interactionTimes": 5,
"duration": 120.994
}
```
## Explanations[](#explanations "Direct link to Explanations")
The `explanations` collection stores all explanations presented to users during gameplay. Each entry includes the explanation content, timing, session context, task context, and user feedback (if provided).
**Fields**
* **\_id**: Internal MongoDB Object ID.
* **explanation\_id**: UUID uniquely identifying the explanation event.
* **explanation**: Text content of the explanation shown to the user.
* **created\_at**: Timestamp of when the explanation was generated or displayed.
* **userSessionId**: References the session during which the explanation was triggered (sessions.sessionId).
* **taskId**: ID of the task associated with the explanation (if applicable).
* **delay**: Delay (in seconds) between triggering and showing the explanation, defined by the associated rule.
* **rating**: Object containing user feedback:
* is\_liked: Boolean indicating whether the user liked the explanation. This field is added only after the user interacts with the feedback UI. **Example**
```
{
"_id": {
"$oid": "68a441d567cee9ab1e3d0f8d"
},
"explanation_id": "13a674b5-b762-4650-8101-2fbe7e5d08cd",
"explanation": "Since the cooker hood is not turned on, the deep fryer cannot be turned on.",
"created_at": {
"$date": "2025-08-19T09:20:21.854Z"
},
"userSessionId": "06711ce4-a2af-4e62-9026-17231df6a985",
"taskId": "deep_fryer",
"delay": 0,
"rating": {
"is_liked": true
}
}
```
---
# Explanation Engine
## Inroduction[](#inroduction "Direct link to Inroduction")
Understanding how intelligent systems make decisions is critical in building trustworthy, usable, and transparent smart environments. In recent years, this has led to growing interest in **explainable systems**, systems that not only act autonomously but also provide human-understandable **reasons** for their behavior.
In smart home environments, users often interact with complex automation rules, adaptive device behaviors, and sensor-triggered events. Without explanations, such interactions can lead to confusion, misunderstanding, or loss of control.
To address this, **explanations** serve as a bridge between **system logic** and **human mental models**. They help users answer questions like:
* *Why did the lamp turn off automatically?*
* *Why can’t I use the oven right now?*
* *What caused the heating to activate?*
In this scope, ehe **Explanation Engine** is the component that generates contextual explanations and feedback based on participants’ interactions with *devices* and *automation rules* within the smart home environment. These explanations are designed to enhance system transparency, improve usability, and support user understanding during task execution.
Our framework enables seamless integration and simulation of the Explanation Engine within a **virtual smart environment**, making it possible to study a wide range of aspects related to **explanation** and **explainability in intelligent systems**.
By using this setup, researchers can conduct both **quantitative** and **qualitative analyses** to assess:
* The **effectiveness** of explanations in supporting user performance and comprehension,
* The **differences between various explanation types**, such as:
* *Causal explanations* (why something happened),
* *Counterfactual explanations* (what would have happened if…),
* *Contrastive explanations* (why this instead of that),
* The impact of different **explanation provision strategies**, such as:
* *Proactive/automated* explanations (delivered by the system automatically),
* *On-demand/user-triggered* explanations (delivered upon request).
This flexibility supports fine-grained experimental design and controlled studies on **Explainable Smart Environments** and **Computer-Human Interaction**.
**Integration Options** You can integrate the Explanation Engine in one of two ways:
1. **Integrated Engine (Default)**
Use the built-in explanation logic that is tightly coupled with the simulation environment. This engine automatically monitors interactions and provides the pre-defined explanations based on the defined rules and states.
2. **Custom API Endpoint**
Connect the system to an external or custom explanation API. This approach is ideal if you want to use your own backend logic, machine learning model, or dynamic explanation strategy.
* The system sends relevant data (e.g., device states, rule matches, user actions) to your API.
* The API returns an explanation string or object to be rendered in the UI.
## JSON Schema[](#json-schema "Direct link to JSON Schema")
The configuration of the **Explanation Engine** is managed through a separate file, `explanation.json`, and is intended to provide modular control over how and when explanations are issued, and which explanation system is activated.
Loading ....
JSON Schema Code
### Explanation Engine Schema
```
{
"$schema": "http://json-schema.org/draft-07/schema#",
"title": "Explanation Engine Configuration",
"description": "Configuration schema for the explanation engine system",
"type": "object",
"properties": {
"explanation_trigger": {
"type": "string",
"enum": [
"pull",
"push",
"interactive"
],
"description": "Defines when explanations are triggered. 'pull' caches explanations until user requests via button click. 'push' shows explanations immediately when conditions are met. 'interactive' enables immediate explanations plus user message input for external explanation engine."
},
"explanation_engine": {
"type": "string",
"enum": [
"integrated",
"external"
],
"description": "Type of explanation engine to use. 'integrated' for simple rule-based explanations, 'external' for complex custom logic."
},
"external_explanation_engine": {
"type": "object",
"description": "Configuration for external explanation engine. Contains engine type and API endpoint.",
"properties": {
"external_engine_type": {
"type": "string",
"enum": [
"rest",
"ws"
],
"description": "Communication protocol for external explanation engine. 'rest' for REST API, 'ws' for WebSocket."
},
"external_explanation_engine_api": {
"type": "string",
"format": "uri",
"description": "URL of the external explanation engine API endpoint (without trailing slash)."
}
},
"required": [
"external_engine_type",
"external_explanation_engine_api"
],
"additionalProperties": false
},
"integrated_explanation_engine": {
"type": "object",
"description": "Collection of explanation rules for the integrated engine. Key is the explanation ID, value is the explanation text (can include HTML).",
"patternProperties": {
"^[a-zA-Z0-9_]+$": {
"type": "string",
"description": "Explanation text that can include HTML tags for formatting"
}
},
"additionalProperties": false
},
"explanation_rating": {
"type": "string",
"enum": [
"like"
],
"description": "Enable rating system for explanations. Currently only 'like' (thumbs up/down) is supported."
}
},
"required": [
"explanation_trigger",
"explanation_engine"
],
"allOf": [
{
"if": {
"properties": {
"explanation_engine": {
"const": "external"
}
}
},
"then": {
"required": [
"external_explanation_engine"
]
}
},
{
"if": {
"properties": {
"explanation_engine": {
"const": "integrated"
}
}
},
"then": {
"required": [
"integrated_explanation_engine"
]
}
}
],
"additionalProperties": false
}
```
| Property | Type | Description |
| ------------------------------- | -------- | -------------------------------------------------------------------------------------------------- |
| `explanation_trigger` | `string` | Determines when explanations are shown. Options: `"pull"`, `"push"`, or `"interactive"`. |
| `explanation_engine` | `string` | Selects the explanation system. Options: `"integrated"` or `"external"`. |
| `explanation_rating` | `string` | Specifies how users rate explanations. Options: `"like"`. |
| `integrated_explanation_engine` | `object` | Required if `explanation_engine` is `"integrated"`; maps device IDs to static explanation strings. |
**Complete Configuration Example**
```
{
"explanation_trigger": "push",
"explanation_engine": "integrated",
"explanation_rating": "like",
"integrated_explanation_engine": {
"deep_fryer_01": "The deep fryer automatically turns off when the cooker hood is not running. This is a safety feature to prevent smoke buildup.",
"mixer_01": "The mixer is automatically disabled after 22:00 to reduce noise for neighbors.",
"lamp_01": "The lamp automatically turns on when you open a book to provide adequate reading light."
}
}
```
### Property: Explanation Trigger[](#property-explanation-trigger "Direct link to Property: Explanation Trigger")
Controls when and how explanations are delivered to participants:
* **`pull`**: Explanations are cached when rule conditions trigger, but only shown when the user clicks "Explain Me!" button. This allows participants to discover contradictions first before seeking explanations.
* **`push`**: Explanations are shown immediately when rule conditions are met or when the external explanation engine emits an explanation.
* **`interactive`**: Explanations are shown immediately like `push` mode, plus enables a chat input for users to send custom messages to the external explanation engine for interactive explanations.
Choosing Trigger Type
* Use **`pull`** when you want participants to discover issues independently before seeking help.
* Use **`push`** for educational scenarios where immediate feedback is beneficial.
* Use **`interactive`** when you want immediate explanations plus the ability for users to ask follow-up questions via chat.
### Property: Explanation Engine[](#property-explanation-engine "Direct link to Property: Explanation Engine")
Specifies **which explanation system** is used to generate and deliver explanations:
* **`integrated`** Uses the built-in explanation engine defined directly within the simulation. This mode relies on predefined mappings between devices and explanation strings. It’s simple, fast, and fully contained within the simulation environment, ideal for controlled experiments where consistency and low complexity are desired.
* **`external`**: Sends explanation queries to an **external API endpoint**. This allows for integration of custom explanation logic, dynamic generation (e.g., with LLMs), or connection to logging systems. The API should return a structured explanation object.
When using `external`, you must also specify the communication protocol within the `external_explanation_engine` object:
```
{
"explanation_engine": "external",
"external_explanation_engine": {
"external_engine_type": "rest",
"external_explanation_engine_api": "https://your-api.com/explanation"
}
}
```
Choosing an Engine Type
Use **integrated** for straightforward, repeatable studies or offline deployments. Use **external** when your study requires flexible, adaptive, or user-personalized explanations powered by external models or logic.
### Property: Explanation Rating[](#property-explanation-rating "Direct link to Property: Explanation Rating")
Controls whether participants can rate (the usefulness\*\*) of the explanations they receive.
```
{
"explanation_rating": "like"
}
```
**Supported Values**:
* **like**: Enables a simple thumbs up/down feedback mechanism after each explanation is shown. It helps
* Understand how users perceive the relevance and helpfulness of the explanations.
* Identify which explanations are working and which need refinement.
info
Additional rating modes (e.g., 5-star scale, open comments) may be supported in future versions. For now, only "like" or "none" (if omitted) are valid options
## Integrated Explanation Engine[](#integrated-explanation-engine "Direct link to Integrated Explanation Engine")
The integrated explanation engine provides a straightforward approach for rule-based explanations without requiring external infrastructure.
### Creating Explanations[](#creating-explanations "Direct link to Creating Explanations")
Define explanations as key-value pairs where:
* **Key**: Explanation ID referenced in rule actions
* **Value**: Explanation text (supports HTML formatting)
```
{
"integrated_explanation_engine": {
"coffee_machine_01": "The coffee machine turns off automatically after making 5 cups to prevent overheating.",
"security_system_01": "The security system requires all doors to be locked before activation.",
"thermostat_01": "Energy saving mode automatically reduces temperature during unoccupied hours."
}
}
```
### Integration with Rules[](#integration-with-rules "Direct link to Integration with Rules")
Explanation generation can be explicitly bound to rule execution. That is, generating an explanation becomes a deliberate action in the system’s rule set, just like turning off a device or adjusting a temperature.
This design allows researchers to precisely specify:
* When and Under which conditions an explanation is generated
* Which explanation text is associated with the event
To trigger an explanation when a rule is executed, include an *Explanation action* within the rule’s action block. This action references an explanation ID previously defined in the explanation.json.
This approach allows fine-grained control over when explanations are generated based on system logic and environmental context.
This mechanism controls when the explanation is generated and queued, not when it is shown to the participant.
Showing the explanation is governed separately by the explanation\_trigger setting (e.g., pull, push, or interactive).
```
{
"name": "Coffee Machine Auto-Off",
"precondition": [
{
"type": "Device",
"device": "coffee_machine",
"condition": {
"name": "Cups Made",
"operator": ">=",
"value": 5
}
}
],
"action": [
{
"type": "Device_Interaction",
"device": "coffee_machine",
"interaction": {
"name": "Power",
"value": false
}
},
{
"type": "Explanation",
"explanation": "coffee_machine_01"
}
]
}
```
This rule disables the coffee machine after 5 cups and generates the explanation with "coffee\_machine\_01" ID (see last example above) that is to explain the action. For a full description of rule structure, preconditions, and supported action types, see [Rules.mdx](https://exmartlab.github.io/SHiNE-Framework/SHiNE-Framework/game-config/game_schema/rules.md).
## External Explanation Engine[](#external-explanation-engine "Direct link to External Explanation Engine")
An **external explanation engine** allows researchers to implement customized, intelligent, or adaptive explanation strategies that go beyond static rule-based logic. This can include:
* Domain-specific reasoning algorithms
* Machine learning or LLM-based explanation generation
* Integration with external systems, datasets, or user profiles
In this setup, the **explanation generation logic is external** to our framework. The internal mechanics of how explanations are created (e.g., inference models, prompt engineering, heuristics) are not managed or constrained by the framework.
Instead, our framework functions as a middleware that:
1. **Collects runtime context** during the simulation or task execution, including:
* User identity or role (if available)
* User interactions (e.g., device toggles, movement, button clicks)
* Game state and environmental context (e.g., current time, temperature, weather)
2. **Sends this context** as a structured request to a configured external API endpoint
3. **Receives the generated explanation** from the external service
4. **Displays the explanation** in the GUI according to the explanation\_trigger setting
The `external_explanation_engine` object is **required** when the explanation\_engine is set to "external". It contains the configuration for the external explanation engine, including the communication protocol and API endpoint.
**Supported Types**
* **rest**
Communicates with the external explanation engine via **HTTP REST API**. Typically uses endpoints such as:
* POST /logger — to send context logs (optional)
* POST /explanation — to request an explanation based on current context
```
{
"external_explanation_engine": {
"external_engine_type": "rest",
"external_explanation_engine_api": "https://example.com/engine"
}
}
```
* **ws**
Connects via **WebSocket** for real-time, bidirectional communication. Suitable for use cases requiring ongoing dialogue or rapid system-user interaction.
```
{
"external_explanation_engine": {
"external_engine_type": "ws",
"external_explanation_engine_api": "ws://example.com:8080"
}
}
```
### REST API Implementation[](#rest-api-implementation "Direct link to REST API Implementation")
#### Setup Configuration Example[](#setup-configuration-example "Direct link to Setup Configuration Example")
```
{
"explanation_trigger": "push",
"explanation_engine": "external",
"external_explanation_engine": {
"external_engine_type": "rest",
"external_explanation_engine_api": "https://your-domain.com/engine"
},
"explanation_rating": "like"
}
```
> 💡 You can change the explanation\_trigger between "pull", "push", or "interactive" based on your study needs.
#### Required API Endpoints[](#required-api-endpoints "Direct link to Required API Endpoints")
When using a REST-based external explanation engine ("external\_engine\_type": "rest"), your API **must implement the following two endpoints**:
| Endpoint | Method | Purpose | Required? |
| -------------------------------------- | ------ | --------------------------------------------- | --------- |
| 1- [`/logger`](#post-logger) | POST | Send context and logging data | Yes |
| 2- [`/explanation`](#post-explanation) | POST | Request explanation (with or without message) | Yes |
##### POST `/logger`[](#post-logger "Direct link to post-logger")
This endpoint is called **whenever a participant interacts** with the environment or when relevant system events occur. It provides the external engine with rich **contextual information** about the participant's current state, environment, and activity history.
Environment Data Sources
The `environment` array contains data from two sources:
* **Task Environment Variables**: Context defined in the current task's `environment` field (e.g., Weather, Temperature)
* **User Custom Data**: Session variables passed via URL context (e.g., user group, study condition, user type)
For more details on session context and user variables, see [Session Context & User Variables](https://exmartlab.github.io/SHiNE-Framework/SHiNE-Framework/getting-started.md#session-context--user-variables).
**Request Payload Example:**
```
{
"user_id": "64bdb062-cb25-487f-8373-c56ac18fba5a",
"current_task": "make_coffee",
"ingame_time": "08:32",
"environment": [
{ "name": "Weather", "value": "Sunny" },
{ "name": "Temperature", "value": 20 },
{ "name": "group", "value": "control" },
{ "name": "user_type", "value": "novice" }
],
"devices": [
{
"device": "coffee_machine",
"interactions": [
{
"name": "Power",
"value": true
},
{
"name": "Cups Made",
"value": 3
}
]
}
],
"logs": [
{
"type": "DEVICE_INTERACTION",
"device_id": "coffee_machine",
"interaction": {
"name": "Power",
"value": true
},
"timestamp": 1739280520
}
]
}
```
> This endpoint is **passive** and does not return an explanation — it exists to keep the external engine context-aware and updated.
##### POST `/explanation`[](#post-explanation "Direct link to post-explanation")
This endpoint is called **when an explanation is requested**, either **on pull** (e.g., user clicks "Explain Me!") or **on push/interactive** (based on rule triggers and system configuration).
**Standard Request:**
```
{
"user_id": "64bdb062-cb25-487f-8373-c56ac18fba5a"
}
```
**Request with User Message (if explanation\_trigger is "interactive"):**
```
{
"user_id": "64bdb062-cb25-487f-8373-c56ac18fba5a",
"user_message": "Why did the coffee machine suddenly turn off?"
}
```
#### API Response Format[](#api-response-format "Direct link to API Response Format")
The API must respond with a structured JSON object:
**Show Explanation:**
```
{
"success": true,
"show_explanation": true,
"explanation": "The coffee machine automatically turns off after making 5 cups to prevent overheating and ensure optimal coffee quality."
}
```
**No Explanation:**
```
{
"success": true,
"show_explanation": false
}
```
### WebSocket Implementation[](#websocket-implementation "Direct link to WebSocket Implementation")
If you set "external\_engine\_type": "ws", the framework will open a **WebSocket connection** to the configured server and communicate using **event-based messages**. This allows for **real-time explanation exchange**, useful for interactive or dialog-based explainable systems.
#### Setup Configuration Example[](#setup-configuration-example-1 "Direct link to Setup Configuration Example")
```
{
"explanation_trigger": "pull",
"explanation_engine": "external",
"external_explanation_engine": {
"external_engine_type": "ws",
"external_explanation_engine_api": "ws://your-domain.com:8080"
},
}
```
#### WebSocket Events[](#websocket-events "Direct link to WebSocket Events")
All communication is in **JSON format**, sent over the open WebSocket channel.
### WebSocket Event Summary[](#websocket-event-summary "Direct link to WebSocket Event Summary")
| Event Name | Direction | Trigger | Purpose |
| -------------------------------------------------------- | --------- | ----------------------------------------------------------- | --------------------------------------------------------------- |
| [`user_log`](#outgoing-user_log) | Outgoing | On participant action or system event | Sends runtime context (user, device, environment) to the engine |
| [`explanation_request`](#outgoing-explanation_request) | Outgoing | When user clicks "Explain Me!" or rule triggers explanation | Requests an explanation from the external engine |
| [`explanation_receival`](#incoming-explanation_receival) | Incoming | On response from external engine | Receives and displays explanation text in the simulation GUI |
##### Outgoing: `user_log`[](#outgoing-user_log "Direct link to outgoing-user_log")
Sent **whenever participant actions generate logs**, such as device interactions.
```
{
"user_id": "64bdb062-cb25-487f-8373-c56ac18fba5a",
"current_task": "make_coffee",
"ingame_time": "08:32",
"environment": [
{ "name": "Weather", "value": "Sunny" },
{ "name": "group", "value": "control" }
],
"devices": [
{
"device": "coffee_machine",
"interactions": [
{
"name": "Power",
"value": true
}
]
}
],
"logs": {
"type": "DEVICE_INTERACTION",
"device_id": "coffee_machine",
"interaction": {
"name": "Power",
"value": true
},
"timestamp": 1739280520
}
}
```
##### Outgoing: `explanation_request`[](#outgoing-explanation_request "Direct link to outgoing-explanation_request")
Sent when an explanation is requested by the participant, either due to a trigger or user action.
```
{
"user_id": "64bdb062-cb25-487f-8373-c56ac18fba5a",
"timestamp": 1739792380,
"user_message": "Why can't I turn on the deep fryer?"
}
```
##### Incoming: `explanation_receival`[](#incoming-explanation_receival "Direct link to incoming-explanation_receival")
The explanation engine responds with an explanation\_receival message. This is then shown in the user interface.
```
{
"user_id": "64bdb062-cb25-487f-8373-c56ac18fba5a",
"explanation": "The deep fryer requires the cooker hood to be active for safety ventilation.",
}
```
> * **explanation**: The explanation text to display.
## Log Types Reference[](#log-types-reference "Direct link to Log Types Reference")
The **Explanation Engine** receives detailed logs about participant interactions throughout the smart home simulation. These logs help external or integrated engines **reason about user behavior**, **device states**, and **rule activations** to generate relevant explanations.
Understanding these log types is essential when designing:
* Context-aware explanation systems
* User modeling algorithms
* Task performance analysis
### Overview of Log Types[](#overview-of-log-types "Direct link to Overview of Log Types")
| Log Type | Trigger Event | Purpose |
| ----------------------------------------------- | --------------------------------------- | ----------------------------------------------------- |
| [`DEVICE_INTERACTION`](#device_interaction) | User interacts with a device | Tracks changes made by the participant |
| [`RULE_TRIGGER`](#rule_trigger) | Automation rule is triggered | Captures rule activations and their resulting actions |
| [`TASK_BEGIN`](#task_begin) | New task starts | Marks the start of a task session |
| [`TASK_COMPLETED`](#task_completed) | Task successfully completed | Marks the end of a successful task |
| [`TASK_TIMEOUT`](#task_timeout) | Task ends due to time expiration | Captures task failure from timeout |
| [`ROOM_SWITCH`](#room_switch) | User moves to another room | Captures spatial navigation across rooms |
| [`WALL_SWITCH`](#wall_switch) | User looks at another wall in same room | Captures intra-room navigation |
| [`ENTER_DEVICE_CLOSEUP`](#enter_device_closeup) | User enters device close-up view | Tracks focus and engagement with a device |
| [`EXIT_DEVICE_CLOSEUP`](#exit_device_closeup) | User exits close-up view | Returns to wall view from close-up |
| [`ABORT_TASK`](#abort_task) | User explicitly gives up on a task | Captures task abandonment with optional reasoning |
### DEVICE\_INTERACTION[](#device_interaction "Direct link to DEVICE_INTERACTION")
Generated when participants change device settings:
```
{
"type": "DEVICE_INTERACTION",
"metadata": {
"device_id": "deep_fryer",
"interaction": {
"name": "Power",
"value": true
}
},
"timestamp": 1748860205
}
```
### RULE\_TRIGGER[](#rule_trigger "Direct link to RULE_TRIGGER")
Generated when smart home rules activate:
```
{
"type": "RULE_TRIGGER",
"metadata": {
"rule_id": "deep_fryer_rule",
"rule_action": [
{
"device": "deep_fryer",
"property": {
"name": "Power",
"value": false
}
}
]
},
"timestamp": 1748860205
}
```
### TASK\_BEGIN[](#task_begin "Direct link to TASK_BEGIN")
Generated when a new task starts:
```
{
"type": "TASK_BEGIN",
"metadata": {
"task_id": "make_coffee"
},
"timestamp": 1748860190
}
```
### TASK\_COMPLETED[](#task_completed "Direct link to TASK_COMPLETED")
Generated when participants successfully complete all task goals:
```
{
"type": "TASK_COMPLETED",
"metadata": {
"task_id": "make_coffee"
},
"timestamp": 1748862020
}
```
### TASK\_TIMEOUT[](#task_timeout "Direct link to TASK_TIMEOUT")
Generated when a task expires due to time limit before completion:
```
{
"type": "TASK_TIMEOUT",
"metadata": {
"task_id": "make_coffee"
},
"timestamp": 1748862033
}
```
### ROOM\_SWITCH[](#room_switch "Direct link to ROOM_SWITCH")
Generated when participants move between rooms using doors:
```
{
"type": "ROOM_SWITCH",
"metadata": {
"destination_room": "kitchen",
"destination_wall": "wall1"
},
"timestamp": 1748860201
}
```
### WALL\_SWITCH[](#wall_switch "Direct link to WALL_SWITCH")
Generated when participants navigate between walls within the same room:
```
{
"type": "WALL_SWITCH",
"metadata": {
"room": "Shared Room",
"wall": "0"
},
"timestamp": 1748860200
}
```
### ENTER\_DEVICE\_CLOSEUP[](#enter_device_closeup "Direct link to ENTER_DEVICE_CLOSEUP")
Generated when participants click on a device to enter its detailed interaction view:
```
{
"type": "ENTER_DEVICE_CLOSEUP",
"metadata": {
"device": "coffee_machine"
},
"timestamp": 1748860202
}
```
### EXIT\_DEVICE\_CLOSEUP[](#exit_device_closeup "Direct link to EXIT_DEVICE_CLOSEUP")
Generated when participants exit from device closeup view back to wall view:
```
{
"type": "EXIT_DEVICE_CLOSEUP",
"metadata": {
"device": "coffee_machine"
},
"timestamp": 1748860203
}
```
### ABORT\_TASK[](#abort_task "Direct link to ABORT_TASK")
Track when participants abandon tasks:
```
{
"type": "ABORT_TASK",
"metadata": {
"task_id": "make_coffee",
"abort_reason": "I believe this task is impossible."
},
"timestamp": 1748862023
}
```
## Implementation Examples[](#implementation-examples "Direct link to Implementation Examples")
### Study: Impossible Task Detection[](#study-impossible-task-detection "Direct link to Study: Impossible Task Detection")
```
{
"explanation_trigger": "pull",
"explanation_engine": "integrated",
"explanation_rating": "like",
"integrated_explanation_engine": {
"contradiction_01": "This task cannot be completed because the security system prevents the coffee machine from operating during night hours.",
"safety_override_01": "The smoke detector has triggered an automatic shutdown of all kitchen appliances.",
"energy_limit_01": "The home's energy management system has reached its daily limit and disabled non-essential devices."
}
}
```
### Study: AI-Powered Explanations[](#study-ai-powered-explanations "Direct link to Study: AI-Powered Explanations")
```
{
"explanation_trigger": "push",
"explanation_engine": "external",
"external_explanation_engine": {
"external_engine_type": "rest",
"external_explanation_engine_api": "https://ai-explainer.your-lab.edu/api"
},
"explanation_rating": "like"
}
```
---
# Game Config Schema
The `game.json` file defines the full structure of a smart home simulation used in our game-based studies. It coordinates all key components that drive user experience, system behavior, and experimental logic.
This configuration includes:
* The **environment** context (e.g., current time, temprature, weather, etc. within the simulated smart home)
* The **rules** that govern smart home automation
* A set of **tasks** players must complete
* Definitions for **rooms**, **walls**, and **doors**
* Interactive **devices** with properties and states
***
## Game Config[](#game-config "Direct link to Game Config")
Loading ....
JSON Schema Code
### Game Schema
```
{
"type": "object",
"title": "Game Configuration File",
"description": "Configuration File of the game",
"properties": {
"environment": {
"$ref": "environmentSchema.json"
},
"rules": {
"type": "array",
"items": {
"$ref": "ruleSchema.json"
}
},
"tasks": {
"type": "object",
"description": "Tasks configuration with metadata and task list",
"properties": {
"ordered": {
"type": "string",
"description": "Whether tasks must be completed in order",
"enum": [
"true",
"false"
]
},
"timer": {
"type": "number",
"description": "Global timer for all tasks in seconds"
},
"abortable": {
"type": "boolean",
"description": "Whether tasks can be aborted globally"
},
"tasks": {
"type": "array",
"description": "Array of individual tasks",
"items": {
"$ref": "taskSchema.json"
},
"minItems": 1
}
},
"required": [
"tasks"
]
},
"rooms": {
"type": "array",
"items": {
"$ref": "roomSchema.json"
}
}
}
}
```
Each section is defined as a modular schema and can be validated independently. For detailed documentation, refer to the dedicated pages for each section below:
| Section | Description | Details |
| ---------------------- | -------------------------------------------------------- | ------------------------------------------------------------------------------------------------------------------------------ |
| **Environment** | Contextual variables that may influence rules | [Environment Schema](https://exmartlab.github.io/SHiNE-Framework/SHiNE-Framework/game-config/game_schema/environment.md) |
| **Rules** | Automation logic that reacts to environment and devices | [Rules Schema](https://exmartlab.github.io/SHiNE-Framework/SHiNE-Framework/game-config/game_schema/rules.md) |
| **Tasks** | Experimental tasks with goals, device resets, and timers | [Tasks Schema](https://exmartlab.github.io/SHiNE-Framework/SHiNE-Framework/game-config/game_schema/tasks.md) |
| **Rooms & Walls** | Visual and navigational layout of the house | [Walls & Rooms Schema](https://exmartlab.github.io/SHiNE-Framework/SHiNE-Framework/game-config/game_schema/walls.md) |
| **Devices** | Smart home devices with states and properties | [Devices Schema](https://exmartlab.github.io/SHiNE-Framework/SHiNE-Framework/game-config/game_schema/devices.md) |
| **Device Interaction** | Device action/state schemas (numerical, boolean, etc.) | [Interaction Schema](https://exmartlab.github.io/SHiNE-Framework/SHiNE-Framework/game-config/game_schema/interaction_types.md) |
---
# Devices
## Introduction[](#introduction "Direct link to Introduction")
Within the simulation environment, devices represent interactive elements that mimic any smart objects commonly found in domestic or workplace contexts, such as lights, thermostats, smart meters, coffee machines, smart speakers, smart TVs, blinds, and more. Each device is a structured object placed spatially within the 3D simulated environment and is associated with a set of interaction modalities and visual states. Participants can engage with these devices, and their state can be monitored or changed by the rule engine.
Devices are embedded within simulation space by assigning them to specific walls in the environment (see [Wall Configuration](https://exmartlab.github.io/SHiNE-Framework/SHiNE-Framework/game-config/game_schema/walls.md)). While each wall can host multiple devices, each device instance is placed on only one wall. This constraint allows for a coherent mapping of the virtual environment and ensures consistent spatial interactions.
Device Configuration
Always start by defining the basic properties (name, id, position, interactions) before adding complex visual states. This makes it easier to test and debug your device configuration.
## JSON Schema[](#json-schema "Direct link to JSON Schema")
Loading ....
JSON Schema Code
### Device Schema
```
{
"type": "object",
"title": "Device",
"description": "A device in the game",
"properties": {
"name": {
"type": "string",
"description": "Name of the device"
},
"id": {
"type": "string",
"description": "Unique identifier for the device, used for referencing in rules and tasks"
},
"position": {
"$ref": "devicePositionSchema.json"
},
"interactions": {
"type": "array",
"items": {
"oneOf": [
{
"$ref": "booleanActionScheme.json"
},
{
"$ref": "numericalActionScheme.json"
},
{
"$ref": "dynamicPropertyScheme.json"
},
{
"$ref": "genericActionScheme.json"
},
{
"$ref": "statelessActionScheme.json"
}
]
}
},
"visualState": {
"type": "array",
"items": {
"$ref": "visualStateSchema.json"
},
"minItems": 1
}
},
"required": [
"name",
"interactions",
"position",
"visualState"
],
"additionalProperties": false
}
```
### Top-Level Properties[](#top-level-properties "Direct link to Top-Level Properties")
| Property | Type | Required | Description |
| -------------- | -------- | -------- | ----------------------------------------------------------------------------------------------------------------------------------------------------------------------------------------------------------------------------- |
| `name` | `string` | **Yes** | The human-readable name of the device, which may be displayed to the player in the UI. |
| `id` | `string` | No | A unique machine-readable identifier for the device. This ID is crucial for linking the device to game logic, such as rules, events, or task objectives. It is highly recommended to provide this for any interactive device. |
| `position` | `object` | **Yes** | An object defining the device's placement and orientation in the game world. This property references an external schema. |
| `interactions` | `array` | **Yes** | An array of interaction objects that define how a player can engage with the device. Each element in the array must conform to one of the specified action schemas. |
| `visualState` | `array` | **Yes** | An array defining the different visual states the device can be in. This allows the device's appearance to change based on its internal state (e.g., "on" vs. "off"). There must be at least one visual state defined. |
### Property: Device Identification[](#property-device-identification "Direct link to Property: Device Identification")
Each device requires two identifiers: a human-readable `name` and a unique system `id`.
* `name`: The display name shown to users (e.g., "Deep Fryer", "Coffee Machine"). This field enhances usability and participant immersion by providing intuitive, natural-language names for each device.
* `id`: A unique system-wide identifier used for all internal referencing. The `id` is essential for:
* Rules: Referencing devices in preconditions and actions (See [Rule](https://exmartlab.github.io/SHiNE-Framework/SHiNE-Framework/game-config/game_schema/rules.md)).
* Tasks: Specifying devices in goals and default properties (See [Task](https://exmartlab.github.io/SHiNE-Framework/SHiNE-Framework/game-config/game_schema/tasks.md)).
* Game Logic: Managing internal device state and inter-device interactions (See [Interactions ](https://exmartlab.github.io/SHiNE-Framework/SHiNE-Framework/game-config/game_schema/interaction_types.md))
```
{
"name": "Deep Fryer",
"id": "deep_fryer",
// ... other properties
}
```
### Property: Position[](#property-position "Direct link to Property: Position")
The `position` property determines where a device appears on a wall and how it is displayed. It contains the following attributes that define its transform.
* `x`: The horizontal coordinate (in pixels) on the wall.
* `y`: The vertical coordinate (in pixels) on the wall.
* `scale`: A multiplier for the device's size (e.g., 1 for original size, 0.5 for half size).
* `origin`: Reference point for positioning (1 represents center)
Origin Property
The origin dictates which part of the device's image is placed at the (x, y) coordinates:
* origin: 0: Aligns the top-left corner of the image to the (x, y) point.
* origin: 1: Aligns the center of the image to the (x, y) point.
These positioning parameters are fully compatible with Phaser 3’s GameObject model, which underpins the simulation’s rendering layer. For more information:
* [Scale Documentation](https://docs.phaser.io/api-documentation/namespace/gameobjects-components-transform)
* [Origin Documentation](https://docs.phaser.io/api-documentation/namespace/gameobjects-components-origin)
### Property: Interactions[](#property-interactions "Direct link to Property: Interactions")
Each device in the simulation can expose **interactions** , these are the ways participants can observe or manipulate the device’s state. For example:
* Turning a lamp on or off
* Adjusting the temperature of an oven
* Selecting the input source of a smart TV
* Triggering a stateless action like “Brew Coffee”
The interactions array in the Device schema defines all such interaction points for a specific device. Each interaction conforms to a specific schema based on its type, including:
* **Boolean Actions** – toggle states (e.g., power on/off)
* **Numerical Actions** – continuous or stepped values (e.g., brightness, temperature)
* **Dynamic Properties** – internal device values that are read-only (e.g., water level, energy usage)
* **Generic Actions** – options from a fixed set (e.g., mode selectors)
* **Stateless Actions** – trigger-like interactions with no memory (e.g., “Start”, “Reset”) Each of these interaction types has a dedicated structure and purpose.
#### Structure[](#structure "Direct link to Structure")
To learn more about how each interaction type works in detail, including JSON schema and examples see the full **Interaction Schema Documentation** at [Interacting with Devices](https://exmartlab.github.io/SHiNE-Framework/SHiNE-Framework/game-config/game_schema/interaction_types.md).
Interaction Validation
Always validate that your interaction types match the expected input ranges in your visual states. Mismatched values can lead to undefined behavior.
### Property: Visual States[](#property-visual-states "Direct link to Property: Visual States")
Devices in the game environment can change their appearance in response to user interactions or internal state changes. These changes are defined through the *Visual State* property in the device configuration.
In this context, **a visual state refers to the concrete graphical representation (i.e., image asset) rendered on screen within the game environment.** It determines how the device is visually presented to participants at any given moment, based on its current internal or interaction-driven state.
Each device must define at least one visual state, and it is strongly recommended to include a default visual state to serve as a fallback if no conditions are met.
#### Structure[](#structure-1 "Direct link to Structure")
Visual states are configured as an array of state objects. Each state can include:
* `default:` A boolean indicating whether this is the fallback state.
* `conditions`: A list of state-based conditions that must be satisfied for the visual state to apply.
* `image`: The image asset (e.g., PNG or WebP) representing the device’s visual appearance.
* `position`: An optional override of the device’s default position properties (such as x, y, scale, or origin) for this specific state.
Visual States Best Practice
Always include a default state as a fallback for when no conditions are met. This prevents devices from becoming invisible due to undefined states.
#### Position Overrides in Visual States[](#position-overrides-in-visual-states "Direct link to Position Overrides in Visual States")
Visual states can optionally override a device’s default position properties to accommodate visual transformations that occur in different states, such as resizing, shifting, or re-aligning the image.
```
{
"default": false,
"conditions": [
{ "name": "Open", "value": true }
],
"image": "assets/images/alice_room/devices/wall1_bookopen.webp",
"position": {
"scale": 0.2
}
}
```
The position field may include any of the following optional properties:
* `x`: Override the X-coordinate of the device image
* `y`: Override the Y-coordinate of the device image
* `scale`: Override the scale (size) of the image
* `origin`: Override the origin anchor point used for rendering
**Common Use Cases**: Position overrides are particularly useful when:
* The visual representation of the device changes substantially (e.g., a book opens)
* Specific states require repositioning to align correctly with other elements
* Different scales improve clarity or layout across states
#### Examples[](#examples "Direct link to Examples")
##### Basic Default State[](#basic-default-state "Direct link to Basic Default State")
This defines a fallback image shown when no specific condition is met.
```
{
"default": true,
"image": "assets/images/living_room/devices/tv.png"
}
```
##### Simple Power States[](#simple-power-states "Direct link to Simple Power States")
These visual states reflect the Power interaction value of the device. When power is turned on or off, the displayed image updates accordingly.
```
[
{
"conditions": [
{ "name": "Power", "value": true }
],
"image": "assets/images/living_room/devices/tv_on.png"
},
{
"conditions": [
{ "name": "Power", "value": false }
],
"image": "assets/images/living_room/devices/tv_off.png"
}
]
```
##### State with Position Override[](#state-with-position-override "Direct link to State with Position Override")
This example shows how a visual state can not only change the displayed image but also override the default position properties, useful for reflecting transformations like opening a book or zooming in on an object as explained above.
```
[
{
"default": true,
"image": "assets/images/alice_room/devices/wall1_book.webp"
},
{
"default": false,
"conditions": [
{ "name": "Open", "value": true }
],
"image": "assets/images/alice_room/devices/wall1_bookopen.webp",
"position": {
"scale": 0.2
}
}
]
```
##### Complex Multi-Condition States[](#complex-multi-condition-states "Direct link to Complex Multi-Condition States")
This example demonstrates how visual states can be driven by multiple interaction values — here, both Power and Temperature determine the rendered image of an oven.
```
[
{
"default": true,
"image": "assets/images/kitchen/devices/oven_off.png"
},
{
"conditions": [
{ "name": "Power", "value": true },
{ "name": "Temperature", "operator": "<", "value": 50 }
],
"image": "assets/images/kitchen/devices/oven_on_low.png"
},
{
"conditions": [
{ "name": "Power", "value": true },
{ "name": "Temperature", "operator": ">=", "value": 50 },
{ "name": "Temperature", "operator": "<", "value": 100 }
],
"image": "assets/images/kitchen/devices/oven_on_med.png"
},
{
"conditions": [
{ "name": "Power", "value": true },
{ "name": "Temperature", "operator": ">=", "value": 100 }
],
"image": "assets/images/kitchen/devices/oven_on_high.png"
}
]
```
### Important Considerations[](#important-considerations "Direct link to Important Considerations")
1. **Condition Evaluation** All conditions within a visual state are combined using **logical AND**. That means **every condition must be satisfied** for the state to activate.
2. **State Priority** Visual states are **evaluated in order**, from top to bottom. The **first state** whose conditions evaluate to true will be applied.
danger
Ensure that the conditions defined across your visual states do **not overlap**. If multiple states match the current conditions simultaneously, **only the first matching state in the array** will be rendered. This may lead to unintended visual output if not carefully structured.
tip
To ensure reliable behavior, **order your visual states from most specific to most general**. Place more narrowly defined or critical states earlier in the list to avoid premature matching.
3. **Condition Operators** The following operators are supported in condition definitions:
* **Equality**: `==`, `!=`
* **Comparison**: `>`, `>=`, `<`, `<=`
* **Boolean Match**: Direct match with `true` or `false` values
4. **Asset Management** Every visual state must reference a valid image path that exists in your project directory. These paths are critical for rendering.
Asset Loading
If a referenced image asset is missing or incorrectly defined, the device may not render correctly, leading to runtime errors. Always verify that **all paths are accurate** and that **required assets are available**.
## Complete Device Example[](#complete-device-example "Direct link to Complete Device Example")
Here's a complete example showing all device properties:
```
{
"name": "Deep Fryer",
"id": "deep_fryer",
"position": {
"x": 657,
"y": 285,
"scale": 1,
"origin": 1
},
"interactions": [
{
"InteractionType": "Boolean_Action",
"name": "Power",
"inputData": {
"valueType": ["PrimitiveType", "Boolean"],
"unitOfMeasure": null,
"type": {
"True": "On",
"False": "Off"
}
},
"currentState": {
"visible": true,
"value": false
}
}
],
"visualState": [
{
"default": true,
"image": "assets/images/shared_room/devices/wall1_deepfryer.webp"
},
{
"default": false,
"conditions": [
{ "name": "Power", "value": true }
],
"image": "assets/images/shared_room/devices/wall1_deepfryer_on.webp"
}
]
}
```
## **Best Practices**[](#best-practices "Direct link to best-practices")
1. **Device Identification**
* Use clear and descriptive name values intended for end-user display.
* Define id values using lowercase letters with underscores (e.g., kitchen\_light).
* Ensure all device IDs are unique to avoid conflicts during rule evaluation and referencing.
2. **Visual State Management**
* Always define a default visual state as a fallback to guarantee device visibility under all conditions.
* Order visual states from most specific to most general to ensure correct evaluation priority.
* Use position overrides only when necessary, and document their purpose clearly (e.g., for transformations or scale adjustments).
3. **Asset Organization**
* Optimize all image assets to reduce loading times and improve runtime performance.
* Adopt consistent and meaningful naming conventions for image files.
* Store assets in logically structured directories that reflect room names or device categories.
4. **Configuration Testing**
* Validate all state combinations to ensure consistent visual behavior across different conditions.
* Test each defined interaction type individually and in combination with others to identify edge cases.
* Verify that position overrides do not cause misalignment or visual artifacts in the rendered scene.
Documentation
Maintain a structured registry of all devices used in the project. This registry should include:
* Device IDs
* Interaction types
* Associated visual states
* Special behaviors or conditions Comprehensive documentation facilitates team collaboration and future maintenance.
---
# Environment
## Temporal Configuration of the Simulation Environment:[](#temporal-configuration-of-the-simulation-environment "Direct link to Temporal Configuration of the Simulation Environment:")
To simulate human interaction within smart environments under controlled temporal conditions, the simulation engine allows configurable virtual time settings. The virtual environment includes a time system that is independent of real-world time, enabling flexible pacing and repeatability of experiments. The temporal dimension of the simulation is critical for studying tasks that are dependent on the time of day, for example morning routines, lighting automation, or energy consumption patterns.
This configurable time model enables experiments to simulate realistic routines or to compress longer interactions into shorter test sessions, without altering the behavior logic of devices or users.
## JSON Schema[](#json-schema "Direct link to JSON Schema")
Loading ....
### Environment Schema
```
{
"title": "Environment Time Configuration",
"description": "Schema for configuring time handling in the application",
"type": "object",
"properties": {
"time": {
"type": "object",
"description": "Configuration for time handling in the application",
"properties": {
"startTime": {
"type": "object",
"description": "The ingame time at the commencement of the game",
"properties": {
"hour": {
"type": "integer",
"description": "Hour of the day to start from (24-hour format)",
"minimum": 0,
"maximum": 23
},
"minute": {
"type": "integer",
"description": "Minute of the hour to start from",
"minimum": 0,
"maximum": 59
}
},
"required": [
"hour",
"minute"
],
"additionalProperties": false
},
"speed": {
"type": "number",
"description": "Speed multiplier for time progression. 1 = real-time, >1 = accelerated, <1 = slowed down",
"minimum": 0,
"exclusiveMinimum": true
}
},
"required": [
"startTime",
"speed"
],
"additionalProperties": false
}
},
"required": [
"time"
],
"additionalProperties": false
}
```
## Time[](#time "Direct link to Time")
The time configuration is defined using a structured schema with two main parameters:
1. `startTime`: Specifies the initial in-game time at the onset of the scenario. This is set using a 24-hour format with `hour` and `minute` fields:
* `hour`: Integer, representing the hour of the day to start from (0-23)
* `minute`: Integer, representing minute of the hour to start from (0-59)
This allows researchers to situate the task within a specific temporal context, for example, setting the `startTime` to (hour: 8, minute: 0) to simulate a user's interaction with a smart coffee machine as part of a morning routine.
2. `speed`(Time Progression Speed): Integer, that controls the rate at which simulated time advances relative to real-world time.
A value of 1 corresponds to real-time progression, while higher values accelerate time (e.g., 10 simulates ten seconds per real second), allowing long-duration tasks to be observed within manageable experiment durations.
`in-game Time Progression` = `Speed` × `Real-World Time Progression`.
# Example
This section provides concrete examples of the `environment.time` configuration to demonstrate its flexibility in establishing varied experimental conditions. Each example includes the JSON snippet and an explanation of its utility for a specific type of study.
### Use Case 1: Baseline Real-Time Scenario[](#use-case-1-baseline-real-time-scenario "Direct link to Use Case 1: Baseline Real-Time Scenario")
```
{
"environment": {
"time": {
"startTime": {
"hour": 8,
"minute": 0
},
"speed": 1
}
}
}
```
**Description**: This configuration initializes the simulation at 8:00 AM with a temporal `speed` of 1.0. The resulting 1:1 mapping with real-world time progression is ideal for user experience studies where the participant's perception of time must align with reality, or for collecting baseline data on task completion duration.
### Use Case 2: Accelerated Time Scenarios for Efficient Analysis[](#use-case-2-accelerated-time-scenarios-for-efficient-analysis "Direct link to Use Case 2: Accelerated Time Scenarios for Efficient Analysis")
The following configurations, while set at different times of day, all leverage temporal acceleration. This approach is highly effective for studies focusing on automated rules and device behaviors, since the acceleration allows researchers to observe the outcomes of several simulated hours within minutes of real-world time.
The choice of the specific acceleration factor—whether high, moderate, or low—is a critical methodological decision.
* **High-Acceleration Example** (`speed: 10.0`)
```
{
"environment": {
"time": {
"startTime": {
"hour": 22,
"minute": 0
},
"speed": 10
}
}
}
```
**Description**: This configuration is optimal for observing very long-duration processes where the final outcome is of primary interest, such as simulating an entire night to verify energy-saving or security automations.
* **High-Acceleration Example** (`speed: 5.0` and `speed: 2.5`)
```
{
"environment": {
"time": {
"startTime": {
"hour": 6,
"minute": 30
},
"speed": 5
}
}
}
```
```
{
"environment": {
"time": {
"startTime": {
"hour": 14,
"minute": 45
},
"speed": 2.5
}
}
}
```
**Description**: These configurations are better suited for scenarios that, while lengthy, may still involve some user interaction or require observation of the process as it unfolds. For example, simulating a morning routine at 5.0x `speed` or a mid-day task at 2.5x `speed` strikes a balance: the simulation is significantly shortened, but not so fast that the agent's interactions with devices become difficult to analyze.
---
# Interacting with Devices
## Introduction[](#introduction "Direct link to Introduction")
Interacting with devices is a pivotal part of any smart environment simulation. In our system, each device not only has a visual representation in the scene (Fig. 1), but also a virtual control panel (Fig. 2) through which participants can interact with the device's internal logic, such as powering it on/off or adjusting a temperature setting. These control panels are dynamically rendered based on an abstract interaction model. Creating a unique control panel for every possible smart device is impractical. To support generalizability across many device types( From sensors to smart home appliance), we adopt a structured interaction model inspired by the [W3C Thing Description (TD)](https://www.w3.org/TR/wot-thing-description10/#introduction), extended via [TDeX](https://ieeexplore.ieee.org/abstract/document/8726632). While TD includes metadata for networking and affordances, TDeX focuses on interaction types and their corresponding GUI elements.
Accoridng to TDeX, smart devices may vary greatly in appearance, complexity, and capabilities, yet the types of interactions users perform fall into a small number of reusable categories. For example:
* Turning a heater on or off is conceptually similar to locking or unlocking a door. Both involve a two-state toggle that alternates between binary values (e.g., on/off, locked/unlocked). These interactions are typically visualized using a switch or toggle button in the control panel.
* Setting the temperature of a deep fryer or adjusting the brightness of a smart light involves choosing a value from a continuous or discrete numerical range. Such interactions are best represented via a slider, allowing users to quickly navigate the spectrum of available values.
* Some actions are independent of internal device state and can be performed repeatedly without regard to current conditions. Examples include taking a snapshot with a security camera or dispensing food from a pet feeder. These actions are most intuitively presented via a button, which simply triggers the action on press.
TDeX captures this insight by categorizing all interactions into a small, expressive set of **interaction types**, each linked to a specific GUI element for rendering in the control panel.
| Type | Description | Example | GUI Element |
| ---------------- | -------------------------------------- | ---------------------------------- | ------------------------- |
| Dynamic Property | Continuously updated internal state | Temperature of fryer | Text/Label bound to state |
| Static Property | Fixed attribute of a device | Model number | Text (non-interactive) |
| Stateless Action | No internal state dependency | Take snapshot | Button |
| Boolean Action | Two-valued toggleable state | Power on/off | Toggle switch |
| Numerical Action | Range-based parameter setting | Temperature, brightness | Slider or input box |
| Generic Action | Enum-based selection from fixed values | Washing machine modes | Dropdown |
| Composed Action | Composite of multiple atomic actions | Order coffee (milk + sugar + type) | Grouped UI with trigger |
## Interaction Schema[](#interaction-schema "Direct link to Interaction Schema")
An Interaction is described by a set of key properties:
* `InteractionType`: Specifies the type of the action (e.g., Stateless\_Action, Boolean\_Action, etc.), which directly determines its behavior and corresponding visualization of the control panel.
* `name`: A string that labels the action in the GUI (e.g., "Take Snapshot","Power").
* `inputData`: Defines the required input structure — such as value type, range, unit, or discrete values.
* `currentState`: Describes the current internal value of the action (if applicable), as well as its visibility in the GUI.
* `visible` : It supports flexible control over when the interaction should be shown and whether it is interactive. This is useful for dependent settings, like a "Mute" toggle that only appears after the TV is powered on (see [Visibility Condition](#visibility-conditions))
* `output` (optional): in most cases, the output of an action in a smart device results in a physical effect on the device or its environment, such as turning a light on or off, making a coffee, or opening a door. However, in some instances, actions may also produce structured output, such as a duration or a calculated value. For example, when the "Start" action is triggered on a washing machine, in addition to changing the system’s state, it may also calculate and visually display the estimated time needed to complete the washing cycle, based on the selected program and the weight of the clothes. These outputs are encoded as part of the action’s schema.
## Dynamic Property[](#dynamic-property "Direct link to Dynamic Property")
A **Dynamic Property** represents a value that is **continuously updated by the system or device**. It is **read-only** from the participant’s perspective and is used to display internal states of devices, such as temperature or energy consumption. Usually, after some actions are performed, the internal state of a device changes, either immediately (e.g., when turning on a light, the power status changes instantly), or gradually (e.g., when setting a fryer to 100 °C, the temperature increases over time). In such cases, the Dynamic Property reflects the current internal value at any given time, offering participants real-time feedback on the system’s status.
Dynamic properties are rendered in the GUI as live, read-only labels or indicators, and update in real-time as the device state changes.
**Common Use Cases**:
* Monitoring sensor-based or calculated values (e.g., Coffee level or water tank status)
* Used to display internal state values that are:
* Continuously changing
* Bound to physical processes
* Dependent on other interactions (e.g., changes after executing an action)
### JSON Schema[](#json-schema "Direct link to JSON Schema")
Loading ....
JSON Schema Code
### Dynamic Property Schema
```
{
"type": "object",
"properties": {
"InteractionType": {
"type": "string",
"enum": [
"Dynamic_Property"
]
},
"name": {
"type": "string"
},
"outputData": {
"type": "object",
"properties": {
"valueType": {
"type": "array",
"items": {
"type": "string"
},
"minItems": 2,
"maxItems": 2,
"contains": {
"enum": [
"PrimitiveType",
"String"
]
}
},
"unitOfMeasure": {
"type": [
"string",
"null"
]
}
},
"required": [
"valueType",
"unitOfMeasure"
],
"additionalProperties": false
},
"currentState": {
"type": "object",
"properties": {
"visible": {
"oneOf": [
{
"type": "boolean",
"description": "For Dynamic_Property: true = shown as read-only, false = not shown at all"
},
{
"type": "array",
"items": {
"type": "object",
"properties": {
"name": {
"type": "string"
},
"value": {
"type": [
"string",
"number",
"boolean"
]
}
},
"required": [
"name",
"value"
],
"additionalProperties": false
},
"description": "For Dynamic_Property: conditions determine if shown as read-only or not shown at all"
}
]
},
"value": {
"type": "string"
}
},
"required": [
"visible",
"value"
],
"additionalProperties": false
}
},
"required": [
"InteractionType",
"name",
"outputData",
"currentState"
],
"additionalProperties": false
}
```
The specification of Interaction's fields (introduced above) for a **Dynamic Property** are as follows:
* `InteractionType`: Must be set to *"Dynamic\_Property"* to declare this as a read-only, real-time property.
* `outputData`:
* `valueType`: This must be set a primitive type, depending on the nature of the data, such as *\["PrimitiveType", "String"], \["PrimitiveType", "Integer"]*
* `unitOfMeasure`:String
label for the unit (e.g., *"°C"*, *"L"*, *"minutes"*). Can be null if no unit is shown.
* `currentState`
* `value`: The current or initial state.
* `visible`: Visibility flag or condition (see [Visibility Condition](#visibility-conditions))
#### Dynamic Property Example 1: Current Temperature Display[](#dynamic-property-example-1-current-temperature-display "Direct link to Dynamic Property Example 1: Current Temperature Display")
```
"InteractionType": "Dynamic_Property",
"name": "Current Temperature",
"outputData": {
"valueType": ["PrimitiveType", "Integer"],
"unitOfMeasure": "°C"
},
"currentState": {
"visible": true,
"value": "175"
}
}
```
The above snippet defines a read-only temperature display labeled *"Current Temperature"*, showing the current internal value of the device (175°C). The value is continuously updated by the system and is always visible in the GUI.
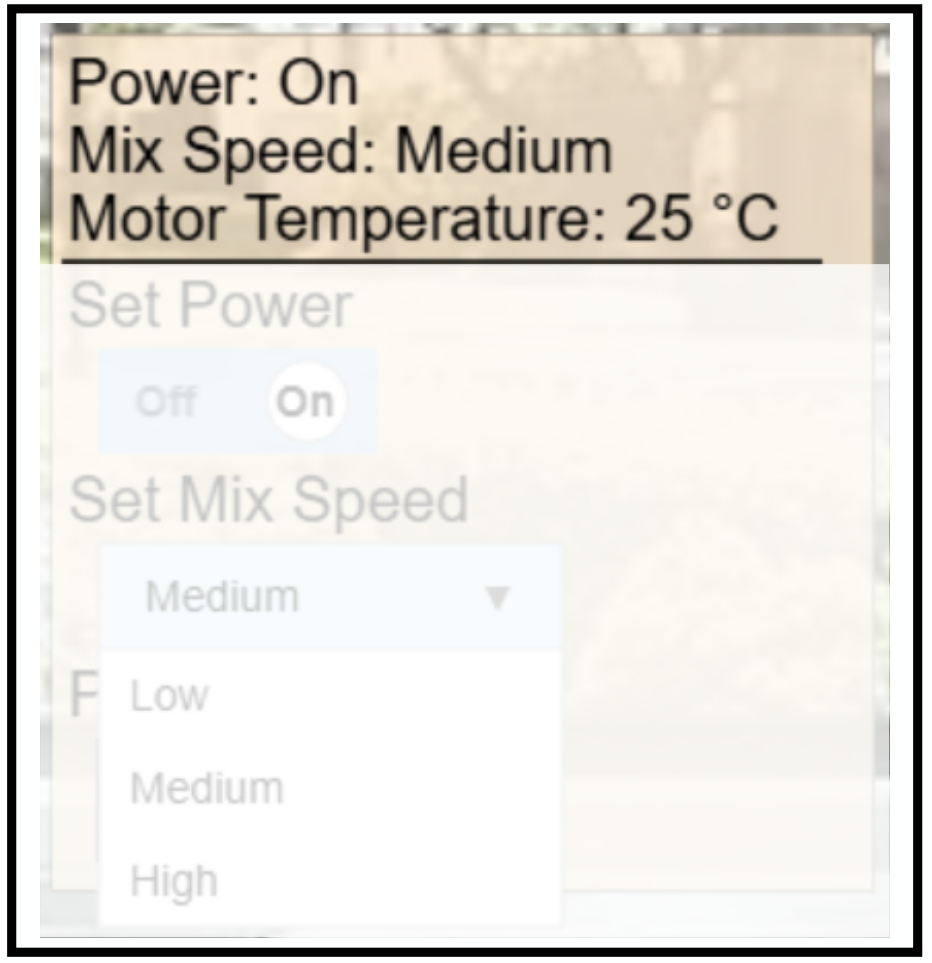
> **GUI Example of a Dynamic Property** This image shows the visual representation of a device’s dynamic properties, including power state, mix speed, and temperature. These values are read-only and continuously updated in the GUI.
#### Dynamic Property Example 2: Water Level Display with Conditional Visibility[](#dynamic-property-example-2-water-level-display-with-conditional-visibility "Direct link to Dynamic Property Example 2: Water Level Display with Conditional Visibility")
```
{
"InteractionType": "Dynamic_Property",
"name": "Water Level",
"outputData": {
"valueType": ["PrimitiveType", "String"],
"unitOfMeasure": "L"
},
"currentState": {
"visible": [
{ "name": "Power", "value": true }
],
"value": "0.8"
}
}
```
The above snippet defines a water level indicator that displays the current value *"0.8"* (liters). This display is conditionally visible, it only appears when the device’s `Power` is turned on.
## Stateless Action[](#stateless-action "Direct link to Stateless Action")
A **Stateless Action** models an interaction that does **not store or depend on internal state**. It can be triggered any number of times and is designed for event-like, one-shot operations. This is the simplest type of interaction in TDeX and is typically used for actions that are repeatable, non-parameterized, and do not alter persistent device status.
**Common Use Cases**:
* Actions that are purely event-driven, without requiring or updating internal state
* Actions that can be executed repeatedly without restriction
* Actions that result in external effects, such as mechanical or sensory responses (e.g., flashes, sounds, movement), but do not toggle or store values
### JSON Schema[](#json-schema-1 "Direct link to JSON Schema")
Loading ....
JSON Schema Code
### Stateless Action Schema
```
{
"type": "object",
"properties": {
"InteractionType": {
"type": "string",
"enum": [
"Stateless_Action"
]
},
"name": {
"type": "string"
},
"inputData": {
"type": "object",
"properties": {
"valueType": {
"type": "array",
"items": {
"type": "string"
},
"minItems": 2,
"maxItems": 2,
"contains": {
"enum": [
"null"
]
}
},
"unitOfMeasure": {
"type": "string",
"enum": [
"null"
]
}
},
"required": [
"valueType",
"unitOfMeasure"
],
"additionalProperties": false
},
"currentState": {
"type": "object",
"properties": {
"visible": {
"oneOf": [
{
"type": "boolean",
"description": "For Stateless_Action: true = button shown and clickable, false = button hidden/disabled"
},
{
"type": "array",
"items": {
"type": "object",
"properties": {
"name": {
"type": "string"
},
"value": {
"type": [
"string",
"number",
"boolean"
]
}
},
"required": [
"name",
"value"
],
"additionalProperties": false
},
"description": "For Stateless_Action: conditions determine if button is shown and clickable or hidden/disabled"
}
]
}
},
"required": [
"visible"
],
"additionalProperties": false
}
},
"required": [
"InteractionType",
"name",
"inputData",
"currentState"
],
"additionalProperties": false
}
```
#### Stateless Action Example 1: Take Snapshot Button[](#stateless-action-example-1-take-snapshot-button "Direct link to Stateless Action Example 1: Take Snapshot Button")
```
{
"InteractionType": "Stateless_Action",
"name": "Take Snapshot",
"inputData": {
"valueType": ["PrimitiveType", "null"],
"unitOfMeasure": "null"
},
"currentState": {
"visible": true
}
}
```
The above snippet defines a stateless button labeled *"Take Snapshot"* that is always visible. When clicked, it initiates an immediate snapshot from the smart camera.
#### Stateless Action Example 2: Conditional Pet Feeder Release[](#stateless-action-example-2-conditional-pet-feeder-release "Direct link to Stateless Action Example 2: Conditional Pet Feeder Release")
```
{
"InteractionType": "Stateless_Action",
"name": "Feed Pet",
"inputData": {
"valueType": ["PrimitiveType", "null"],
"unitOfMeasure": "null"
},
"currentState": {
"visible": [
{ "name": "Power", "value": true }
]
}
}
```
This button dispenses food only if the `Power` is turned on, making the interaction context-sensitive and realistic.
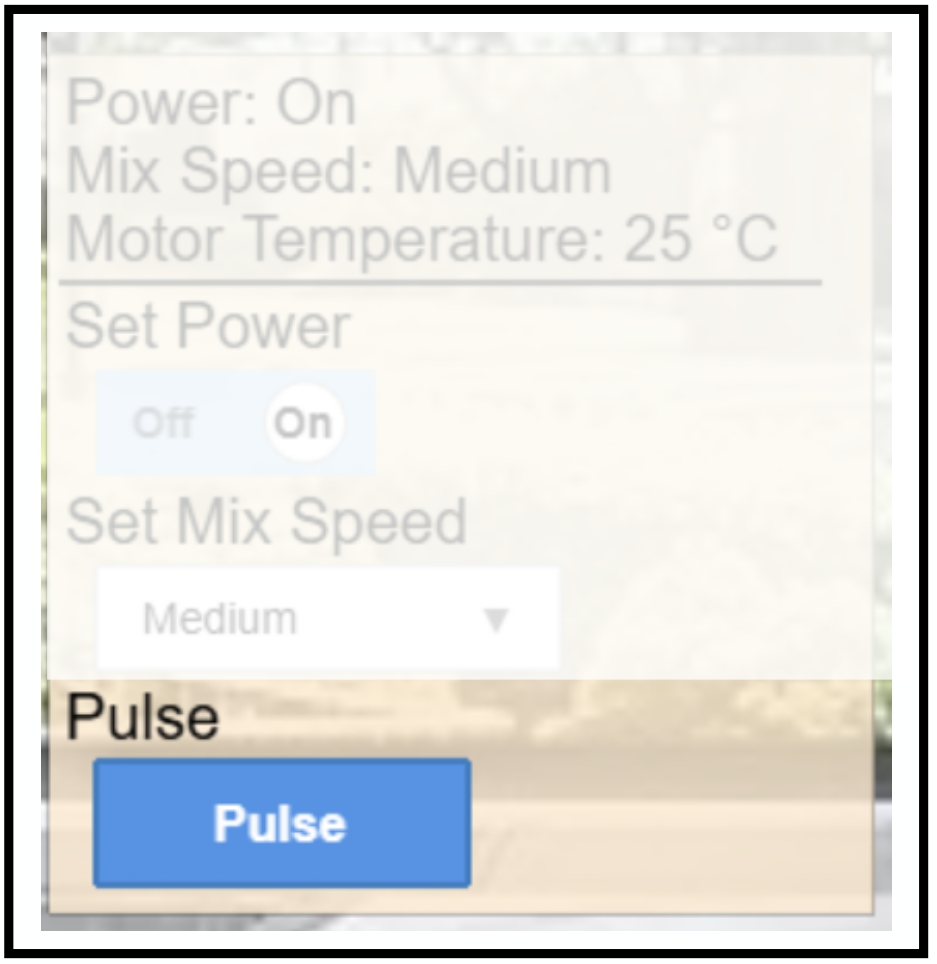
> **GUI Example of a Stateless Action**
## Boolean Action[](#boolean-action "Direct link to Boolean Action")
A **Boolean Action** models an interaction with exactly **two possible states**, such as `on/off`, `enabled/disabled`, or `open/close`. This type of interaction is ideal for simple toggles and switch-like controls, and is one of the most common primitives in smart home interfaces.
**Common Use Cases**:
* Power toggle (e.g., turning a coffee machine on/off)
* Binary operating modes (e.g., High vs. Low)
* Physical state detection (e.g., book open/closed)
### JSON Schema[](#json-schema-2 "Direct link to JSON Schema")
Loading ....
JSON Schema Code
### Boolean Action Schema
```
{
"type": "object",
"properties": {
"InteractionType": {
"type": "string",
"enum": [
"Boolean_Action"
]
},
"name": {
"type": "string"
},
"inputData": {
"type": "object",
"properties": {
"valueType": {
"type": "array",
"items": {
"type": "string"
},
"minItems": 2,
"maxItems": 2,
"contains": {
"enum": [
"PrimitiveType",
"Boolean"
]
}
},
"unitOfMeasure": {
"type": [
"string",
"null"
]
},
"type": {
"type": "object",
"properties": {
"True": {
"type": "string"
},
"False": {
"type": "string"
}
},
"required": [
"True",
"False"
],
"additionalProperties": false
}
},
"required": [
"valueType",
"unitOfMeasure",
"type"
],
"additionalProperties": false
},
"currentState": {
"type": "object",
"properties": {
"visible": {
"oneOf": [
{
"type": "boolean",
"description": "For Boolean_Action: true = status shown + interactive control available, false = interactive control grayed out/disabled (status always shown)"
},
{
"type": "array",
"items": {
"type": "object",
"properties": {
"name": {
"type": "string"
},
"value": {
"type": [
"string",
"number",
"boolean"
]
}
},
"required": [
"name",
"value"
],
"additionalProperties": false
},
"description": "For Boolean_Action: conditions determine if interactive control is available or grayed out/disabled (status always shown)"
}
]
},
"value": {
"type": "boolean"
}
},
"required": [
"visible",
"value"
],
"additionalProperties": false
}
},
"required": [
"InteractionType",
"name",
"inputData",
"currentState"
],
"additionalProperties": false
}
```
The specification of Interaction's fields for a **Boolean Action** are as follows:
* `InteractionType`: This must be set to *"Boolean\_Action"* to identify the interaction as a two-state toggle.
* `inputData`:
* `valueType`: This must be set to *\["PrimitiveType", "Boolean"]*
* `unitOfMeasure`: Set to *"null"* (no unit applies for Boolean Action)
* `type`: A mapping between Boolean values (`true` / `false`) and display strings (e.g., *"On"*, *"Off"*)
* `currentState`
* `value`: The current or initial state (*"true"* or *"false"*)
* `visible`: Visibility flag or condition (see [Visibility Condition](#visibility-conditions))
#### Boolean Action – Example 1: Power Toggle[](#boolean-action--example-1-power-toggle "Direct link to Boolean Action – Example 1: Power Toggle")
```
{
"InteractionType": "Boolean_Action",
"name": "Power",
"inputData": {
"valueType": ["PrimitiveType", "Boolean"],
"unitOfMeasure": null,
"type": {
"True": "On",
"False": "Off"
}
},
"currentState": {
"visible": true,
"value": true
}
}
```
The above snippet defines a Power control (e.g., for a smart appliance) with the following characteristics:
* A toggle rendered with "On" and "Off" labels
* Initial state set to "ON" as the `value` in `CurrentState` is set to true.
* Always visible and interactive
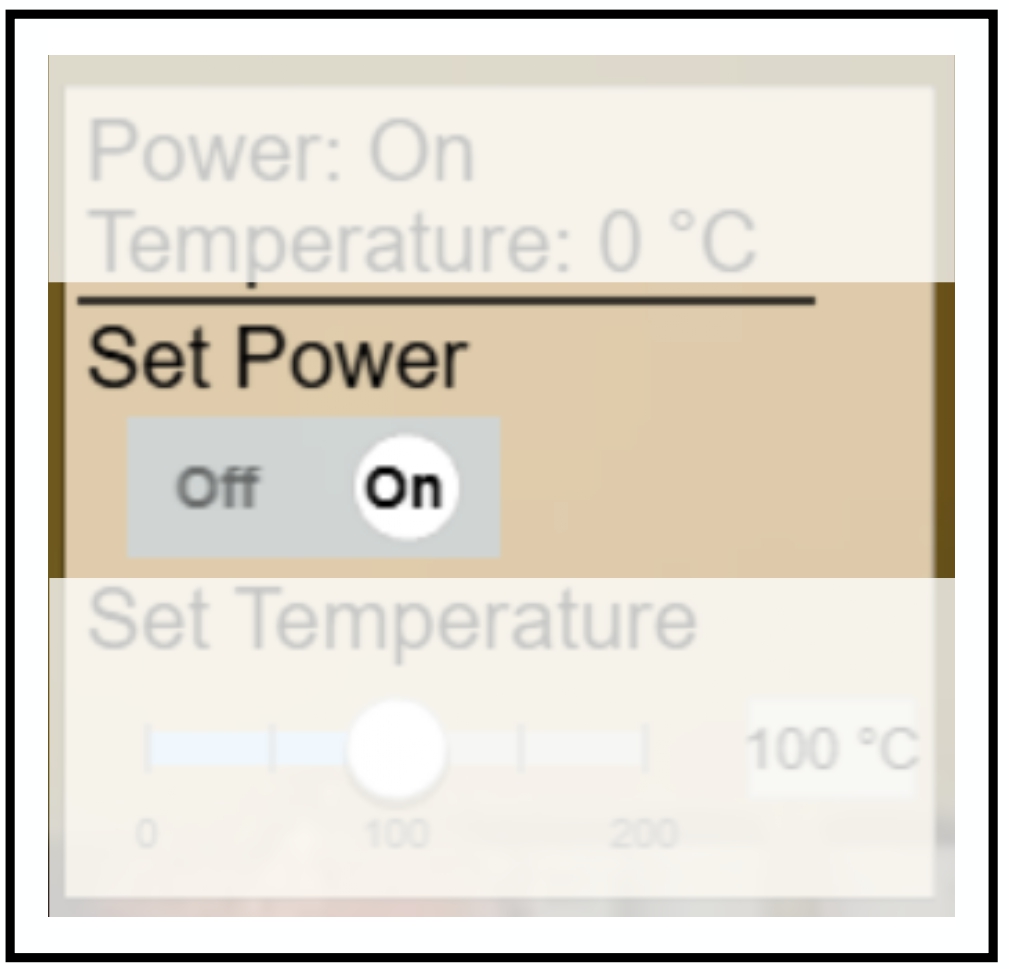
> **GUI Example of a Boolean Action**
#### Boolean Action – Example 2: Mode Switch[](#boolean-action--example-2-mode-switch "Direct link to Boolean Action – Example 2: Mode Switch")
```
{
"InteractionType": "Boolean_Action",
"name": "Mode",
"inputData": {
"valueType": ["PrimitiveType", "Boolean"],
"unitOfMeasure": null,
"type": {
"True": "High",
"False": "Low"
}
},
"currentState": {
"visible": [
{ "name": "Power", "value": true }
],
"value": false
}
}
```
The above snippet defines a Mode toggle with two possible states of "High" and "Low", which could, for example, represent an interaction type for a fan. The `value` in `currentState` is set to "true", indicating that on initial rendering, the toggle is set to "Low".
Furthermore, the toggle is visible only when the device’s Power is "On" supporting context-sensitive visualization and reflecting realistic constraints found in physical appliances (see [Visibility Condition](#visibility-conditions)).
## Numerical Action[](#numerical-action "Direct link to Numerical Action")
A **Numerical Action** models an interaction that involves selecting a value from a predefined numerical range, such as setting temperature, adjusting brightness, or choosing volume levels. It supports discrete intervals and is rendered using a slider or numeric input field in the user interface.
**Common Use Cases:**
* Used for continuous control interactions involving quantities such as temperature, brightness, speed, or volume
* Designed for bounded input ranges, where users can only select from a specified minimum and maximum
* Can be configured to be interactive or read-only, depending on the current system state
* Typically modeled using sliders or step-wise selectors, defined by a range and interval
### JSON Schema[](#json-schema-3 "Direct link to JSON Schema")
Loading ....
JSON Schema Code
### Numerical Action Schema
```
{
"type": "object",
"properties": {
"InteractionType": {
"type": "string",
"enum": [
"Numerical_Action"
]
},
"name": {
"type": "string"
},
"inputData": {
"type": "object",
"properties": {
"valueType": {
"type": "array",
"items": {
"type": "string"
},
"minItems": 2,
"maxItems": 2,
"contains": {
"enum": [
"PrimitiveType",
"Integer"
]
}
},
"unitOfMeasure": {
"type": "string"
},
"type": {
"type": "object",
"properties": {
"Range": {
"type": "array",
"items": {
"type": "number"
},
"minItems": 2,
"maxItems": 2
},
"Interval": {
"type": "array",
"items": {
"type": "number"
},
"minItems": 1,
"maxItems": 1
}
},
"required": [
"Range",
"Interval"
],
"additionalProperties": false
}
},
"required": [
"valueType",
"unitOfMeasure",
"type"
],
"additionalProperties": false
},
"currentState": {
"type": "object",
"properties": {
"visible": {
"oneOf": [
{
"type": "boolean",
"description": "For Numerical_Action: true = status shown + interactive control available, false = interactive control grayed out/disabled (status always shown)"
},
{
"type": "array",
"items": {
"type": "object",
"properties": {
"name": {
"type": "string"
},
"value": {
"type": [
"string",
"number",
"boolean"
]
}
},
"required": [
"name",
"value"
],
"additionalProperties": false
},
"description": "For Numerical_Action: conditions determine if interactive control is available or grayed out/disabled (status always shown)"
}
]
},
"value": {
"type": "number"
}
},
"required": [
"visible",
"value"
],
"additionalProperties": false
}
},
"required": [
"InteractionType",
"name",
"inputData",
"currentState"
],
"additionalProperties": false
}
```
The specification of Interaction's fields for a **Numerical Action** are as follows:
* `InteractionType`: Must be set to *"Numerical\_Action"* to declare the action as numerical.
* `inputData`:
* `valueType`: Always *\["PrimitiveType", "Integer"]* for numerical actions
* `unitOfMeasure`: String label for unit (e.g., *"°C"*, *"dB"*, *"%"*)
* `type`:
* `Range`: *\[min, max]* values defining the valid range
* `Interval`: Step size for permitted inputs
* `currentState`:
* `value`: The current or initial numerical value shown in the interface
* `visible`: Visibility flag or condition (see [Visibility Condition](#visibility-conditions))
#### Numerical Action – Example 1: Temperature Control[](#numerical-action--example-1-temperature-control "Direct link to Numerical Action – Example 1: Temperature Control")
The snippet below defines a `Temperature` control that allows users to select a value between *"0°C*" and *"250°C*" in discrete steps of *"25°C*" — for instance, to set the temperature of a deep fryer.
```
{
"InteractionType": "Numerical_Action",
"name": "Temperature",
"inputData": {
"valueType": ["PrimitiveType", "Integer"],
"unitOfMeasure": "°C",
"type": {
"Range": [0, 250],
"Interval": [25]
}
},
"currentState": {
"visible": [
{ "name": "Power", "value": true }
],
"value": 0
}
}
```
* The initial value is set to *"0°C*", as defined in the `value` field of `currentState`.
* The control is only visible when the associated `Power` toggle is set to `true`.
* The `unitOfMeasure` is shown alongside the value in the GUI, ensuring clarity for participants.
* The step size defined in `Interval` enforces a fixed increment of *"25°C*", allowing only 11 valid input values (0, 25, …, 250).
This configuration enables bounded, interval-based numerical input and supports conditional visibility based on other device states (see [Visibility Condition](#visibility-conditions)).
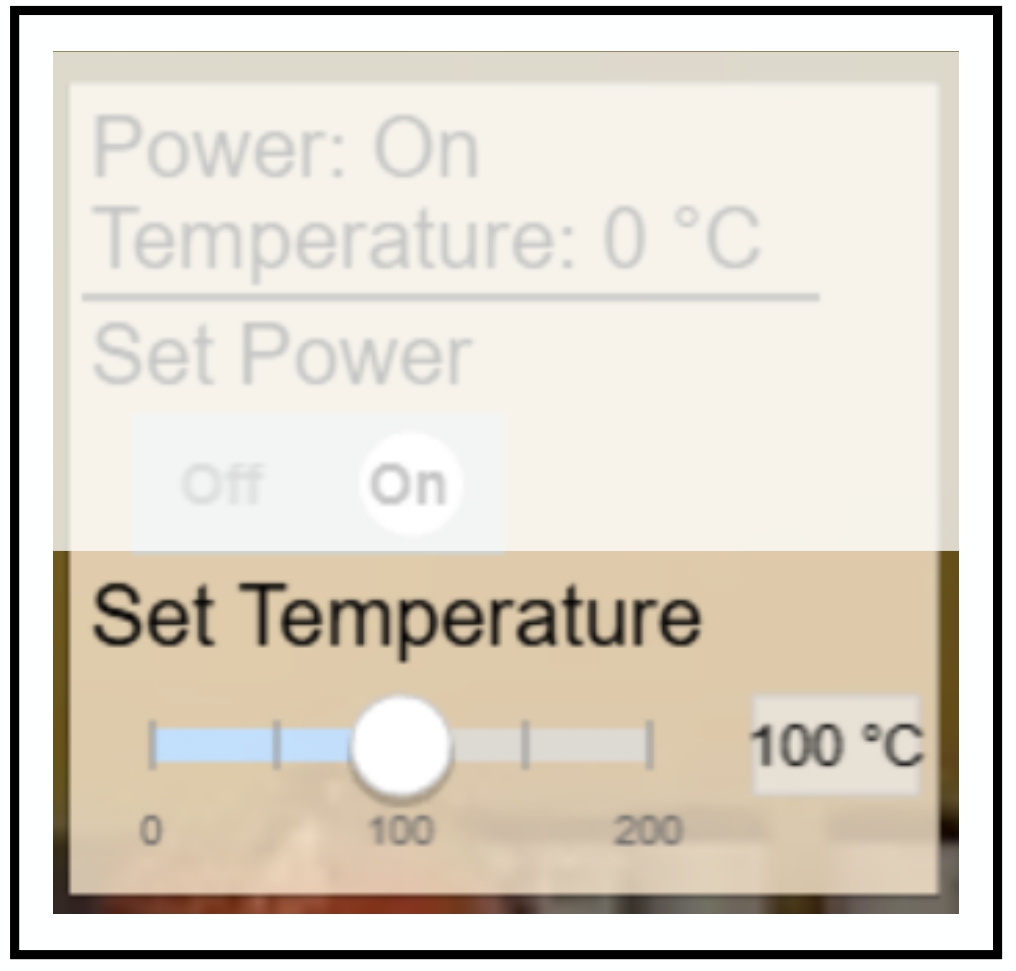
> **GUI Example of a Numerical Action** The Set Temperature action immediately updates the target value (100 °C), but the actual temperature property remains at 0 °C initially. It will gradually increase over time, reflecting the physical behavior of the system.
#### Numerical Action – Example 2: Volume Control[](#numerical-action--example-2-volume-control "Direct link to Numerical Action – Example 2: Volume Control")
```
{
"InteractionType": "Numerical_Action",
"name": "Volume",
"inputData": {
"valueType": ["PrimitiveType", "Integer"],
"unitOfMeasure": "dB",
"type": {
"Range": [0, 100],
"Interval": [10]
}
},
"currentState": {
"visible": [
{ "name": "Power", "value": true }
],
"value": 50
}
}
```
The above snippet defines a `Volume` control that enables users to select sound levels in the range of *"0 dB"* to *"100 dB"*, with discrete steps of *"10 dB"*.
* The initial value is set to *"50 dB"*, as specified in the `value` field of `currentState`.
* The control is only visible when the associated `Power` control is set to *"true"*.
* The `unitOfMeasure` is *"dB"*, and will be displayed alongside the numeric value in the GUI.
* The defined `Interval` of *"10 dB"* enforces stepwise adjustments, allowing 11 valid input values (0, 10, 20, …, 100).
This setup provides a structured and intuitive interface for quantitative control of volume, while maintaining conditional visibility in context-sensitive scenarios((see [Visibility Condition](#visibility-conditions))).
## Generic Action[](#generic-action "Direct link to Generic Action")
A **Generic Action** models an interaction where the user must choose from a fixed set of discrete string-labeled options. It is ideal for settings where actions are not **numeric** or **boolean**, but instead belong to an enumerated set of modes or presets.
These actions are rendered in the GUI as Dropdown Menus, Radio Button groups, or other selection widgets that support labeled options.
**Common Use Cases**
* Selecting from predefined modes (e.g., washing machine programs)
* Choosing input sources (e.g., *"HDMI 1"*, *"HDMI 2"*, *"USB"*)
* Setting device profiles (e.g., *"Eco"*, *"Turbo"*, *"Night Mode"*)
* Selecting functional categories (e.g., `Defrost mode` for *"Vegetables*", *"Meat*", or *"Bread*")
### JSON Schema[](#json-schema-4 "Direct link to JSON Schema")
Loading ....
JSON Schema Code
### Generic Action Schema
```
{
"type": "object",
"properties": {
"InteractionType": {
"type": "string",
"enum": [
"Generic_Action"
]
},
"name": {
"type": "string"
},
"inputData": {
"type": "object",
"properties": {
"valueType": {
"type": "array",
"items": {
"type": "string"
},
"minItems": 2,
"maxItems": 2,
"contains": {
"enum": [
"PrimitiveType",
"String"
]
}
},
"unitOfMeasure": {
"type": [
"string",
"null"
]
},
"type": {
"type": "object",
"properties": {
"String": {
"type": "object",
"properties": {
"Options": {
"type": "array",
"items": {
"type": "string"
},
"minItems": 1,
"uniqueItems": true
}
},
"required": [
"Options"
],
"additionalProperties": false
}
},
"required": [
"String"
],
"additionalProperties": false
}
},
"required": [
"valueType",
"unitOfMeasure",
"type"
],
"additionalProperties": false
},
"currentState": {
"type": "object",
"properties": {
"visible": {
"oneOf": [
{
"type": "boolean",
"description": "For Generic_Action: true = status shown + interactive control available, false = interactive control grayed out/disabled (status always shown)"
},
{
"type": "array",
"items": {
"type": "object",
"properties": {
"name": {
"type": "string"
},
"value": {
"type": [
"string",
"number",
"boolean"
]
}
},
"required": [
"name",
"value"
],
"additionalProperties": false
},
"description": "For Generic_Action: conditions determine if interactive control is available or grayed out/disabled (status always shown)"
}
]
},
"value": {
"type": "string"
}
},
"required": [
"visible",
"value"
],
"additionalProperties": false
}
},
"required": [
"InteractionType",
"name",
"inputData",
"currentState"
],
"additionalProperties": false
}
```
The specification of Interaction's fields for a **Generic Action** are as follows:
* `InteractionType`: Must be set to *"Generic\_Action"* to declare the action as numerical.
* `inputData`:
* `valueType`: Always *\["PrimitiveType", "String"]* for Generic Actions
* `unitOfMeasure`: Optional string label (can be null); not typically used
* `type`: An array of unique string values that represent the available options
* `currentState`
* `value`: The current or initial option selected (must match one of the values in Options)
* `visible`: Controls whether the dropdown is visible and interactive (see [Visibility Condition](#visibility-conditions))
#### Generic Action Example 1: Washing Machine Mode Selector[](#generic-action-example-1-washing-machine-mode-selector "Direct link to Generic Action Example 1: Washing Machine Mode Selector")
```
{
"InteractionType": "Generic_Action",
"name": "Program",
"inputData": {
"valueType": ["PrimitiveType", "String"],
"unitOfMeasure": null,
"type": {
"String": {
"Options": ["Quick Wash", "Delicate", "Heavy", "Eco"]
}
}
},
"currentState": {
"visible": true,
"value": "Eco"
}
}
```
The above snippet defines a mode selector with four labeled options, and the default selected value is "Eco".
#### Generic Action Example 2: Input Source Selector[](#generic-action-example-2-input-source-selector "Direct link to Generic Action Example 2: Input Source Selector")
```
{
"InteractionType": "Generic_Action",
"name": "Input Source",
"inputData": {
"valueType": ["PrimitiveType", "String"],
"unitOfMeasure": null,
"type": {
"String": {
"Options": ["HDMI 1", "HDMI 2", "USB", "AV"]
}
}
},
"currentState": {
"visible": [
{ "name": "Power", "value": true }
],
"value": "HDMI 1"
}
}
```
In the example above, the user can choose the input source, but only if the device’s Power is turned on.
> GUI Example of a Generic Action
## Visibility Conditions[](#visibility-conditions "Direct link to Visibility Conditions")
The `visible` field in `currentState` plays a **central role** in determining when and how an interaction is shown to the user. It allows both **simple control over visibility** and **sophisticated conditional logic**, enabling context-sensitive and phase-dependent interaction designs.
***
### Visibility Modes[](#visibility-modes "Direct link to Visibility Modes")
| Mode | Syntax | Effect |
| ------------------------- | ------------------ | ------------------------------------------------------------------------------------- |
| **Always Interactive** | `"visible": true` | The interaction is always visible and user-editable |
| **Read-Only Display** | `"visible": false` | The interaction is always shown but **cannot** be modified |
| **Contextual Conditions** | `visible: [ ... ]` | The interaction is only editable **if all** listed conditions are met (**AND** logic) |
***
### Conditional Visibility[](#conditional-visibility "Direct link to Conditional Visibility")
**Single Condition**
```
"visible": [
{ "name": "Power", "value": true }
]
```
The interaction becomes interactive only when `Power` is *"true"*.
**Multiple Conditions (AND Logic)**
```
"visible": [
{ "name": "Power", "value": true },
{ "name": "Mode", "value": "Advanced" }
]
```
The interaction is interactive only when both `Power` is *"true"* **and** `Mode` is *"Advanced"*.
**Common Use Cases**:
* **Read-Only Status**: Show current values from sensors or devices (e.g., temperature, fill level) that **cannot** be altered by users.
* **Safety Controls**: Prevent access to potentially dangerous controls unless certain prerequisites are met (e.g., child lock active).
* **Progressive Disclosure**: Hide advanced options until a basic setup is complete or a prior interaction is enabled.
* **Context-Sensitive Interfaces**: Display or activate UI elements based on the current state of the device or other controls (e.g., brightness only when a light is on).
* **Phase-Controlled Studies**: Control what participants can see or modify during different experimental stages in your user study.
#### Examples Using Conditional Visibility[](#examples-using-conditional-visibility "Direct link to Examples Using Conditional Visibility")
* [Dynamic Property Example 2: Water Level Display with Conditional Visibility](#dynamic-property-example-2-water-level-display-with-conditional-visibility)
* [Stateless Action Example 2: Conditional Pet Feeder Release](#stateless-action-example-2-conditional-pet-feeder-release)
* [Boolean Action – Example 2: Mode Switch](#boolean-action--example-2-mode-switch)
* [Numerical Action – Example 2: Volume Control](#numerical-action--example-2-volume-control)
* [Generic Action Example 2: Input Source Selector](#generic-action-example-2-input-source-selector)
## Integration with Visual States[](#integration-with-visual-states "Direct link to Integration with Visual States")
When participants interact with a device, by pressing a button, toggling a switch, or adjusting a slider, the *internal state* of that device changes. But to make this change visible and intuitive, the **device’s appearance should update as well**. This is where *Visual States* come into play.
Visual states define how a device **looks** at any given moment, based on its current state. These are essentially the **images or GUI elements** that participants see in the interface. For example:
* When a **light is turned on**, it should appear visually brighter.
* When a **TV is powered off**, it might display a blank screen image.
* When **brewing coffee**, the visible **water level** might gradually drop.
These graphical changes enhance immersion and clarity for the participant. For full details and structure, see [Visual States](https://exmartlab.github.io/SHiNE-Framework/SHiNE-Framework/game-config/game_schema/devices.md#property-visual-states)
You can configure visual states by uploading appropriate image assets and linking them to device conditions. When these conditions are met, the corresponding image is shown.
#### Example Integration:[](#example-integration "Direct link to Example Integration:")
```
// Boolean interaction
{
"InteractionType": "Boolean_Action",
"name": "Power",
"currentState": {
"value": false
}
}
// Corresponding visual states
{
"visualState": [
{
"default": true,
"image": "device_off.png"
},
{
"conditions": [
{ "name": "Power", "value": true }
],
"image": "device_on.png"
}
]
}
```
In the example above:
* When the user toggles the **Power** switch to true, the system checks the visual state conditions.
* Since "Power": true is satisfied, the image changes from device\_off.png to device\_on.png. This allows seamless **graphical feedback** to match internal state changes.
tip
Upload one image for each possible device state you want to reflect. Without a defined image for a given state, participants may see a broken or missing visual.
## Complete Device Example[](#complete-device-example "Direct link to Complete Device Example")
Here's a complete device showing two interaction types working together:
```
{
"name": "Smart Oven",
"id": "smart_oven",
"image": "assets/images/kitchen/oven.png",
"position": {
"x": 400,
"y": 300,
"scale": 1.0,
"origin": 0.5
},
"interactions": [
{
"InteractionType": "Boolean_Action",
"name": "Power",
"inputData": {
"valueType": ["PrimitiveType", "Boolean"],
"unitOfMeasure": null,
"type": {
"True": "On",
"False": "Off"
}
},
"currentState": {
"visible": null,
"value": false
}
},
{
"InteractionType": "Numerical_Action",
"name": "Temperature",
"inputData": {
"valueType": ["PrimitiveType", "Integer"],
"unitOfMeasure": "°C",
"type": {
"Range": [100, 250],
"Interval": [25]
}
},
"currentState": {
"visible": [
{ "name": "Power", "value": true }
],
"value": 150
}
}
],
"visualState": [
{
"default": true,
"image": "assets/images/kitchen/oven_off.png"
},
{
"conditions": [
{ "name": "Power", "value": true }
],
"image": "assets/images/kitchen/oven_on.png"
}
]
}
```
---
# Rules
## Inroduction:[](#inroduction "Direct link to Inroduction:")
To enable dynamic, context-sensitive behavior within the simulated smart environment, we implement a rule-based logic engine that governs the behavior of devices and the presentation of explanations. Each rule defines a set of **precondition** that, when satisfied, trigger one or more **actions**. This structure models programmable automation scenarios common in real-world smart home ecosystems.
This *Rule-Based Interaction Logic* is a powerful approach for experimental design, enabling the study of user interaction with smart systems. It allows designers to create scenarios with custom task logic, personalization, and even intentionally contradictory or impossible rules. This capability is crucial for researching user problem-solving, cognitive load, and frustration in response to systems that are confusing or appear to be malfunctioning. The rule-based nature of the engine also provides a foundation for explanation mechanisms and adaptive explanation systems, where the rules that drive the system's behavior also serve as triggers for transparency features that explain that behavior to the user.
## JSON Schema[](#json-schema "Direct link to JSON Schema")
Loading ....
JSON Schema Code
### Rule Schema
```
{
"title": "Rule",
"description": "A rule in the smart home system that defines automated behavior",
"type": "object",
"properties": {
"id": {
"type": "string",
"description": "Unique identifier for the rule"
},
"name": {
"type": "string",
"description": "The name of the rule"
},
"precondition": {
"type": "array",
"description": "The preconditions of the rule that must be satisfied to trigger the rule. All preconditions must be satisfied.",
"items": {
"oneOf": [
{
"type": "object",
"description": "Device property precondition",
"properties": {
"type": {
"type": "string",
"const": "Device",
"description": "Indicates this is a device-based precondition"
},
"device": {
"type": "string",
"description": "The device's name ID"
},
"condition": {
"type": "object",
"description": "The condition to check on the device",
"properties": {
"name": {
"type": "string",
"description": "The property name"
},
"operator": {
"type": "string",
"enum": [
"<=",
">",
"<",
">=",
"==",
"!="
],
"description": "The comparison operator"
},
"value": {
"type": [
"string",
"number",
"boolean"
],
"description": "The value to compare against"
}
},
"required": [
"name",
"operator",
"value"
]
}
},
"required": [
"type",
"device",
"condition"
]
},
{
"type": "object",
"description": "Time-based precondition",
"properties": {
"type": {
"type": "string",
"const": "Time",
"description": "Indicates this is a time-based precondition"
},
"condition": {
"type": "object",
"description": "The time condition to check",
"properties": {
"operator": {
"type": "string",
"enum": [
"<=",
">",
"<",
">=",
"==",
"!="
],
"description": "The comparison operator"
},
"value": {
"type": "string",
"description": "The value to compare against"
}
},
"required": [
"operator",
"value"
]
}
},
"required": [
"type",
"condition"
]
},
{
"type": "object",
"description": "Context-based precondition",
"properties": {
"type": {
"type": "string",
"const": "Context",
"description": "Indicates this is a context-based precondition"
},
"condition": {
"type": "object",
"description": "The context condition to check",
"properties": {
"name": {
"type": "string",
"description": "The context variable to check (e.g., 'task', ...)"
},
"operator": {
"type": "string",
"enum": [
"<=",
">",
"<",
">=",
"==",
"!="
],
"description": "The comparison operator"
},
"value": {
"type": [
"string",
"number"
],
"description": "The value to compare against"
}
},
"required": [
"name",
"operator",
"value"
]
}
},
"required": [
"type",
"condition"
]
}
]
},
"minItems": 1
},
"delay": {
"type": "number",
"description": "Optional delay in seconds before executing the action after preconditions are met",
"minimum": 0
},
"action": {
"type": "array",
"description": "The actions to be executed when the rule is triggered",
"items": {
"oneOf": [
{
"type": "object",
"description": "Device interaction action",
"properties": {
"type": {
"type": "string",
"const": "Device_Interaction",
"description": "Indicates this is a device interaction action"
},
"device": {
"type": "string",
"description": "The device's name ID to control"
},
"interaction": {
"type": "object",
"description": "The interaction to perform on the device",
"properties": {
"name": {
"type": "string",
"description": "The property name to change"
},
"value": {
"type": [
"string",
"number",
"boolean"
],
"description": "The value to set"
}
},
"required": [
"name",
"value"
]
}
},
"required": [
"type",
"device",
"interaction"
]
},
{
"type": "object",
"description": "Explanation action",
"properties": {
"type": {
"type": "string",
"const": "Explanation",
"description": "Indicates this is an explanation action"
},
"explanation": {
"type": "string",
"description": "The explanation ID which corresponds to the ID in explanation.json"
}
},
"required": [
"type",
"explanation"
]
}
]
},
"minItems": 1
}
},
"required": [
"name",
"precondition",
"action"
]
}
```
### Top-Level Properties[](#top-level-properties "Direct link to Top-Level Properties")
| Property | Type | Description |
| -------------- | ------ | --------------------------------------------------------------------------- |
| `id` | string | Unique identifier for the rule (optional, but recommended for traceability) |
| `name` | string | Name/title of the rule |
| `precondition` | array | Conditions that must all be satisfied to trigger the rule |
| `delay` | number | (Optional) Delay in seconds before executing actions |
| `action` | array | List of actions triggered if preconditions are met |
Each rule within the rules array is a self-contained object with several key properties that define its behavior: id, name, precondition, delay, and action.
* **ID** (optistring, optionaonal): A unique identifier for the rule
* **Name** (string, required): A human-readable name describing the rule's purpose (e.g., "Turn Off Coffee Machine Automatically").
* **Delay** (number, optional): The time in seconds to wait after the preconditions are met before executing the action. This allows for the modeling of system latency or the creation of more naturalistic, timed behaviors.
* **Preconditions** (array, required): An array of condition objects that represent the *"IF"* part of a rule. Preconditions specify when a rule becomes eligible for execution. All listed preconditions must be met (logical AND). Different types of preconditions are as follows:
* **Device State Conditions**
* **Time conditions**
* **Contextual Conditions (User's Context and Task)**
* **Actions** (array, required): An array of action objects that represent the *"THEN"* part of a rule. These are the events that occur once the preconditions are satisfied and the delay has elapsed. Supported actions include:
* **Device Interaction**: Changes a device’s internal state (e.g., turning off a coffee machine).
* **Explanation Actions**: Issues system-generated explanations
### Property: ID and Name[](#property-id-and-name "Direct link to Property: ID and Name")
Each rule is identified with two fields: a machine-readable id for programmatic tracking and a human-readable name for clarity. The optional id serves as a unique system identifier, while the required name describes the rule's purpose for easy debugging and management.
```
{
"id": "coffee_machine_rule",
"name": "Turn Off Coffee Machine",
// ... rest of rule
}
```
### Property: Delay[](#property-delay "Direct link to Property: Delay")
Furthermore, a rule can include an optional `delay` property. It is used to configure a latency period, specified in seconds, that must elapse before the rule's actions are executed.
```
{
"name": "Turn On Lamp When Book Is Open",
"delay": 3,
"precondition": [
// ... preconditions
],
"action": [
// ... actions
]
}
```
### Property: Precondition[](#property-precondition "Direct link to Property: Precondition")
An array of condition objects that represent the *"IF"* part of a rule. Preconditions specify when a rule becomes eligible for execution. All listed preconditions must be met (logical AND). Different types of preconditions are as follows: This framework supports a variety of condition types to create rich, context-aware triggers. Different types of preconditions are as follows:
* **Device State Conditions**
* **Time conditions**
* **Contextual Conditions (User's Context and Task)**
info
All preconditions must satisfy to trigger the rule's actions.
#### Device State Conditions[](#device-state-conditions "Direct link to Device State Conditions")
An interesting feature of the simulation’s rule engine is its ability to monitor and respond to real-time device states. Rules may include preconditions that inspect the internal properties of devices in the environment. This allows a rule to be triggered based on the status of any monitored device.
Each Device-based precondition is structured as follows:
* `type`: Must be set to "Device".
* `device`: A unique identifier (ID) corresponding to the target device within the environment (e.g., "coffee\_machine").
* `condition`: A logical expression applied to a named device property. The `condition` object contains three elements:
* `name`: The property to be monitored (e.g., "Number of Coffees Made").
* `operator`: The logical operator used for evaluation (e.g., `>=` , `==`, `<`).
* `value`: The threshold or value to compare against.
```
{
"type": "Device",
"device": "coffee_machine",
"condition": {
"name": "Number of Coffees Made",
"operator": ">=",
"value": 3
}
}
```
This precondition evaluates to true when the device with ID coffee\_machine has produced three or more coffees.
#### Time conditions[](#time-conditions "Direct link to Time conditions")
Time Conditions trigger a rule based on the absolute time of day within the environment (i.e., the "game clock"), modeling behaviors that depend on the time of day rather than the duration of interaction. This reflects how many real-world smart environments operate, for example, lights turning on after 18:00, or appliances powering down at 22:00.
Each precondition of this type consists of:
* `type`: "Time" that identifies the condition category
* `condition`: The `condition` object contains two elements:
* `operator`: Comparison symbol (`==`, `>=`, `<=`, etc.)
* `value`: Time string in 24-hour "HH
:MM
" format
The following condition evaluates to True if the current time is 10:30 PM (22:30) or later.
```
{
"type": "Time",
"condition": {
"operator": ">=",
"value": "22:30",
}
}
```
#### Context conditions[](#context-conditions "Direct link to Context conditions")
In addition to time- and device-based triggers, the rule engine supports contextual preconditions, rules that activate based on properties of the user’s current state, such as their assigned experimental group or the task they are performing. his allows for personalization and dynamic behavior based on who the user is and what they are currently doing. This is a powerful way to create rules that adapt to individual circumstances.
Contextual conditions are specified with:
* `type`: "Context", indicating that the rule depends on user-related context
* `condition`: The `condition` object contains:
* `variable`: the name of the contextual attribute to evaluate
* `operator`: logical comparator (`==`, `>=`, `<=`, etc.)
* `value`: target value to compare
Contextual variables fall into two broad categories:
##### System Context Variables[](#system-context-variables "Direct link to System Context Variables")
These refer to shared dynamic state tracked by the system itself and updated during runtime. They are global across all users change as the simulation progresses, allowing rules to be triggered by events. A key example is the `task` variable.
```
{
"type": "Context",
"condition": {
"variable": "task",
"operator": "==",
"value": "task_3"
}
}
```
For instance, here when the simulation advances to the third task, a condition checking for this becomes true for every participant. This is useful for simulating the conditions and events relevant to a specific stage of the simulation.
##### User-Specific Context Variables[](#user-specific-context-variables "Direct link to User-Specific Context Variables")
These are externally defined attributes passed into the platform at the start of the session through the session URL. They allow fine-grained personalization of rule behavior on a per-user basis.The simulation is initialized with a base64-encoded JSON object in the session URL. This object can include arbitrary key-value pairs representing user-specific metadata such as group assignment, preferences, conditions, or cognitive load level.
```
{
"type": "Context",
"condition": {
"variable": "group",
"operator": "==",
"value": "1"
}
}
```
For example, In this case, the rule will only activate for users whose session context includes "group": "1", enabling between-subject design strategies, such as assigning different rules, device behaviors, or explanation styles to control and experimental groups.
#### Combined Use Case:[](#combined-use-case "Direct link to Combined Use Case:")
The flexibility of contextual preconditions allows researchers to combine both system-wide and personalized conditions in a single rule. For example:
```
{
"precondition": [
{
"type": "Context",
"condition": {
"variable": "task",
"operator": "==",
"value": "plant_watering"
}
},
{
"type": "Context",
"condition": {
"variable": "group",
"operator": "==",
"value": "control"
}
}
]
}
```
This rule triggers only when a participant from the control group reaches the plant\_watering task, enabling precise targeting of rule-based interventions. By supporting both system and user-specific context variables, the platform enables:
* **Between- and within-subject experimental designs**
* **Adaptive behavior modeling** based on user group or profile
* **Stage-aware feedback**, only triggered during specific tasks
* **Scenario tailoring** across diverse participant populations
This contextual design makes the platform suitable for controlled usability studies, cognitive workload comparisons, or personalized explanation strategies in human-smart environment interaction research.
### Property: Actions[](#property-actions "Direct link to Property: Actions")
#### Device interactions[](#device-interactions "Direct link to Device interactions")
A rule can **change the state of a device** by defining a **Device Interaction** action. To configure such an action, create an object with the following fields:
* `type`: must be set to "Device\_Interaction"
* `device`: the **name ID** of the target device
* `interaction`: an object defining:
* `name`: the property to change
* `value`: the new value to set
```
{
"type": "Device_Interaction",
"device": "coffee_machine",
"interaction": {
"name": "Power",
"value": false
}
}
```
This example turns off the coffee machine by setting its *Power property* to *false*.
#### Explanations[](#explanations "Direct link to Explanations")
In our framework, **explanations play a pivotal role** in enabling transparency, trust, and usability. They are **not passive byproducts**, but **explicitly modeled as actions** within the rule system. See also [**Explanation.mdx**](https://exmartlab.github.io/SHiNE-Framework/SHiNE-Framework/game-config/explanation_engine.md) for a full overview of explanation generation configurations.
Explanation generation is **governed by the same rule-based mechanism** as other smart home behaviors. This gives researchers **fine-grained control** over:
* **When** an explanation should be shown
* **Under which preconditions** it should be triggered
* **What explanation** (identified by ID) should be displayed
In simple terms:
> **Explanations are modeled as a special type of action** within rules. That is: **IF** some preconditions are met, **THEN** generate a specific explanation.
This allows fully configurable, **context-aware explanations**, ideal for experimentation and user studies.
To create a such action, create an object with following properties :
* `type` : must be set to "Explanation"
* `explanation`: a string ID referencing the explanation to show (must exist in explanation.json)
```
{
"type": "Explanation",
"explanation": "coffee_01"
}
```
This action triggers the explanation with ID\_ *coffee\_01* *(e.g., “The coffee machine was turned off to save energy”).*
## Example[](#example "Direct link to Example")
```
{
"rules": [
{
"id": "coffee_machine_rule",
"name": "Turn Off Coffee Machine",
"precondition": [
{
"type": "Device",
"device": "coffee_machine",
"condition": {
"name": "Number of Coffees Made",
"operator": ">=",
"value": 3
}
},
{
"type": "Time",
"condition": {
"variable": "minute",
"operator": ">=",
"value": 10
}
}
],
"delay": 2,
"action": [
{
"type": "Device_Interaction",
"device": "coffee_machine",
"interaction": {
"name": "Power",
"value": false
}
}
]
}
]
}
```
## Best Practices[](#best-practices "Direct link to Best Practices")
* Design intentional contradictions if your goal is to create confusing situations
* Test rule interactions thoroughly
* Use meaningful IDs for rules to make debugging and maintenance easier
* Consider using delays for rules that should have realistic timing behavior
---
# Tasks
## Introduction[](#introduction "Direct link to Introduction")
In out framework, **tasks** define specific objectives for players to complete using smart home devices. Tasks simulate both achievable and intentionally unachievable scenarios to study user behavior, decision-making, and system understanding Each task defines:
* The **objective** (what needs to be achieved)
* The **context** (environment and device setup)
* The **constraints** (e.g., time limits or system conflicts)
* The **expected conditions for success** (goals)
Tasks can be configured globally (e.g., timing, order, abortability) and individually (e.g., task-specific timers, goals, device states).
## JSON Schema[](#json-schema "Direct link to JSON Schema")
Loading ....
JSON Schema Code
### Task Schema
```
{
"title": "Task",
"description": "A task in the game",
"type": "object",
"properties": {
"id": {
"type": "string",
"description": "The task ID"
},
"description": {
"type": "string",
"description": "The description of the task to be displayed to the player"
},
"timer": {
"type": "number",
"description": "The time in seconds to complete the task until it expires"
},
"delay": {
"type": "number",
"description": "The delay in seconds before the task's action is executed"
},
"abortable": {
"type": "boolean",
"description": "Whether this specific task can be aborted by the player"
},
"abortionOptions": {
"type": "array",
"description": "List of abortion reason options presented to the player",
"items": {
"type": "string"
}
},
"environment": {
"type": "array",
"description": "The environment variables of the task to be displayed to the player",
"items": {
"type": "object",
"properties": {
"name": {
"type": "string",
"description": "The name of the environment variable"
},
"value": {
"type": [
"number",
"string"
],
"description": "The value of the environment variable"
}
},
"required": [
"name",
"value"
]
}
},
"defaultDeviceProperties": {
"type": "array",
"description": "The default properties of the device that is set when the task starts",
"items": {
"type": "object",
"properties": {
"device": {
"type": "string",
"description": "The name/ID of the device"
},
"properties": {
"type": "array",
"description": "The properties to be overridden in the device",
"items": {
"type": "object",
"properties": {
"name": {
"type": "string",
"description": "The name of the property"
},
"value": {
"type": [
"number",
"boolean"
],
"description": "The value of the property"
}
},
"required": [
"name",
"value"
]
}
}
},
"required": [
"device",
"properties"
]
}
},
"goals": {
"type": "array",
"description": "The goals of the task to be completed by the player. All goals must be completed to finish the task",
"items": {
"type": "object",
"properties": {
"device": {
"type": "string",
"description": "The name of the device"
},
"condition": {
"type": "object",
"description": "The condition to be met for this goal",
"properties": {
"name": {
"type": "string",
"description": "The name of the property to check"
},
"operator": {
"type": "string",
"enum": [
"<=",
">",
"<",
">=",
"==",
"!="
],
"description": "The operator to compare the property value"
},
"value": {
"type": [
"string",
"number",
"boolean"
],
"description": "The value to compare against"
}
},
"required": [
"name",
"operator",
"value"
]
}
},
"required": [
"device",
"condition"
]
},
"minItems": 1
}
},
"required": [
"id",
"description",
"environment",
"defaultDeviceProperties",
"goals"
]
}
```
### Top-Level Properties[](#top-level-properties "Direct link to Top-Level Properties")
| Property | Type | Required | Description |
| ------------------------- | --------- | -------- | -------------------------------------------------------------------------------------------------------------------------------------------------------------------------------------------------------------- |
| `id` | `string` | **Yes** | A unique, machine-readable identifier for the task. This is used for logging, tracking progress, and referencing the task in game logic. |
| `description` | `string` | **Yes** | The player-facing text that describes the objective. This is the main instruction displayed to the participant in the UI. |
| `timer` | `number` | No | An optional time limit in seconds for the task. If the timer expires before the goals are met, the task is considered failed or expired. This can override any global timer settings. |
| `delay` | `number` | No | An optional delay in seconds before the task officially begins after it has been loaded. This can be used to sequence events or pace the gameplay. |
| `abortable` | `boolean` | No | A flag to specify if this particular task can be aborted by the player. This overrides any global `abortable` setting, allowing for fine-grained control over which tasks can be skipped. |
| `abortionOptions` | `array` | No | A list of predefined string options presented to the player when they choose to abort a task. This is only effective if `abortable` is set to `true`. It is useful for gathering data on why a player gave up. |
| `environment` | `array` | **Yes** | An array of key-value objects that define the contextual state for the duration of the task. These variables can be read by the rules engine to influence device behavior and create dynamic scenarios. |
| `defaultDeviceProperties` | `array` | **Yes** | An array of objects that sets the initial state of one or more devices at the very beginning of the task. This is crucial for ensuring a consistent starting point and for configuring impossible scenarios. |
| `goals` | `array` | **Yes** | An array of goal objects that define the specific success conditions for the task. All goals in the array must be met for the task to be considered complete. A task must have at least one goal. |
## Global Task Configuration[](#global-task-configuration "Direct link to Global Task Configuration")
Global task properties apply to all tasks unless overridden. These are useful for setting:
* Task order (sequential or random)
* A shared default timer
* Global abortability behavior We’ll start with ordered. Here’s a refined documentation block:
Tasks have four primary global properties that control their presentation, timing, and the optional ability to abort the task: `ordered`, `timer`, `abortable`, and `tasks`.
### Property: Order[](#property-order "Direct link to Property: Order")
The `ordered` flag determines whether tasks should be presented to players **in a fixed sequence** or **in randomized order**.
```
{
"ordered": "true",
"tasks": [
{ "id": "task_a", "description": "First task" },
{ "id": "task_b", "description": "Second task" },
{ "id": "task_c", "description": "Third task" }
]
}
```
#### Order Behavior[](#order-behavior "Direct link to Order Behavior")
When `ordered: "true"`:
* Tasks will be presented **in the order they appear** in the array.
* You must **explicitly define the desired order** by arranging tasks accordingly.
When `ordered: "false"` (or omitted):
* Tasks will be **randomized** each time the task list is loaded.
Choosing Task Order
Use ordered tasks when:
* Tasks follow a logical progression (e.g., build on prior knowledge or steps)
* Later tasks depend on context from earlier ones
* You are assessing learning or sequential reasoning
Use random order when:
* Tasks are independent of each other
* You want to reduce learning effects or ordering bias
### Property: Timer[](#property-timer "Direct link to Property: Timer")
The global timer property sets a default time limit (in seconds) for each task. This value applies to all tasks **unless explicitly overridden** by an individual task’s timer.
```
{
"timer": 300, // Global 5-minute timer
"tasks": [...]
}
```
#### **Override Behavior**[](#override-behavior "Direct link to override-behavior")
If a task defines its own timer, it will **override the global timer**:
```
{
"id": "prepare_coffee",
"description": "Prepare a cup of coffee",
"timer": 120 // This task will have a 2-minute limit
}
```
Global vs Local Timers
* Use a **global timer** to maintain consistent task duration across similar tasks.
* Use **per-task timers** to fine-tune time limits based on complexity, length, or experiment design.
### Property: Abortable[](#property-abortable "Direct link to Property: Abortable")
The global `abortable` flag controls whether tasks can be skipped by participants using the in-game abort button.
```
{
"abortable": true,
"tasks": [...]
}
```
If `abortable: true`, participants may **choose to skip** any task. This setting applies to all tasks **unless individually overridden** (See [Task-Level Aborting Setting](#task-level-aborting-setting))
## Individual Task Configuration[](#individual-task-configuration "Direct link to Individual Task Configuration")
Each task in the tasks array defines its own behavior, goals, and constraints. These task-level properties can override global settings and allow for detailed customization per task.
### Core Properties[](#core-properties "Direct link to Core Properties")
Defines the basic identity and display information for a task.
```
{
"id": "make_coffee",
"description": "Make 5 coffees using the coffee machine",
}
```
| Property | Type | Description |
| ------------- | -------- | --------------------------------------------------------------------- |
| `id` | `string` | Unique identifier of the task. **Required.** |
| `description` | `string` | Text shown to the user describing the goal of the task. **Required.** |
### Task-Level Aborting Setting[](#task-level-aborting-setting "Direct link to Task-Level Aborting Setting")
Each task can override the global abort setting by specifying its own abortable value:
```
{
"id": "deep_fryer_task",
"abortable": false, // This task cannot be aborted even if global setting allows it
"abortionOptions": [
"I believe this task is impossible.",
"I want to skip this task."
]
}
```
* **`abortable`**: Boolean that overrides the global abortable setting for this specific task
* **`abortionOptions`**: Array of strings providing predefined reasons for task abortion
If a task is abortable, you may optionally define a list of abortionOptions, preset reasons that are shown to the participant when they choose to abort:
Abortability Rules
* If a task sets abortable: false, the aborting button is **not displayed** during that task.
* If abortable: true but no *abortionOptions* are provided, participants can skip **without stating a reason**.
* If *abortionOptions* are provided, participants **must select one** to proceed.
### Environment Variables[](#environment-variables "Direct link to Environment Variables")
Environment variables define the contextual conditions under which a task takes place. They help simulate realistic smart home situations and serve as triggers for behavior rules, dynamic explanations, or device responses.
Each task can define one or more environment variables using a name and a value. These variables exist **only within the scope of the task** and do **not persist globally**.
```
{
"environment": [
{ "name": "Weather", "value": "Sunny" },
{ "name": "Temperature", "value": 20 },
{ "name": "RoomOccupied", "value": true }
]
}
```
#### **Structure**[](#structure "Direct link to structure")
Each environment variable is defined as an object with the following keys:
| Field | Type | Description |
| ----- | ------------------------- | ------------------------------------------------- |
| name | string | Name of the environment variable |
| value | string / number / boolean | Value of the variable (text, numeric, or boolean) |
#### **Usage**[](#usage "Direct link to usage")
* Environment variables can trigger **explanation rules**, **automated smart home behaviors**, or **conditional device states**.
* They allow tasks to reflect **realistic and dynamic home scenarios** (e.g., different weather or presence conditions).
* You can define **as many variables as needed** per task.
Best Practices
* Use consistent naming conventions across tasks.
* Define variables that match the logic of your rules and explanations.
### Default Device Properties[](#default-device-properties "Direct link to Default Device Properties")
Default device properties define the initial state of specific devices at the start of a task. This ensures consistent and controlled environments for each task scenario.
These properties are set **per task** and override any global or previously configured device states.
```
{
"defaultDeviceProperties": [
{
"device": "coffee_machine",
"properties": [
{ "name": "Power", "value": false },
{ "name": "Roasting", "value": true }
]
}
]
}
```
| Field | Type | Description |
| ---------- | ---------------- | ------------------------------------------------------------------------- |
| device | string | The unique name or ID of the device whose properties will be initialized. |
| properties | array of objects | List of properties to be applied to this device. |
| → name | string | Name of the property to override (e.g., "Power", "Brightness"). |
| → value | number / boolean | New value to assign (e.g., `true`, `false`, `100`). |
#### **Purpose**[](#purpose "Direct link to purpose")
* Ensure devices start in a known state
* Avoid unintended carry-over effects between tasks
* Simulate specific environmental or behavioral conditions
### Goals[](#goals "Direct link to Goals")
Goals define the success criteria for each task. A task is marked as **completed** when **all** its goals are satisfied. Each goal checks a condition on a specific device property. Each task must have at least one goal.
Goals can also be used to define **impossible tasks** by setting conditions that cannot be met due to conflicting rules, device limitations, or initial states.
```
{
"goals": [
{
"device": "coffee_machine",
"condition": {
"name": "Number of Coffees Made",
"operator": ">=",
"value": 5
}
}
]
}
```
This example defines two goals:
* The number of coffees made must be at least 5.
* The coffee machine must be powered on.
All conditions must be satisfied for the task to be considered successful.
#### **Goal Structure**[](#goal-structure "Direct link to goal-structure")
| Field | Type | Description |
| ---------- | ------------------------- | --------------------------------------------------------------- |
| device | string | ID of the device to check the condition on |
| condition | object | The condition that must be met |
| → name | string | Name of the property to evaluate (e.g., "Power", "Temperature") |
| → operator | string | Comparison operator (e.g., `==`, `>=`, `<`, `!=`, etc.) |
| → value | string / number / boolean | Value to compare against |
Goal Definition Tip
* Use precise and measurable device states.
* Combine multiple goals to create realistic and challenging tasks.
* For impossible tasks, ensure that goal conditions cannot be satisfied based on the environment or rules.
* Even for impossible tasks:
* Define clear, measurable objectives
* Use precise operators and values
* Make the goal requirements obvious to participants
Debugging
While goals are required in the schema (minItems: 1), for internal testing you may temporarily leave the array empty to allow task progression without condition checks.
## Complete Example[](#complete-example "Direct link to Complete Example")
Here's a complete example showing the updated task structure:
```
{
"ordered": "true",
"timer": 120,
"abortable": true,
"tasks": [
{
"id": "deep_fryer",
"description": "Turn on the deep fryer",
"timer": 120,
"abortable": false,
"abortionOptions": [
"I believe this task is impossible.",
"I want to skip this task."
],
"environment": [
{ "name": "Weather", "value": "Rainy" },
{ "name": "Temperature", "value": 13 }
],
"defaultDeviceProperties": [
{
"device": "deep_fryer",
"properties": [
{ "name": "Power", "value": false }
]
}
],
"goals": [
{
"device": "deep_fryer",
"condition": {
"name": "Power",
"operator": "==",
"value": true
}
}
]
}
]
}
```
## **Best Practices**[](#best-practices "Direct link to best-practices")
1. **Task Description**
* Write clear, unambiguous instructions that are easy to understand for participants.
* If a task is intentionally impossible, avoid hinting at its impossibility.
* Use consistent terminology across all tasks to prevent confusion.
2. **Timer Management**
* Set appropriate time limits based on task complexity.
* Ensure enough time is given for trial-and-error, especially in exploratory or deceptive tasks.
* Avoid overly long timers to prevent participant fatigue or disengagement.
3. **Abortion Control**
* Use task-level abortable settings to selectively allow skipping tasks.
* Provide carefully worded abortionOptions to capture participants’ reasoning when they give up.
* Consider how abortion opportunities affect participant behavior, engagement, and data quality.
4. **Environment Design**
* Use environment variables to simulate dynamic contexts like temperature, occupancy, or external conditions.
* Design environments that logically support the goals or contribute to task difficulty.
5. **Device State Initialization**
* Use defaultDeviceProperties to reset device states before each task.
* Ensure consistent starting conditions across sessions and participants.
* Design initial states to align with or counteract rule behavior intentionally.
6. **Goal Definition**
* Use precise, measurable, and logically achievable (or unachievable) goal conditions.
* Combine multiple goals to simulate complex tasks.
* For impossible tasks, ensure the defined goals appear achievable but are logically blocked by the environment or rules.
---
# Walls
## Introduction[](#introduction "Direct link to Introduction")
The Wall schema defines a visual surface within a smart home room onto which interactive elements, such as devices and doors, are placed. Each wall is represented by an image asset and serves as a primary canvas for constructing the user-facing interface of the environment.
In the game interface, each room is composed of **four walls**, which the participant can navigate using `left/right` arrow keys. This wall-based navigation allows users to explore different perspectives of a room and interact with devices positioned on each wall independently.
Walls are central to the spatial organization of the smart home simulation and are responsible for:
* Hosting device and door placements
* Displaying background visuals per wall
* Defining navigation flow within a room
* Determining the initial view when a room is entered (via the default property)
## JSON Schema[](#json-schema "Direct link to JSON Schema")
Loading ....
JSON Schema Code
### Wall Schema
```
{
"title": "Wall",
"description": "Property of a wall",
"type": "object",
"properties": {
"default": {
"type": "boolean",
"description": "Whether the wall should be displayed as default upon starting the game",
"default": false
},
"image": {
"type": "string",
"description": "Path to the image asset corresponding to the wall"
},
"devices": {
"type": "array",
"description": "Array of devices placed on this wall",
"items": {
"$ref": "device/deviceSchema.json"
}
},
"doors": {
"type": "array",
"description": "Array of doors for navigation between rooms",
"items": {
"$ref": "doorSchema.json"
}
}
},
"required": [
"image"
]
}
```
### Top-Level Properties[](#top-level-properties "Direct link to Top-Level Properties")
| Property | Type | Description |
| --------- | ------- | -------------------------------------------------------------------------------------------------------------------------------------------------------------------------------------------- |
| `default` | boolean | Indicates whether this wall should be displayed as the **default view** when entering the room |
| `image` | string | Path to the image asset used as the **background graphic** for the wall |
| `devices` | array | Array of devices to be placed on this wall. Each device is defined using the [Device Schema](https://exmartlab.github.io/SHiNE-Framework/SHiNE-Framework/game-config/game_schema/devices.md) |
| `doors` | array | Array of doors to be rendered on this wall. |
## Wall Images[](#wall-images "Direct link to Wall Images")
Each wall in a room configuration requires an image that serves as the **background visual context** for that wall. These images define the rendered scene in the game environment and provide spatial and semantic cues to participants.
#### Image Specifications[](#image-specifications "Direct link to Image Specifications")
* **Supported formats**: .png, .jpg, .webp
* **Exact resolution**: 1024 × 576 pixels
* **Aspect ratio**: 16:9 (standard for the game’s visual display)
Strict Size Requirement
All wall images must be exactly 1024 × 576 pixels. Using images with incorrect dimensions can result in rendering artifacts, stretching, or misalignment within the game scene. Ensure that images are properly scaled and cropped before inclusion.
```
{
"image": "assets/images/kitchen/north_wall.jpg",
"default": false
}
```
In this example, the wall is associated with the north\_wall.jpg image and is not the default wall for initial display.
## Default Wall Configuration[](#default-wall-configuration "Direct link to Default Wall Configuration")
The `default` boolean property determines whether a wall is shown as the initial view when a participant enters a room. It defines the starting perspective of the user in the interactive environment.
**Usage Example**
```
[
{
"image": "assets/images/kitchen/first_wall.jpg",
"default": false
},
{
"image": "assets/images/kitchen/second_wall.jpg",
"default": true
},
{
"image": "assets/images/kitchen/third_wall.jpg",
"default": false
},
{
"image": "assets/images/kitchen/fourth_wall.jpg",
"default": false
}
]
```
In this example, the wall defined with second\_wall.jpg is marked as the default and will be the first view rendered when the room is entered.
#### **Behavior and Constraints**[](#behavior-and-constraints "Direct link to behavior-and-constraints")
* **Explicit assignment**: The default property is optional. If omitted, it is treated as false.
* **Uniqueness per room**: Only **one wall per room** should be marked with default: true.
* **Fallback logic**: If no wall is explicitly marked as default, the **first wall** listed in the array will be shown by default.
Default Wall Selection
Choose the default wall to ensure a smooth and intuitive participant experience:
* Prioritize walls containing **important devices**, **task-relevant elements**, or **key visual cues**.
* Align the default view with the **logical point of entry** into the room or the **most frequently used area**.
* Ensure the chosen wall provides **clear spatial orientation** and a coherent introduction to the room context.
### Wall Navigation Order[](#wall-navigation-order "Direct link to Wall Navigation Order")
The order in which walls appear in the configuration array defines how users navigate through them using the **left** and **right arrow keys**. This navigation simulates a 360° rotation within the room and loops seamlessly across all four walls. **Navigation Behavior** Given a room defined with four walls:
```
[
{
"image": "assets/images/kitchen/first_wall.jpg",
"devices": []
},
{
"image": "assets/images/kitchen/second_wall.jpg",
"devices": []
},
{
"image": "assets/images/kitchen/third_wall.jpg",
"devices": []
},
{
"image": "assets/images/kitchen/fourth_wall.jpg",
"devices": []
}
]
```
* **Right Arrow Key** Navigates in forward sequence: first\_wall → second\_wall → third\_wall → fourth\_wall → first\_wall (loops)
* **Left Arrow Key** Navigates in reverse sequence: first\_wall → fourth\_wall → third\_wall → second\_wall → first\_wall (loops)
Wall Ordering
Walls should be ordered in the array according to their **physical placement** in the room — typically in a **clockwise** or **counter-clockwise** sequence.
Correct ordering ensures that the virtual navigation experience aligns with the **real-world spatial layout**, supporting participant orientation and spatial memory.
### Wall Numbering Convention[](#wall-numbering-convention "Direct link to Wall Numbering Convention")
Each wall within a room is indexed according to its position in the room’s walls array. This indexing is used to specify door destinations and navigation references.
| Label | Index | Description |
| ----- | ----- | ------------------------------------- |
| wall1 | 0 | First wall in the room’s walls array |
| wall2 | 1 | Second wall in the room’s walls array |
| wall3 | 2 | Third wall in the room’s walls array |
| wall4 | 3 | Fourth wall in the room’s walls array |
This convention enables a structured and predictable reference system across rooms.
## Device Configuration on Walls[](#device-configuration-on-walls "Direct link to Device Configuration on Walls")
Walls act as interactive canvases where multiple **smart devices** can be placed. These devices form the core of user interaction and gameplay within the smart home environment. Each device includes metadata, image references, positional coordinates, and interaction logic—allowing users to view and manipulate their state in real time.
#### Device Placement Example[](#device-placement-example "Direct link to Device Placement Example")
Here is an example of a `Wall` object containing two distinct devices: a "Deep Fryer" and a "Mixer". Each device has its own image, position on the wall, and a set of interactions.
```
{
"image": "assets/images/shared_room/wall1.webp",
"default": true,
"devices": [
{
"name": "Deep Fryer",
"id": "deep_fryer",
"image": "assets/images/shared_room/devices/deep_fryer.webp",
"position": {
"x": 657,
"y": 285,
"scale": 1,
"origin": 1
},
"interactions": [
{
"InteractionType": "Boolean_Action",
"name": "Power",
"inputData": {
"valueType": ["PrimitiveType", "Boolean"],
"unitOfMeasure": null,
"type": {
"True": "On",
"False": "off"
}
},
"currentState": {
"visible": null,
"value": false
}
}
],
"visualState": [
{
"default": true,
"image": "assets/images/shared_room/devices/wall1_deepfryer.webp"
}
]
},
{
"name": "Mixer",
"id": "mixer",
"image": "assets/images/shared_room/devices/wall1_mixer.png",
"position": {
"x": 367,
"y": 280,
"scale": 0.25,
"origin": 1
},
"interactions": [
{
"InteractionType": "Boolean_Action",
"name": "Power",
"inputData": {
"valueType": ["PrimitiveType", "Boolean"],
"unitOfMeasure": null,
"type": {
"True": "On",
"False": "Off"
}
},
"currentState": {
"visible": null,
"value": false
}
}
],
"visualState": [
{
"default": true,
"image": "assets/images/shared_room/devices/wall1_mixer.png"
}
]
}
]
}
```
## Door Configuration on Walls[](#door-configuration-on-walls "Direct link to Door Configuration on Walls")
Doors are non-interactive objects whose sole purpose is to enable navigation between different rooms and walls in the smart home environment. They are defined within the `doors` array of a `Wall` object.
#### Basic Door Structure Example[](#basic-door-structure-example "Direct link to Basic Door Structure Example")
The following example shows a `Wall` that contains a single door. Clicking on this door would navigate the player to the first wall (`wall1`) of the room identified as `"bob_room"`.
```
{
"image": "assets/images/shared_room/wall3.webp",
"doors": [
{
"image": "assets/images/shared_room/doors/wall3_door.webp",
"position": {
"x": 425,
"y": 100,
"scale": 0.5
},
"destination": {
"room": "bob_room",
"wall": "wall1"
}
}
]
}
```
**Door Properties**
| Property | Type | Required | Description |
| ------------- | -------- | -------- | --------------------------------------------------------------------------------------- |
| `image` | `string` | **Yes** | The file path to the visual asset for the door. |
| `position` | `object` | **Yes** | An object defining the door's placement and size on the wall. Contains x, y, and scale. |
| `destination` | `object` | **Yes** | An object specifying the target location. Contains the destination room ID and wall ID. |
**Best Practices**
* Ensure that **destination room names** match those defined in your global room configuration.
* Always use a **valid wall label** (wall1 to wall4) corresponding to a real wall in the destination room.
* Position doors so they do not visually overlap with interactive devices on the wall.
* Keep door images **visually distinct** from devices for clarity during gameplay.
Door Behavior
When a player clicks or taps on a door, the game automatically navigates to the specified room and wall. This enables room-to-room transitions within a single scene.
Door Destination Validation
When defining door transitions: • Ensure the referenced target room exists in your configuration. • Confirm that the specified wall number corresponds to a valid index in the target room’s walls array. • Design navigation paths that are logical and intuitive for participants.
## Examples[](#examples "Direct link to Examples")
This section presents full examples of wall objects, showcasing minimal and complex configurations used in the smart home simulation environment.
#### Example 1: Simple Static Wall[](#example-1-simple-static-wall "Direct link to Example 1: Simple Static Wall")
A minimal wall definition that includes only a background image. This wall contains no interactive devices or doors.
```
{
"image": "assets/images/shared_room/wall2.webp",
"default": false
}
```
#### Example 2: Wall with Door for Room Navigation[](#example-2-wall-with-door-for-room-navigation "Direct link to Example 2: Wall with Door for Room Navigation")
This example illustrates how to define a wall that includes a single door used to navigate to another room in the game environment.
```
{
"image": "assets/images/shared_room/wall4.webp",
"doors": [
{
"image": "assets/images/shared_room/doors/wall4_door.webp",
"position": {
"x": 425,
"y": 100,
"scale": 0.5
},
"destination": {
"room": "alice_room",
"wall": "wall1"
}
}
]
}
```
#### Example 3: Wall with Multiple Devices[](#example-3-wall-with-multiple-devices "Direct link to Example 3: Wall with Multiple Devices")
This configuration includes two smart devices placed on a single wall. Each device is defined with its image, position, and a default visual state.
```
{
"image": "assets/images/shared_room/wall1.webp",
"default": true,
"devices": [
{
"name": "Deep Fryer",
"id": "deep_fryer",
"image": "assets/images/shared_room/devices/wall1_deepfryer.webp",
"position": {
"x": 657,
"y": 285,
"scale": 1,
"origin": 1
},
"interactions": [],
"visualState": [
{
"default": true,
"image": "assets/images/shared_room/devices/wall1_deepfryer.webp"
}
]
},
{
"name": "Cooker Hood",
"id": "cooker_hood",
"image": "assets/images/shared_room/devices/wall1_cookerhood.webp",
"position": {
"x": 659,
"y": 222,
"scale": 1,
"origin": 1
},
"interactions": [],
"visualState": [
{
"default": true,
"image": "assets/images/shared_room/devices/wall1_cookerhood.webp"
}
]
}
]
}
```
#### Example 4: Wall with Devices and Door[](#example-4-wall-with-devices-and-door "Direct link to Example 4: Wall with Devices and Door")
A fully configured wall that includes both a smart device and a navigable door.
```
{
"image": "assets/images/alice_room/wall1.webp",
"default": false,
"devices": [
{
"name": "Lamp",
"id": "lamp",
"image": "assets/images/alice_room/devices/wall1_lamp.webp",
"position": {
"x": 525,
"y": 320,
"scale": 1,
"origin": 1
},
"interactions": [],
"visualState": [
{
"default": true,
"image": "assets/images/alice_room/devices/wall1_lamp.webp"
}
]
}
],
"doors": [
{
"image": "assets/images/alice_room/doors/wall1_door.webp",
"position": {
"x": 0,
"y": 45,
"scale": 0.5
},
"destination": {
"room": "shared_room",
"wall": "wall1"
}
}
]
}
```
---
# Getting Started
This guide helps you understand the platform architecture and create your first smart home study. After completing the [Installation](https://exmartlab.github.io/SHiNE-Framework/SHiNE-Framework/installation.md), you're ready to build your first interactive smart home scenario.
## Platform Overview[](#platform-overview "Direct link to Platform Overview")
V-SHINE consists of three main components that work together to create immersive smart home studies:
### Core Files Structure[](#core-files-structure "Direct link to Core Files Structure")
```
platform/
├── src/
│ ├── game.json # Main study configuration
│ └── explanation.json # Explanation engine setup
├── public/
│ └── assets/
│ └── images/ # Study assets (room images, devices)
└── .env # Database configuration
```
### Configuration Files[](#configuration-files "Direct link to Configuration Files")
* **`game.json`**: Defines rooms, devices, rules, and tasks for your study
* **`explanation.json`**: Configures how explanations are provided to participants
* **`.env`**: Database connection and environment settings
## Quick Start: Your First Study[](#quick-start-your-first-study "Direct link to Quick Start: Your First Study")
### Step 1: Start the Development Server[](#step-1-start-the-development-server "Direct link to Step 1: Start the Development Server")
After installation, navigate to the platform directory and start the server:
```
cd platform
npm run dev
```
This opens your study at `http://localhost:3000`
### Step 2: Create a User Session[](#step-2-create-a-user-session "Direct link to Step 2: Create a User Session")
V-SHINE requires session context to run. For development, use an empty session:
**URL**: `http://localhost:3000/?data=eyB9`
Session Context
The `?data=eyB9` parameter contains base64-encoded JSON (`{}` = empty object). This system allows you to pass user variables, study conditions, and other context data to your study.
### Step 3: Understand the Default Setup[](#step-3-understand-the-default-setup "Direct link to Step 3: Understand the Default Setup")
Your initial `game.json` should contain:
```
{
"environment": {
"time": {
"startTime": { "hour": 8, "minute": 0 },
"speed": 1
}
},
"rules": [],
"tasks": {
"tasks": [
{
"id": "base_task",
"description": "Explore the smart home",
"timer": 600,
"environment": [],
"defaultDeviceProperties": [],
"goals": []
}
]
},
"rooms": [
{
"name": "Living Room",
"walls": [
{
"image": "assets/images/living_room/wall1.jpg",
"default": true
},
{
"image": "assets/images/living_room/wall2.jpg"
},
{
"image": "assets/images/living_room/wall3.jpg"
},
{
"image": "assets/images/living_room/wall4.jpg"
}
]
}
]
}
```
## Development Workflow[](#development-workflow "Direct link to Development Workflow")
### Making Changes[](#making-changes "Direct link to Making Changes")
1. **Edit `game.json`** for study configuration changes
2. **Save the file** - changes are automatically detected
3. **Refresh your browser** - no server restart needed for most changes
4. **Restart server** only when changing explanation.json or adding new assets
### Testing Your Study[](#testing-your-study "Direct link to Testing Your Study")
* **Navigate between walls** using arrow keys or navigation buttons
* **Interact with devices** by clicking on them
* **Monitor the console** for any configuration errors
* **Check the network tab** if assets aren't loading
### Common Development Tasks[](#common-development-tasks "Direct link to Common Development Tasks")
#### Adding New Assets[](#adding-new-assets "Direct link to Adding New Assets")
1. Place images in `platform/public/assets/images/`
2. Reference them in game.json as `"assets/images/path/to/image.jpg"`
3. Refresh browser to see changes
#### Positioning Devices[](#positioning-devices "Direct link to Positioning Devices")
1. Set initial position in device configuration
2. Save and refresh to see placement
3. Adjust x/y coordinates iteratively
4. Use browser developer tools to fine-tune positioning
#### Testing Rules[](#testing-rules "Direct link to Testing Rules")
1. Configure rule preconditions and actions
2. Interact with devices to trigger rules
3. Check console logs for rule activation
4. Verify device states change as expected
## Study Architecture[](#study-architecture "Direct link to Study Architecture")
### Key Concepts[](#key-concepts "Direct link to Key Concepts")
#### Rooms and Walls[](#rooms-and-walls "Direct link to Rooms and Walls")
* Each room has exactly **4 walls**
* Participants navigate between walls using arrow keys
* One wall per room should be marked as `"default": true`
#### Devices and Interactions[](#devices-and-interactions "Direct link to Devices and Interactions")
* **Devices** are placed on walls and have visual representations
* **Interactions** define how participants can control devices
* **Visual States** change device appearance based on interaction values
#### Rules and Automation[](#rules-and-automation "Direct link to Rules and Automation")
* **Rules** create smart home automation behavior
* **Preconditions** define when rules should trigger
* **Actions** specify what happens when rules activate
#### Tasks and Goals[](#tasks-and-goals "Direct link to Tasks and Goals")
* **Tasks** give participants specific objectives
* **Goals** define success criteria for task completion
* **Environment variables** provide context information
## Configuration Examples[](#configuration-examples "Direct link to Configuration Examples")
### Simple Light Switch[](#simple-light-switch "Direct link to Simple Light Switch")
```
{
"name": "Living Room Light",
"id": "living_room_light",
"image": "assets/images/devices/light_switch.png",
"position": {
"x": 400,
"y": 300,
"scale": 1.0,
"origin": 0.5
},
"interactions": [
{
"InteractionType": "Boolean_Action",
"name": "Power",
"inputData": {
"valueType": ["PrimitiveType", "Boolean"],
"unitOfMeasure": null,
"type": {
"True": "On",
"False": "Off"
}
},
"currentState": {
"visible": null,
"value": false
}
}
],
"visualState": [
{
"default": true,
"image": "assets/images/devices/light_off.png"
},
{
"conditions": [
{ "name": "Power", "value": true }
],
"image": "assets/images/devices/light_on.png"
}
]
}
```
### Basic Automation Rule[](#basic-automation-rule "Direct link to Basic Automation Rule")
```
{
"name": "Auto Light at Night",
"precondition": [
{
"type": "Time",
"condition": {
"variable": "hour",
"operator": ">=",
"value": 18
}
}
],
"action": [
{
"type": "Device_Interaction",
"device": "living_room_light",
"interaction": {
"name": "Power",
"value": true
}
}
]
}
```
### Simple Task[](#simple-task "Direct link to Simple Task")
```
{
"id": "turn_on_light",
"description": "Turn on the living room light",
"timer": 60,
"environment": [
{ "name": "Time of Day", "value": "Evening" }
],
"goals": [
{
"device": "living_room_light",
"condition": {
"name": "Power",
"operator": "==",
"value": true
}
}
]
}
```
## Asset Requirements[](#asset-requirements "Direct link to Asset Requirements")
### Image Specifications[](#image-specifications "Direct link to Image Specifications")
| Asset Type | Dimensions | Format | Notes |
| ------------- | ------------- | ----------------- | --------------------------------- |
| Wall Images | 1024 × 576 px | WebP, PNG, JPG | Exact size required |
| Device Images | Variable | PNG (recommended) | Transparent backgrounds preferred |
### File Organization[](#file-organization "Direct link to File Organization")
```
assets/
└── images/
├── living_room/
│ ├── wall1.jpg
│ ├── wall2.jpg
│ ├── wall3.jpg
│ ├── wall4.jpg
│ └── devices/
│ ├── light_switch.png
│ ├── light_on.png
│ └── light_off.png
└── kitchen/
├── wall1.jpg
└── devices/
└── coffee_machine.png
```
## Session Context & User Variables[](#session-context--user-variables "Direct link to Session Context & User Variables")
### Basic Session Context[](#basic-session-context "Direct link to Basic Session Context")
The URL parameter `?data=` contains base64-encoded JSON with user context:
```
// Empty session
{}
// Encoded: eyB9
// URL: http://localhost:3000/?data=eyB9
// Session with user variables
{"user_type": "novice", "group": "control"}
// Encoded: eyJ1c2VyX3R5cGUiOiJub3ZpY2UiLCJncm91cCI6ImNvbnRyb2wifQ==
// URL: http://localhost:3000/?data=eyJ1c2VyX3R5cGUiOiJub3ZpY2UiLCJncm91cCI6ImNvbnRyb2wifQ==
```
### Using Context in Rules[](#using-context-in-rules "Direct link to Using Context in Rules")
Context variables can be combined with other preconditions for sophisticated behavior:
```
{
"name": "Novice User Safety Override",
"precondition": [
{
"type": "Context",
"condition": {
"variable": "user_type",
"operator": "==",
"value": "novice"
}
},
{
"type": "Device",
"device": "oven",
"condition": {
"name": "Temperature",
"operator": ">",
"value": 200
}
}
],
"action": [
{
"type": "Device_Interaction",
"device": "oven",
"interaction": {
"name": "Temperature",
"value": 180
}
},
{
"type": "Explanation",
"explanation": "novice_safety"
}
]
}
```
This rule automatically reduces oven temperature for novice users and provides an explanation.
## Explanation Engine Setup[](#explanation-engine-setup "Direct link to Explanation Engine Setup")
### Basic Integrated Engine[](#basic-integrated-engine "Direct link to Basic Integrated Engine")
Create `explanation.json`:
```
{
"explanation_trigger": "pull",
"explanation_engine": "integrated",
"integrated_explanation_engine": {
"light_auto": "The light turns on automatically in the evening for safety and convenience.",
"novice_safety": "For your safety, the oven temperature has been automatically reduced. High temperatures can be dangerous for new users."
}
}
```
### Adding Explanations to Rules[](#adding-explanations-to-rules "Direct link to Adding Explanations to Rules")
```
{
"name": "Auto Light at Night",
"precondition": [
{
"type": "Time",
"condition": {
"variable": "hour",
"operator": ">=",
"value": 18
}
}
],
"action": [
{
"type": "Device_Interaction",
"device": "living_room_light",
"interaction": {
"name": "Power",
"value": true
}
},
{
"type": "Explanation",
"explanation": "light_auto"
}
]
}
```
## Common Pitfalls & Solutions[](#common-pitfalls--solutions "Direct link to Common Pitfalls & Solutions")
### Images Not Loading[](#images-not-loading "Direct link to Images Not Loading")
**Problem**: Device images appear as broken links **Solution**:
* Check file path matches exactly (case-sensitive)
* Ensure images are in `platform/public/assets/` directory
* Verify image file format is supported
### Rules Not Triggering[](#rules-not-triggering "Direct link to Rules Not Triggering")
**Problem**: Smart home automation doesn't work **Solution**:
* Check precondition logic and operators
* Verify device IDs match exactly
* Check browser console for rule evaluation errors
### Session Not Loading[](#session-not-loading "Direct link to Session Not Loading")
**Problem**: Platform shows error or blank screen **Solution**:
* Ensure URL includes `?data=` parameter
* Check base64 encoding is valid JSON
* Try with empty session: `?data=eyB9`
### Changes Not Appearing[](#changes-not-appearing "Direct link to Changes Not Appearing")
**Problem**: Modifications to game.json don't show up **Solution**:
* Save the file completely
* Refresh browser (F5)
* Check browser console for JSON syntax errors
* Clear browser cache if needed
## Next Steps[](#next-steps "Direct link to Next Steps")
Now that you understand the basics, you can:
1. **Follow the [Scenario 2](https://exmartlab.github.io/SHiNE-Framework/SHiNE-Framework/scenario/scenario-2.md)** tutorial for a complete walkthrough
2. **Explore specific configuration options** in the Configuration section
3. **Learn about advanced features** like external explanation engines
4. **Design your own study** using the patterns and examples provided
## Development Tips[](#development-tips "Direct link to Development Tips")
### Iterative Development[](#iterative-development "Direct link to Iterative Development")
* Start with simple rooms and basic devices
* Add complexity gradually (interactions → rules → tasks)
* Test frequently during development
* Use browser developer tools for debugging
### Asset Creation Workflow[](#asset-creation-workflow "Direct link to Asset Creation Workflow")
1. **Design**: Plan your room layout and device placement
2. **Render**: Create room images (1024×576px) and device assets
3. **Configure**: Set up game.json with your assets
4. **Test**: Verify positioning and interactions work correctly
5. **Refine**: Adjust based on testing feedback
### Performance Considerations[](#performance-considerations "Direct link to Performance Considerations")
* Use WebP format for smaller file sizes
* Optimize images before adding to project
* Limit the number of complex visual states
* Test on different devices and browsers
Ready to build your first smart home study? Let's start with [Scenario 2](https://exmartlab.github.io/SHiNE-Framework/SHiNE-Framework/scenario/scenario-2.md) for a hands-on tutorial!
---
# Installation
This guide covers the installation requirements and setup process for the V-SHINE Study Platform.
## Requirements[](#requirements "Direct link to Requirements")
### For Local Development[](#for-local-development "Direct link to For Local Development")
* **Node.js 22** (Virtual Study Platform)
* **MongoDB** (Database)
* **MongoDB Compass** (GUI - optional but recommended)
* **Python 3** (Explanation Engine - optional)
### For Production[](#for-production "Direct link to For Production")
* **Docker** and **Docker Compose**
## Local Development Setup[](#local-development-setup "Direct link to Local Development Setup")
### Node.js 22 Installation[](#nodejs-22-installation "Direct link to Node.js 22 Installation")
To install Node.js, visit and download Node.js v22.15.1 (LTS as of May 21st, 2025).
During installation, simply click 'Next'/'Continue' in the installation wizard as no extra packages are needed. It's recommended to restart your PC after installation to ensure all changes take effect.
### MongoDB Installation[](#mongodb-installation "Direct link to MongoDB Installation")
Install MongoDB Community Server from .
For detailed installation instructions specific to your operating system, follow the official guides at .
### MongoDB Compass Installation (Optional)[](#mongodb-compass-installation-optional "Direct link to MongoDB Compass Installation (Optional)")
MongoDB Compass provides a GUI for managing your MongoDB databases. Download it from and select the appropriate version for your operating system.
### Platform Setup[](#platform-setup "Direct link to Platform Setup")
Once the prerequisites are installed, set up the platform:
1. Navigate to the platform directory:
```
cd platform
```
2. Configure MongoDB connection (optional). The default values are:
* MongoDB URI: `mongodb://localhost:27017/smart-home-study`
* Database: `smart-home-study`
To override defaults, create a `.env` file in the root directory:
```
MONGODB_URI=mongodb://localhost:27017/smart-home-study
MONGODB_DB=smart-home-study
```
3. Install dependencies:
```
npm install
```
4. Start the development server:
```
npm run dev
```
## Production Setup with Docker[](#production-setup-with-docker "Direct link to Production Setup with Docker")
### Initial Setup[](#initial-setup "Direct link to Initial Setup")
For the first time setup, run:
```
docker-compose up -d
```
### Starting/Stopping the Server[](#startingstopping-the-server "Direct link to Starting/Stopping the Server")
For subsequent runs:
```
docker-compose start
```
To stop the server:
```
docker-compose stop
```
### Rebuilding Docker Images[](#rebuilding-docker-images "Direct link to Rebuilding Docker Images")
If you need to force rebuild the Docker image:
```
docker-compose up -d --build
```
## Documentation Setup[](#documentation-setup "Direct link to Documentation Setup")
The documentation is built with Docusaurus and requires Node.js.
1. Navigate to the docs directory:
```
cd docs
```
2. Install dependencies:
```
npm install
```
3. Start the development server:
```
npm run start
```
## Configuration[](#configuration "Direct link to Configuration")
The platform's game configuration file is located at `src/game.json`. Modify this file to customize the platform's behavior and settings.
---
# Scenarios
This section contains example scenarios demonstrating how to configure and implement smart home simulation studies using the V-SHiNE platform.
## Available Scenarios[](#available-scenarios "Direct link to Available Scenarios")
| Scenario | Title | Description | Based On | Study Type |
| ------------------------------------------------------------------------------------------------------ | ------------------------------- | ----------------------------------------------------------------------------------------------------------------------------------------------------------------------------------------------- | -------------------------------------------------------------------------------------------------------------------------------- | ------------------------------------------------------------------- |
| [Scenario 1](https://exmartlab.github.io/SHiNE-Framework/SHiNE-Framework/scenario/default-scenario.md) | Default Scenario | A predefined smart home scenario featuring three rooms and three tasks, each linked to a contextual automation rule that determines whether the task is feasible. | It is a simplified and shortened version of one of our research studies (currently under anonymous review; details omitted) | User study investigating the effects of different explanation types |
| [Scenario 2](https://exmartlab.github.io/SHiNE-Framework/SHiNE-Framework/scenario/scenario-2.md) | CIRCE Smart Home Heater Control | Interactive smart home scenario where users attempt to turn off a heater but are constrained by environmental rules. Features window control, temperature monitoring, and explanation requests. | [CIRCE: a Scalable Methodology for Causal Explanations in Cyber-Physical Systems](https://doi.org/10.1109/ACSOS61780.2024.00026) | User Interaction & Explanation Study |
---
# Default Scenario
## Introduction[](#introduction "Direct link to Introduction")
The Default Scenario is the standard setup loaded when the base Docker (Compose) image is launched. It features a smart home environment with three rooms:
* Living Room
* Bob’s Room
* Participant's Room
In this scenario, the user is expected to complete three tasks, each associated with a contextual smart home rule:
| # | Task | Involved Automation / Rule |
| - | ---------------------- | --------------------------------------------------- |
| 1 | Turn on the Deep Fryer | Deep Fryer only turns on when the Cooker Hood is on |
| 2 | Turn on the Mixer | Mixer automatically turns off after 22:00 |
| 3 | Open Book in Your Room | Lamp turns on 3 seconds after the book is opened |
### **Dynamics for Each Task**[](#dynamics-for-each-task "Direct link to dynamics-for-each-task")
* **Task 1: Turn on the Deep Fryer** This task is affected by a rule that requires the cooker hood to be active. The fryer cannot be turned on unless this condition is met, creating a *resolvable conflict*. The explanation is meant to help the user recognize and address the dependency, enabling successful task completion.
* **Task 2: Turn on the Mixer** This task is governed by a time-based rule that disables the mixer after 22:00. If attempted during restricted hours, the task cannot be completed, and the conflict is *not resolvable* by user action. The explanation helps users understand the reason for failure and encourages them to stop pursuing the task.
* **Task 3: Open Book in Your Room** This task can be completed without any conflicts. However, a related automation (lamp turns on with a delay) may surprise the user. Although the behavior does not block task completion, an explanation is available to clarify the system’s response and maintain transparency.
In all cases, explanations are configured to be shown automatically (push-based) when the user fails to complete a task. For the sake of demonstration, we use a simplified explanation approach—namely, an integrated explanation—where a specific explanation is directly mapped to each task. This means that the same explanation is shown to all users whenever that task is not successfully completed.
| Task | Explanation Shown |
| ---- | -------------------------------------------------------------- |
| #1 | As long as the cooker hood is off, the deep fryer remains off. |
| #2 | The mixer cannot be turned on after 22:00. |
| #3 | The lamp is turned on because the room is dark |
## Installation[](#installation "Direct link to Installation")
The installation of the default scenario is explained in the GitHub [README](https://github.com/ExmartLab/SHiNE-Framework/blob/master/README.md#option-2-using-pre-built-image-from-github-container-registry) of the repository.
## Configuration File[](#configuration-file "Direct link to Configuration File")
### game.json[](#gamejson "Direct link to game.json")
```
{
"environment": {
"time": {
"startTime": {
"hour": 22,
"minute": 0
},
"speed": 10
}
},
"rules": [
{
"id": "deep_fryer_rule",
"name": "Deep Fryer Only On When Cooker Hood Is On",
"precondition": [
{
"type": "Device",
"device": "cooker_hood",
"condition": {
"name": "Power",
"operator": "==",
"value": false
}
},
{
"type": "Device",
"device": "deep_fryer",
"condition": {
"name": "Power",
"operator": "==",
"value": true
}
},
{
"type": "Context",
"condition": {
"name": "task",
"operator": "==",
"value": "deep_fryer"
}
}
],
"action": [
{
"type": "Device_Interaction",
"device": "deep_fryer",
"interaction": {
"name": "Power",
"value": false
}
},
{
"type": "Explanation",
"explanation": "deep_fryer_01"
}
]
},
{
"id": "mixer_rule",
"name": "Turn Off Mixer After 22:00",
"precondition": [
{
"type": "Time",
"condition": {
"operator": ">=",
"value": "22:00"
}
},
{
"type": "Device",
"device": "mixer",
"condition": {
"name": "Power",
"operator": "==",
"value": true
}
},
{
"type": "Context",
"condition": {
"name": "task",
"operator": "==",
"value": "turn_on_mixer"
}
}
],
"action": [
{
"type": "Device_Interaction",
"device": "mixer",
"interaction": {
"name": "Power",
"value": false
}
},
{
"type": "Explanation",
"explanation": "mixer_01"
}
]
},
{
"id": "book_rule",
"name": "Turn On Lamp When Book Is Open",
"precondition": [
{
"type": "Device",
"device": "book",
"condition": {
"name": "Open",
"operator": "==",
"value": true
}
}
],
"delay": 3,
"action": [
{
"type": "Device_Interaction",
"device": "lamp",
"interaction": {
"name": "Power",
"value": true
}
},
{
"type": "Explanation",
"explanation": "lamp_01"
}
]
}
],
"tasks": {
"ordered": "true",
"timer": 120,
"abortable": true,
"tasks": [
{
"id": "deep_fryer",
"description": "Turn on the deep fryer",
"timer": 120,
"abortable": false,
"abortionOptions": [
"I believe this task is impossible.",
"I want to skip this task."
],
"environment": [
{ "name": "Weather", "value": "Rainy" },
{ "name": "Temperature", "value": "13 °C" }
],
"defaultDeviceProperties": [
{
"device": "deep_fryer",
"properties": [
{ "name": "Power", "value": false }
]
},
{
"device": "mixer",
"properties": [
{ "name": "Power", "value": true }
]
}
],
"goals": [
{
"device": "deep_fryer",
"condition": {
"name": "Power",
"operator": "==",
"value": true
}
}
]
},
{
"id": "turn_on_mixer",
"description": "Turn on the mixer",
"timer": 120,
"abortable": true,
"abortionOptions": [
"I believe this task is impossible.",
"I want to skip this task.",
"I believe the mixer is broken"
],
"environment": [
{ "name": "Weather", "value": "Cloudy" },
{ "name": "Temperature", "value": "8 °C" }
],
"defaultDeviceProperties": [
{
"device": "mixer",
"properties": [
{ "name": "Power", "value": false }
]
}
],
"goals": [
{
"device": "mixer",
"condition": {
"name": "Power",
"operator": "==",
"value": true
}
}
]
},
{
"id": "book",
"description": "Open the book",
"abortable": true,
"timer": 120,
"abortionOptions": [
"I believe this task is impossible.",
"I want to skip this task."
],
"environment": [
{ "name": "Weather", "value": "Very Cloudy" },
{ "name": "Temperature", "value": "-3 °C" }
],
"defaultDeviceProperties": [
{
"device": "book",
"properties": [
{ "name": "Open", "value": false }
]
},
{
"device": "lamp",
"properties": [
{ "name": "Power", "value": false }
]
}
],
"goals": [
{
"device": "book",
"condition": {
"name": "Open",
"operator": "==",
"value": true
}
}
]
}
]
},
"rooms": [
{
"name": "Shared Room",
"walls": [
{
"image": "assets/images/shared_room/wall1.webp",
"default": true,
"devices": [
{
"name": "Deep Fryer",
"id": "deep_fryer",
"position": {
"x": 657,
"y": 285,
"scale": 1,
"origin": 1
},
"interactions":
[
{
"InteractionType": "Boolean_Action",
"name": "Power",
"inputData": {
"valueType": ["PrimitiveType", "Boolean"],
"unitOfMeasure": null,
"type": {
"True": "On",
"False": "Off"
}
},
"currentState": {
"visible": true,
"value": false
}
},
{
"InteractionType": "Numerical_Action",
"name": "Temperature",
"inputData": {
"valueType": ["PrimitiveType", "Integer"],
"unitOfMeasure": "°C",
"type": {
"Range": [0, 200],
"Interval": [50]
}
},
"currentState": {
"visible": [
{ "name": "Power", "value": true }
],
"value": 0
}
}
],
"visualState": [
{ "default": true, "image": "assets/images/shared_room/devices/wall1_deepfryer.webp" },
{
"default": false,
"conditions": [
{ "name": "Power", "value": true },
{ "name": "Temperature", "operator": "<=", "value": 50 }
],
"image": "assets/images/shared_room/devices/wall1_deepfryer_low_temp.webp"
},
{
"default": false,
"conditions": [
{ "name": "Power", "value": true },
{ "name": "Temperature", "operator": ">", "value": 50 },
{ "name": "Temperature", "operator": "<=", "value": 100 }
],
"image": "assets/images/shared_room/devices/wall1_deepfryer_med_temp.webp"
},
{
"default": false,
"conditions": [
{ "name": "Power", "value": true },
{ "name": "Temperature", "operator": ">", "value": 100 },
{ "name": "Temperature", "operator": "<=", "value": 200 }
],
"image": "assets/images/shared_room/devices/wall1_deepfryer_high_temp.webp"
}
]
},
{
"name": "Mixer",
"id": "mixer",
"position": {
"x": 367,
"y": 280,
"scale": 0.25,
"origin": 1
},
"interactions":
[
{
"InteractionType": "Boolean_Action",
"name": "Power",
"inputData": {
"valueType": ["PrimitiveType", "Boolean"],
"unitOfMeasure": null,
"type": {
"True": "On",
"False": "Off"
}
},
"currentState": {
"visible": true,
"value": false
}
},
{
"InteractionType": "Generic_Action",
"name": "Mix Speed",
"inputData": {
"valueType": ["PrimitiveType", "String"],
"unitOfMeasure": null,
"type": {
"String": {
"Options": [
"Low",
"Medium",
"High"
]
}
}
},
"currentState": {
"visible": [
{ "name": "Power", "value": true }
],
"value": "Medium"
}
},
{
"InteractionType": "Dynamic_Property",
"name": "Motor Temperature",
"outputData": {
"valueType": ["PrimitiveType", "String"],
"unitOfMeasure": "°C"
},
"currentState": {
"visible": true,
"value": "25"
}
},
{
"InteractionType": "Stateless_Action",
"name": "Pulse",
"inputData": {
"valueType": [
"null",
"null"
],
"unitOfMeasure": "null"
},
"currentState": {
"visible": [
{ "name": "Power", "value": true }
]
}
}
],
"visualState": [
{ "default": true, "image": "assets/images/shared_room/devices/wall1_mixer.png" }
]
},
{
"name": "Cooker Hood",
"id": "cooker_hood",
"position": {
"x": 659,
"y": 222,
"scale": 1,
"origin": 1
},
"interactions": [
{
"InteractionType": "Boolean_Action",
"name": "Power",
"inputData": {
"valueType": ["PrimitiveType", "Boolean"],
"unitOfMeasure": null,
"type": {
"True": "On",
"False": "Off"
}
},
"currentState": {
"visible": true,
"value": false
}
}
],
"visualState": [
{ "default": true, "image": "assets/images/shared_room/devices/wall1_cookerhood.webp" }
]
}
]
},
{
"image": "assets/images/shared_room/wall2.webp",
"default": false
},
{
"image": "assets/images/shared_room/wall3.webp",
"doors": [
{
"image": "assets/images/shared_room/doors/wall3_door.webp",
"position": {
"x": 595,
"y": 95,
"scale": 0.5
},
"destination": {
"room": "bob_room",
"wall": "wall1"
}
}
]
},
{
"image": "assets/images/shared_room/wall4.webp",
"doors": [
{
"image": "assets/images/shared_room/doors/wall4_door.webp",
"position": {
"x": 425,
"y": 100,
"scale": 0.5
},
"destination": {
"room": "alice_room",
"wall": "wall1"
}
}
]
}
]
},
{
"name": "Bob Room",
"walls": [
{
"image": "assets/images/bob_room/wall1.webp",
"default": false,
"doors": [
{
"image": "assets/images/bob_room/doors/wall1_door.webp",
"position": {
"x": 0,
"y": 24,
"scale": 0.5
},
"destination": {
"room": "shared_room",
"wall": "wall1"
}
}
]
},
{
"image": "assets/images/bob_room/wall2.webp",
"default": false
},
{
"image": "assets/images/bob_room/wall3.webp",
"default": false
},
{
"image": "assets/images/bob_room/wall4.webp",
"default": false,
"doors": [
{
"image": "assets/images/bob_room/doors/wall4_door.webp",
"position": {
"x": 521,
"y": 85,
"scale": 0.5
},
"destination": {
"room": "shared_room",
"wall": "wall1"
}
}
]
}
]
},
{
"name": "Alice Room",
"walls": [
{
"image": "assets/images/alice_room/wall1.webp",
"default": false,
"devices": [
{
"name": "Lamp",
"id": "lamp",
"position": {
"x": 525,
"y": 320,
"scale": 1,
"origin": 1
},
"interactions": [
{
"InteractionType": "Boolean_Action",
"name": "Power",
"inputData": {
"valueType": ["PrimitiveType", "Boolean"],
"unitOfMeasure": null,
"type": {
"True": "On",
"False": "Off"
}
},
"currentState": {
"visible": true,
"value": false
}
}
],
"visualState": [
{ "default": true, "image": "assets/images/alice_room/devices/wall1_lamp.webp" },
{
"default": false,
"conditions": [
{ "name": "Power", "value": true }
],
"image": "assets/images/alice_room/devices/wall1_lampon.webp"
}
]
},
{
"name": "Book",
"id": "book",
"position": {
"x": 590,
"y": 325,
"scale": 1,
"origin": 1
},
"interactions": [
{
"InteractionType": "Boolean_Action",
"name": "Open",
"inputData": {
"valueType": ["PrimitiveType", "Boolean"],
"unitOfMeasure": null,
"type": {
"True": "Yes",
"False": "No"
}
},
"currentState": {
"visible": true,
"value": false
}
}
],
"visualState": [
{ "default": true, "image": "assets/images/alice_room/devices/wall1_book.webp" },
{
"default": false,
"conditions": [
{ "name": "Open", "value": true }
],
"image": "assets/images/alice_room/devices/wall1_bookopen.webp",
"position": {
"scale": 0.2
}
}
]
}
],
"doors": [
{
"image": "assets/images/alice_room/doors/wall1_door.webp",
"position": {
"x": 0,
"y": 45,
"scale": 0.5
},
"destination": {
"room": "shared_room",
"wall": "wall1"
}
}
]
},
{
"image": "assets/images/alice_room/wall2.webp",
"default": false
},
{
"image": "assets/images/alice_room/wall3.webp",
"default": false
},
{
"image": "assets/images/alice_room/wall4.webp",
"default": false,
"doors": [
{
"image": "assets/images/alice_room/doors/wall4_door.webp",
"position": {
"x": 530,
"y": 93,
"scale": 0.5
},
"destination": {
"room": "shared_room",
"wall": "wall1"
}
}
]
}
]
}
]
}
```
### explanation.json[](#explanationjson "Direct link to explanation.json")
```
{
"explanation_trigger": "push",
"explanation_engine": "integrated",
"integrated_explanation_engine": {
"mixer_01": "The mixer cannot be turned on after 22:00",
"deep_fryer_01": "As long as the cooker hood is off, the deep fryer remains off.",
"lamp_01": "The lamp is turned on because the room is dark."
},
"explanation_rating": "like"
}
```
## Previews[](#previews "Direct link to Previews")
**Deep Fryer Task**
**Mixer Task**
**Book Task**

---
# CIRCE Scenario
## Introduction[](#introduction "Direct link to Introduction")
To demonstrate the practical application and utility of our framework, we present an illustrative case study that also serves as a step-by-step guide for its implementation.
To ensure neutrality and demonstrate the generalizability of our system, we deliberately chose a scenario from a published research study unrelated to our own group or work. We conducted a keyword search on Google Scholar to identify various research efforts focused on explanation systems in smart home environments. We reviewed their implementations and evaluations to assess whether our framework could help the authors more effectively evaluate and understand their systems’ behavior, specifically by allowing them to simulate their system in a way that real end-users can interact with it.
From the pool of relevant studies, we selected the following scenario as an example. It is used in this documentation both to demonstrate the feasibility of our framework and to provide a practical, walk-through example of how to configure and run a scenario using our system.
We selected the study:
> **“CIRCE: a Scalable Methodology for Causal Explanations in Cyber-Physical Systems”**, published at the *IEEE International Conference on Autonomic Computing and Self-Organizing Systems (ACSOS), 2024.* [DOI: 10.1109/ACSOS61780.2024.00026](https://doi.org/10.1109/ACSOS61780.2024.00026)
> **Abstract Summary**: CIRCE proposes a scalable method to generate contextual, interpretable, and reactive causal explanations in cyber-physical systems such as smart homes. It determines the cause of a user-questioned fact at runtime using a local abduction technique and LIME-based approximation. CIRCE was validated via **simulated smart home scenarios**, but **no user study** was performed to evaluate the effectiveness or usability of the generated explanations.
The original study evaluated its methodology by simulating a smart home to generate causal explanations, focusing on system-centric metrics like performance and the accuracy of the explanation versus an expected outcome. However, this evaluation did not involve end-users to assess the human-centric aspects of the explanations, such as their effectiveness, clarity, or how well they were understood.
This presents an ideal use case for our framework, demonstrating its capability to bridge the gap between technical validation and essential user-centered evaluation.
## Adapting CIRCE’s Example Scenarios in V-SHiNE[](#adapting-circes-example-scenarios-in-v-shine "Direct link to Adapting CIRCE’s Example Scenarios in V-SHiNE")
In the CIRCE paper, four distinct explanatory situations are described. Each involves a user asking for the cause of a system behavior (e.g., why a device is on, why a temperature is low, etc.), and CIRCE provides causally sound answers.
**Situation 1 — Recreated in V-SHiNE**
* **User Task**: *Turn off the Heater*
* **System Behavior**: The heater cannot be turned off due to environmental constraints.
* **Triggering Explanations**: The user initiates on-demand questions to understand the situation.
**Interaction Flow:**
1. The user tries to **turn off the heater** but **cannot**.
2. The user clicks the explanation button and asks:
→ *“Why can’t I turn off the heater?”*
3. The system returns:
→ "The indoor temperature is lower than 15°C"
4. The user then asks:
→ *“Why is the temperature below 15°C?”*
5. The system returns: → "The window is open and the outside temperature is lower than 15°C"
6. The user may choose to abort the task.
## Step 1- Room Creation and 3D Rendering[](#step-1--room-creation-and-3d-rendering "Direct link to Step 1- Room Creation and 3D Rendering")
### 1.1- Build the Room[](#11--build-the-room "Direct link to 1.1- Build the Room")
To visually simulate the smart environment, we create a 3D model of the room using [Coohom](https://www.coohom.com/), an free interior design tool that supports realistic rendering. Alternative tools such as Planner 5D or Sweet Home 3D may also be used, but the following walkthrough is based on Coohom.
In floor mode, we first create the room using rectangular walls. Additionally, we create an opening for the window 
Next, we go to the 3D view and click on the sidebar on 'Models'. There, we search for window and place it in the opening. For later rendering, it's recommended to hide the window for now. For the heater, we search for heater and place it on another wall than the window wall. Similarly, we search for a tablet that acts as thermostat and place on the same wall. The heater and tablet should also be hidden for the rendering.
Additionally, other models can be placed on the same or other walls. Lastly, ceiling lamps can be placed so the brightness in the room remains high on the rendered images later.
Once we're finished, we perform the rendering. For that, we go to 'Render' mode and generate a picture of each wall - note that the window, heater and tablet should be hidden during this phase. As a result, we get four pictures, one of each wall without the window, heater and tablet.
Now, switch back to 3D edit mode and unhide the window, heater and tablet using the eye on the bottom and ticking the options.
### 1.2- Generate Rendered Images[](#12--generate-rendered-images "Direct link to 1.2- Generate Rendered Images")
Now, go back and make close-up pictures of the window, thermostat and heater so that we get three close-up images.
For now, the rendering is completed and we download the rendered images for further editing.
info
The wall images should have a size of 1024x576 pixel. When rendering with Coohom, you can choose the size.
For other tools, please consider resizing the images.
### 1.3-Post-process renderings[](#13-post-process-renderings "Direct link to 1.3-Post-process renderings")
For each close-up image, we remove the background by using [remove.bg](https://remove.bg) or the library [rembg](https://github.com/danielgatis/rembg). On the close-up device with removed background, we additionally crop the image to its content using GIMP, so that any excess transparent background is removed making the image smaller.
In addition, to the thermostat we modify the image so that the digital numbers '13' and '21' are shown.
## Step 2- Set up the V-SHiNE Study Platform[](#step-2--set-up-the-v-shine-study-platform "Direct link to Step 2- Set up the V-SHiNE Study Platform")
Since we have finished creating the images, we can proceed to set up the study platform. For that, we need to install some softwares prior - please follow the [installation](https://exmartlab.github.io/SHiNE-Framework/SHiNE-Framework/installation.md).
Once we're done installing the software, we can download the repository and go to the folder 'platform'. There, we run the command `npm install` which installs the dependencies of the study platform.
After, we create in 'platform' the environment file `.env` with the following code:
```
MONGODB_URI=mongodb://localhost:27017/vshine_scenario1
MONGODB_DB=vshine_scenario1
```
This creates during runtime the database `vshine_scenario1` at the local MongoDB database.
Finally, we can start the development server with `npm run dev`. This opens a local server at `localhost:3000`.
Currently, we cannot proceed to the platform as it requires a base64-encoded JSON. This can be easily done by passing an base64-encoded empty JSON (`{ }`) via the GET parameter `data`. To create a such base64-decoded JSON, online tools such as can be used.
Thus, the final URL is `http://localhost:3000/?data=eyB9`.
There, we can proceed to view the prototype.
## Step 3- Configuring the Game Schema[](#step-3--configuring-the-game-schema "Direct link to Step 3- Configuring the Game Schema")
We begin by configuring the main simulation setup in 'platform/src/game.json' (See [Game Config Schema](https://exmartlab.github.io/SHiNE-Framework/SHiNE-Framework/game-config/game_schema.md)).
### 3.1- Environment and Walls configuration[](#31--environment-and-walls-configuration "Direct link to 3.1- Environment and Walls configuration")
We first define the simulation time using the environment object:
```
{
"environment": {
"time": {
"startTime": {
"hour": 8,
"minute": 0
},
"speed": 10
}
}
}
```
This defines that the in-game time starts at **08:00**, and each second of real time corresponds to **10 seconds** of in-game time. See [Environment](https://exmartlab.github.io/SHiNE-Framework/SHiNE-Framework/game-config/game_schema/environment.md) for more info.
**Rooms configuration**
Next, we define the **room and its walls**. In this example, we use one room with four walls:
```
{
"rooms": [
{
"name": "Base Room",
"walls": [
{},
{},
{},
{}
]
}
]
}
```
For this, we define the `rooms` object with each object corresponding to a room. Within each object, we define the room name using `name` and an array of `walls` with each object corresponding to a wall.
We then provide wall images and designate the first wall as the default visible wall:
```
{
"rooms": [
{
"name": "Base Room",
"walls": [
{
"image": "assets/images/room/wall1/wall1.webp",
"default": true
},
{
"image": "assets/images/room/wall2/wall2.webp",
"default": false
},
{
"image": "assets/images/room/wall3/wall3.webp"
},
{
"image": "assets/images/room/wall4/wall4.webp"
}
]
}
]
}
```
Wall images must be stored in: 'platform/public/assets/images/room/'.
See [Walls](https://exmartlab.github.io/SHiNE-Framework/SHiNE-Framework/game-config/game_schema/walls.md) for more info.
### 3.2- Run the development Server with empty objects and place holders[](#32--run-the-development-server-with-empty-objects-and-place-holders "Direct link to 3.2- Run the development Server with empty objects and place holders")
#### Base Task and Rules[](#base-task-and-rules "Direct link to Base Task and Rules")
Further, we define a base task object and empty rules, as follow. It allows us to explore the environment during development:
```
{
"tasks": {
"tasks": [
{
"id": "base_task",
"description": "Base task",
"timer": 600,
"abortable": false,
"environment": [
],
"defaultDeviceProperties": [
],
"goals": [
]
}
]
}
}
```
In `tasks.tasks` object we define the base task with id `base_task`, description `Base task`, timer set to `600` seconds, `abortable` to `false` and empty `environment`, `defaultDeviceProperties` and `goals`.
Finally, we set an empty rules object as follow
```
{
"rules": [
]
}
```
#### Putting It All Together[](#putting-it-all-together "Direct link to Putting It All Together")
Here’s the full base game.json configuration, so far:
```
{
"environment": {
"time": {
"startTime": {
"hour": 22,
"minute": 0
},
"speed": 10
}
},
"rules": [
],
"tasks": {
"tasks": [
{
"id": "base_task",
"description": "Base task",
"timer": 600,
"abortable": false,
"environment": [
],
"defaultDeviceProperties": [
],
"goals": [
]
}
]
},
"rooms": [
{
"name": "Base Room",
"walls": [
{
"image": "assets/images/room/wall1/wall1.webp",
"default": true
},
{
"image": "assets/images/room/wall2/wall2.webp",
"default": false
},
{
"image": "assets/images/room/wall3/wall3.webp"
},
{
"image": "assets/images/room/wall4/wall4.webp"
}
]
}
]
}
```
#### Run the development Server[](#run-the-development-server "Direct link to Run the development Server")
Once saved, restart the development server `npm run dev` and visit
You will see the default wall and can switch views using the controls above. The room is named “Base Room” as defined.
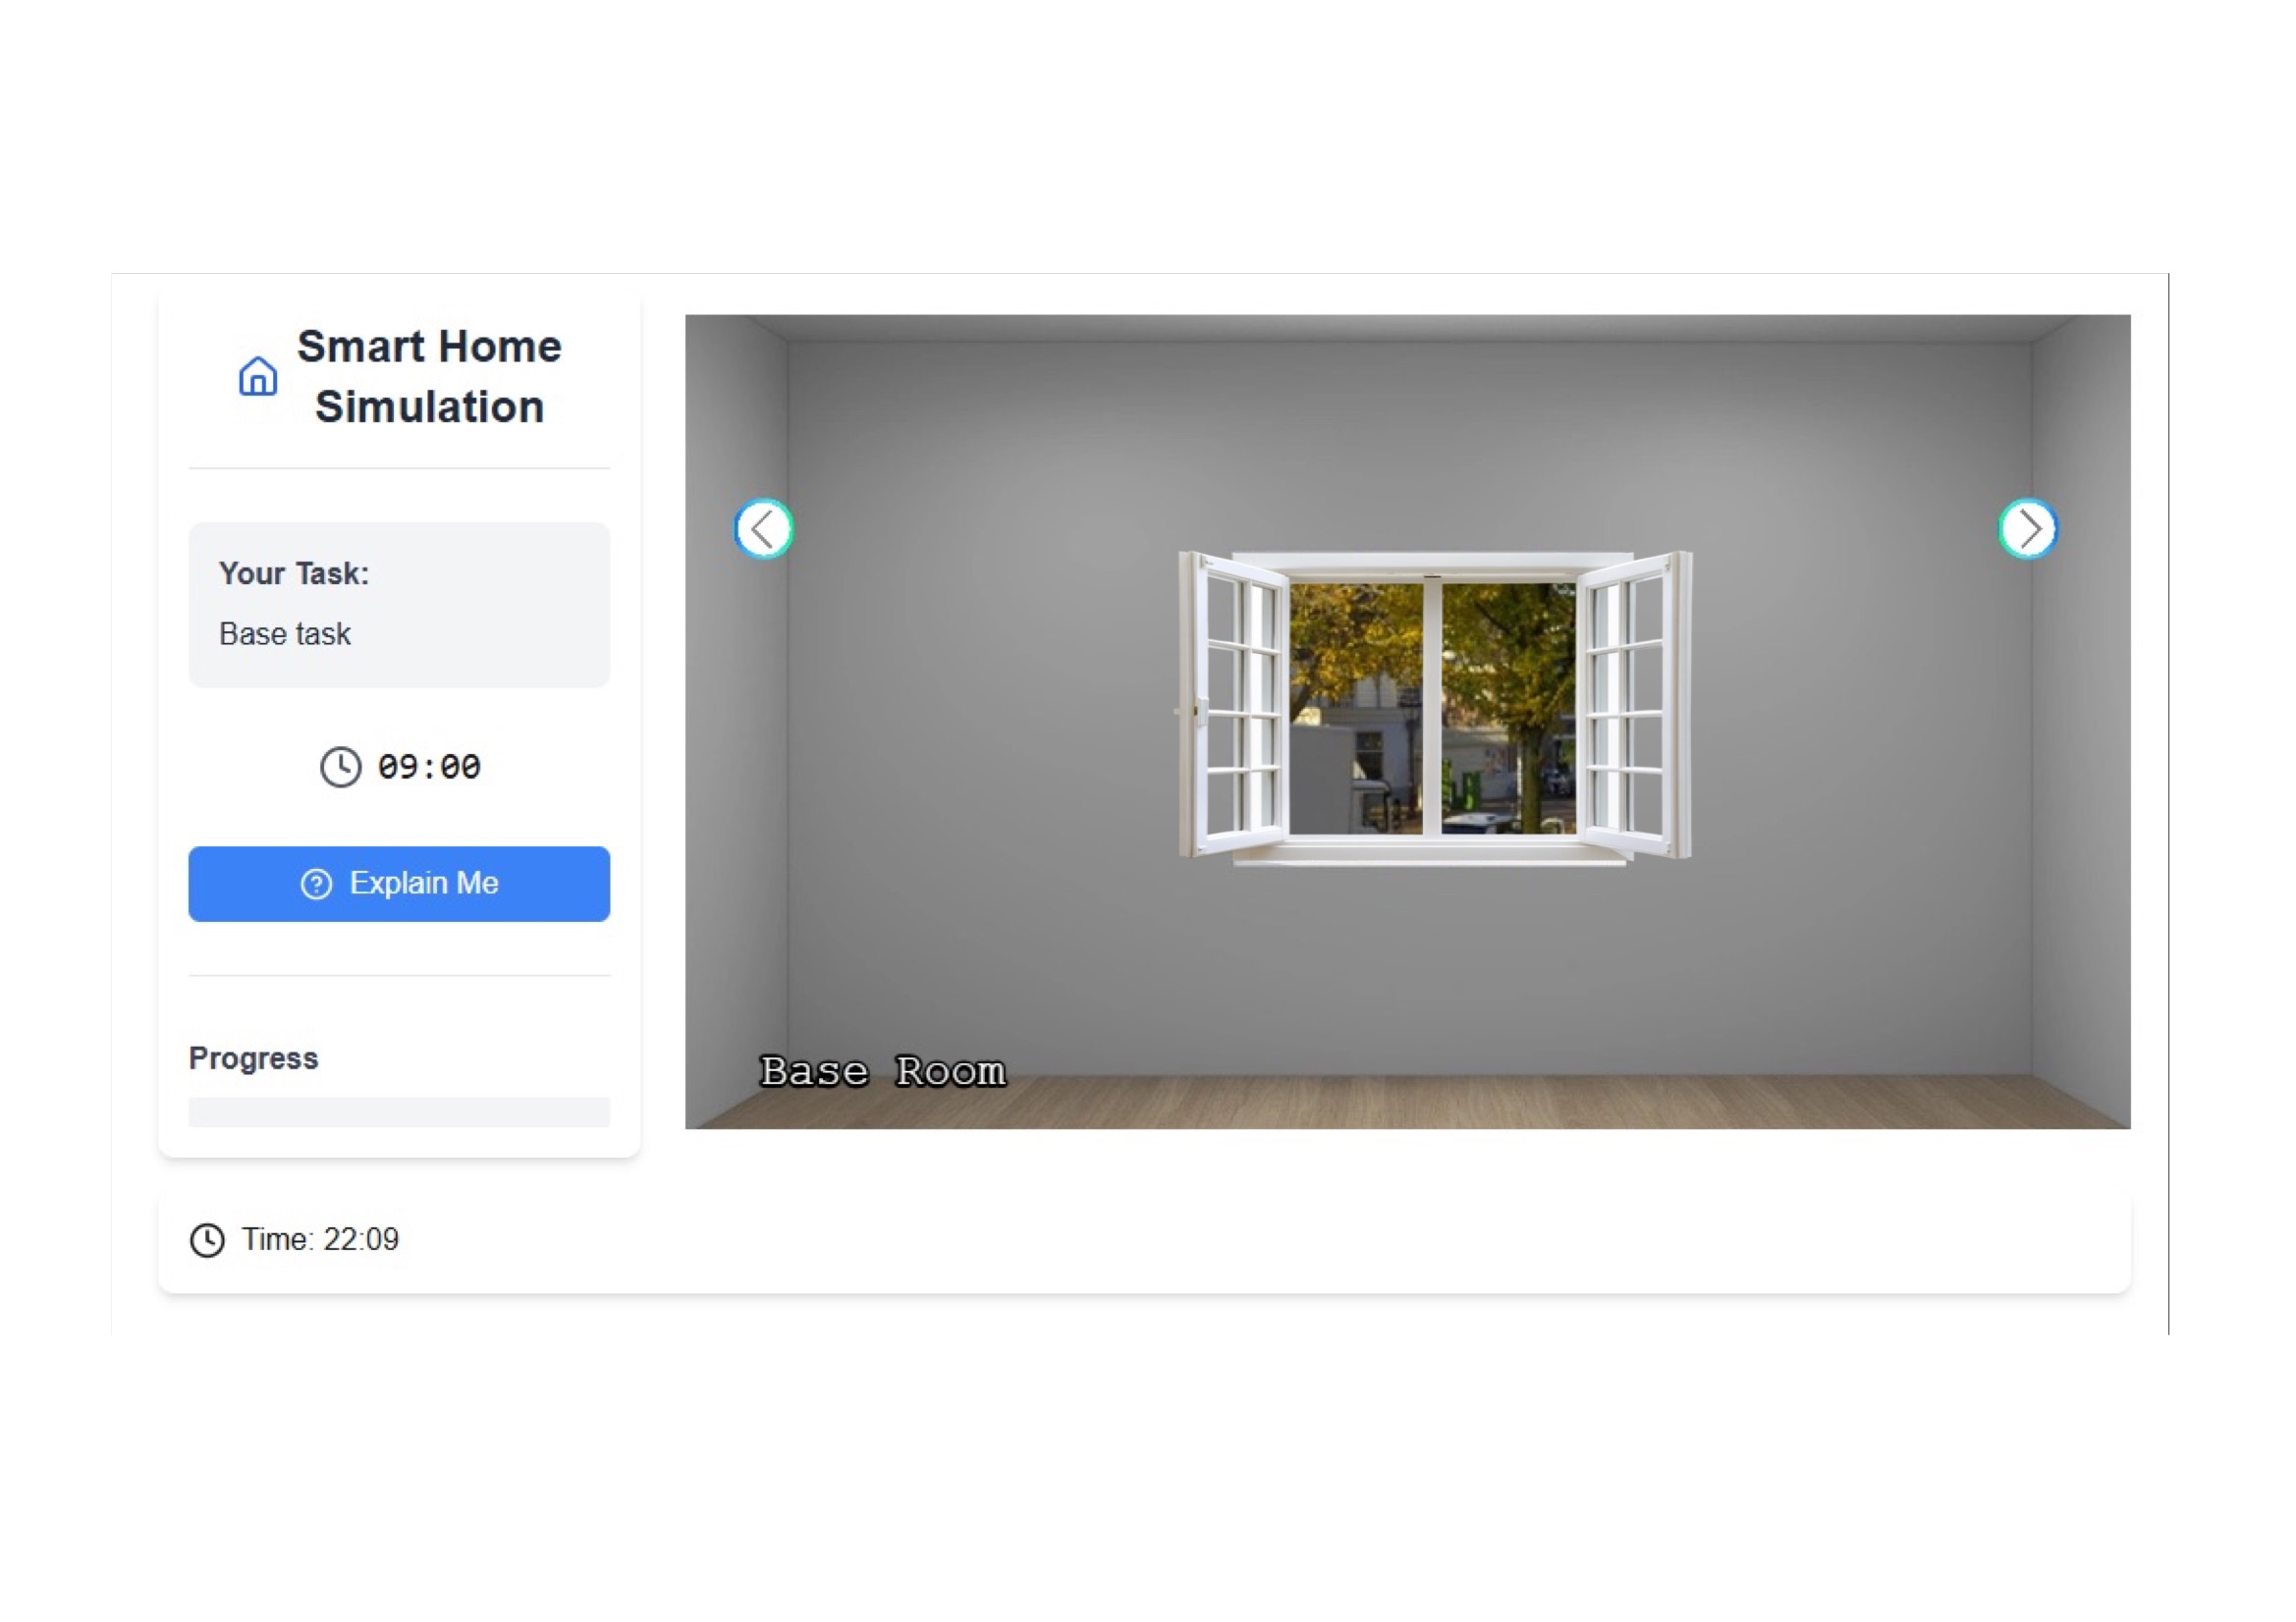
### 3.3- Devices Configuration[](#33--devices-configuration "Direct link to 3.3- Devices Configuration")
Each device is defined inside the corresponding wall object:
```
{
"image": "assets/images/room/wall1/wall1.webp",
"default": true,
"devices": [
]
}
```
You can find full description of Device schema at [Device](https://exmartlab.github.io/SHiNE-Framework/SHiNE-Framework/game-config/game_schema/devices.md).
Let’s add the following devices:
#### 🪟 Window[](#-window "Direct link to 🪟 Window")
We create the first device - window - as follow:
```
{
"name": "Window",
"id": "window",
"position": {
"x": 500,
"y": 313,
"scale": 1.5,
"origin": 1
},
"interactions": [],
"visualState": [
{
"default": true,
"image": "assets/images/room/wall1/devices/window_closed.png"
}
]
}
```
with `name` being 'Window', `id` being `window` or any other id following lowercase and underscores, the position as JSON object itself with `x` the x-position, `y` the y-position, `scale`, the scale parameter (controls if image should be larger/smaller) which defaults to 1 and the origin which follows Phaser and should be set to `1`. For the position, it's recommended to set an initial position and adjust with multiple iterations to the correct place by saving the configuration file and refreshing the page - restarting the development serer is not needed.
##### Creating the Interactions and Visual States (See [Interacting With devices](https://exmartlab.github.io/SHiNE-Framework/SHiNE-Framework/game-config/game_schema/interaction_types.md))[](#creating-the-interactions-and-visual-states-see-interacting-with-devices "Direct link to creating-the-interactions-and-visual-states-see-interacting-with-devices")
Then, we define an empty array of interactions, and an array of visual states with the default visual state - defined via `default` to `true`
```
{
"default": true,
"image": "assets/images/room/wall1/devices/window_closed.png"
}
```
The visual states are responsible for showing different image states depending on interactions' values later.
Now, the window appears within the game. 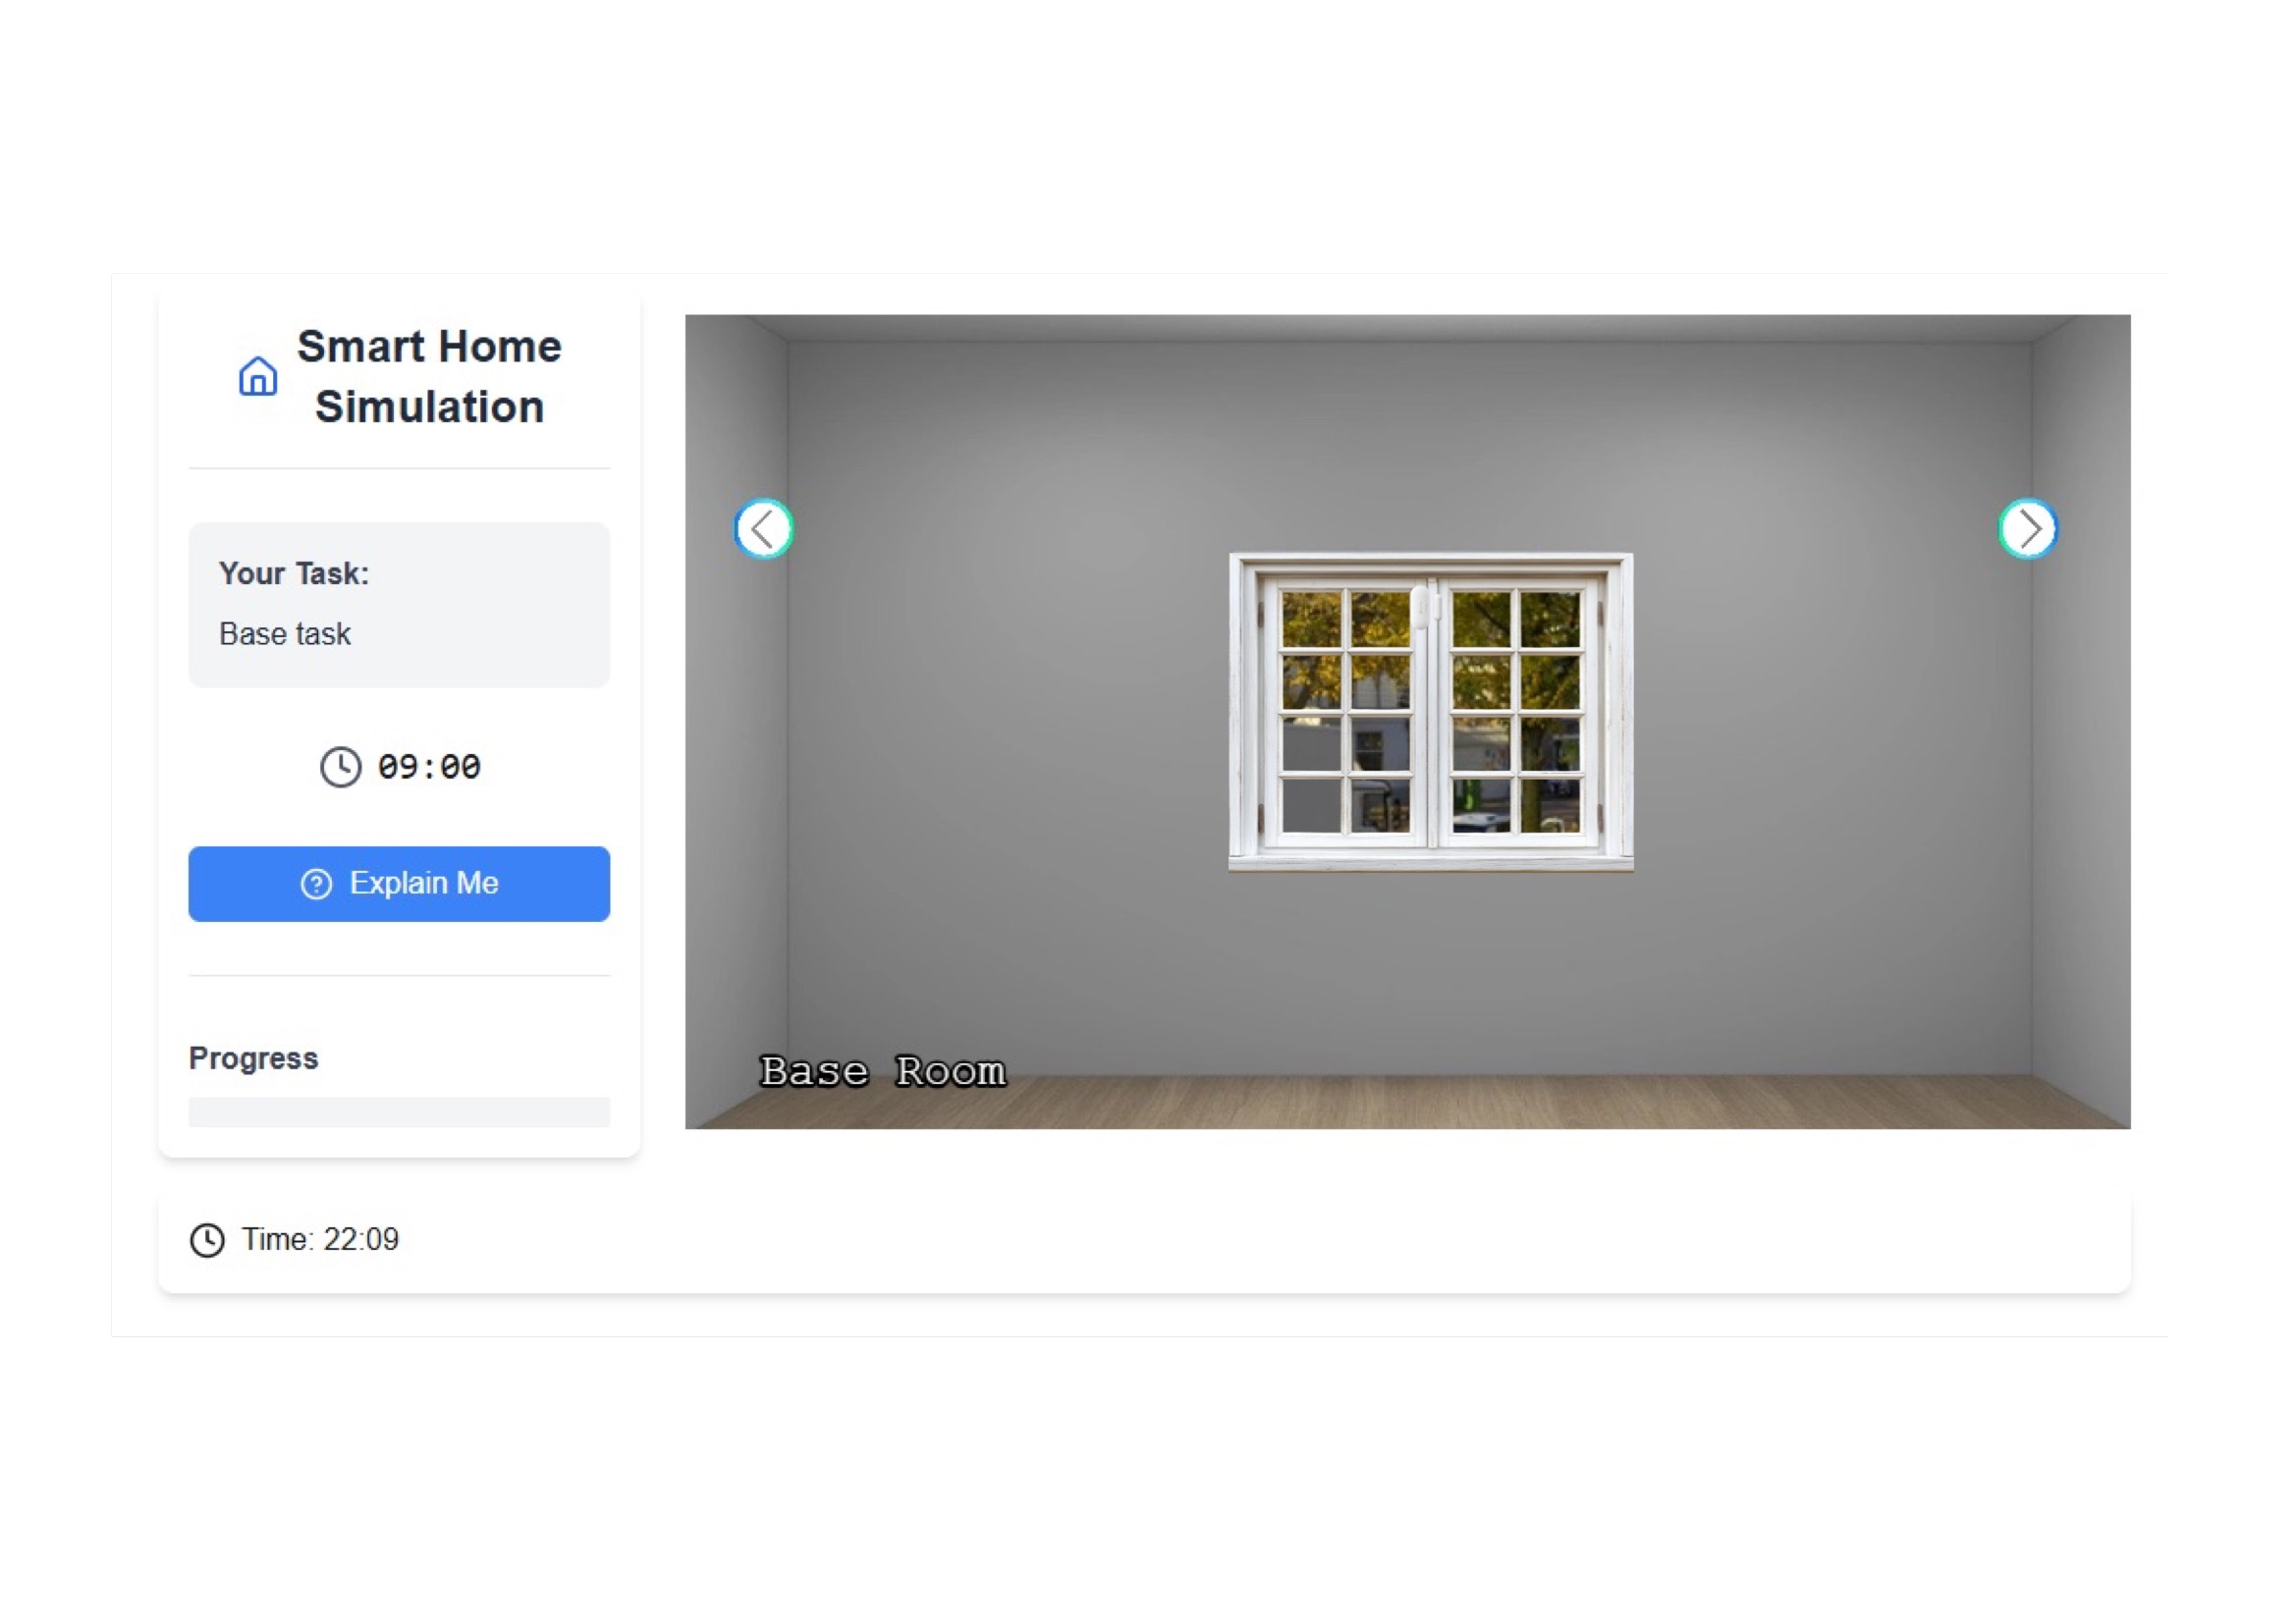
Next, we define the interactions to open/close the window. For that we define an interaction of type `Boolean_Action`
```
{
"interactions": [
{
"InteractionType": "Boolean_Action",
"name": "Open",
"inputData": {
"valueType": ["PrimitiveType", "Boolean"],
"unitOfMeasure": null,
"type": {
"True": "Yes",
"False": "No"
}
},
"currentState": {
"visible": null,
"value": true
}
}
]
}
```
There, we create an object with variables `InteractionType` to `Boolean_Action`, `name` to `Open`, `inputData` with `valueType` always set to `["PrimitiveType", "Boolean"]`, `unitOfMeasure` to `null` and the boolean types to which the actual values correspond. Here, `True` defaults to `"Yes"` and `False` to `"No"`. Lastly, we set the `currentState` with `visible` to `null` (the interaction is never hidden - does not depend on any condition) and `value` to `true` (Open is `Yes` per mapping).
This boolean interaction realizes a switch (True/False) in the panel later.
Since we created the interaction for open and closed window, we create another image for the open window which is a transparent image with the same size as closed window. We name the transparent image `window_open.png`. We can add `window_open.png` to the visual state as folllow:
```
{
"visualState": [
{
"default": true,
"image": "assets/images/room/wall1/devices/window_closed.png"
},
{
"image": "assets/images/room/wall1/devices/window_open.png",
"conditions": [
{
"name": "Open",
"value": true
}
]
}
]
}
```
We keep the first image which is the default image when window is closed. This visual state applies if no other visual states apply. Next, we create another object for opened window with the `conditions` array of the object that the interaction `Open` value is true. If this case applies that the `Open` value is true, then this visual states will be shown.
Another way of realising this is by creating two visual states with two opposed conditions - one with `Open` to `false`, the other one with `Open` to `true`.
Note that the visual states are evaluated and shown in the order they're listed in the array from top to bottom.
Hence, we are done and the window can be closed/opened within the game using the switch. Note, to reload the development server via `npm run dev` and create a new session to see the changes apply.
#### 🔥 Heater (with Boolean Interaction)[](#-heater-with-boolean-interaction "Direct link to 🔥 Heater (with Boolean Interaction)")
Next, we create the heater device with an boolean interaction `Power` in the same way as the window
```
{
"name": "Heater",
"id": "heater",
"position": {
"x": 510,
"y": 393,
"scale": 0.5,
"origin": 1
},
"interactions": [
{
"InteractionType": "Boolean_Action",
"name": "Power",
"inputData": {
"valueType": [
"PrimitiveType",
"Boolean"
],
"unitOfMeasure": null,
"type": {
"True": "On",
"False": "Off"
}
},
"currentState": {
"visible": null,
"value": true
}
}
],
"visualState": [
{
"default": true,
"image": "assets/images/room/wall2/devices/heater.png"
}
]
}
```
#### 🌡️ Thermostat (with §Numerical Interaction)[](#️-thermostat-with----numerical-interaction "Direct link to 🌡️ Thermostat (with §Numerical Interaction)")
Lastly, we create the thermostat with the numerical interaction `Temperature`
```
{
"name": "Thermostat",
"id": "thermostat",
"position": {
"x": 280,
"y": 270,
"scale": 0.35,
"origin": 1
},
"interactions": [
{
"InteractionType": "Numerical_Action",
"name": "Temperature",
"inputData": {
"valueType": [
"PrimitiveType",
"Integer"
],
"unitOfMeasure": "°C",
"type": {
"Range": [
13,
21
],
"Interval": [
8
]
}
},
"currentState": {
"visible": false,
"value": 13
}
}
],
"visualState": [
{
"default": true,
"image": "assets/images/room/wall2/devices/thermostat-13.png"
},
{
"image": "assets/images/room/wall2/devices/thermostat-21.png",
"conditions": [
{
"name": "Temperature",
"value": 21
}
]
}
]
}
```
Unlike boolean interactions, numerical interactions define the range (here from 13 to 21) and the interval (here 8, difference between 13 and 21). Also, the `default` value is set to 13 and `visible` to false (the numerical slider is not shown). Note that `visible` can be `null`, `false` or accept an array of conditions when it's shown that depend on other interaction values. Here, `unitOfMeasure` can be set to `°C`, which is appended to the value.
Besides, we add the visual state for 13 and 21. where the latter one depends on the condition whether the temperatue equals 21.
That's the final result after reloading the development server and starting a new session. 
### 3.4- Rules Configuration[](#34--rules-configuration "Direct link to 3.4- Rules Configuration")
For the scenario, we have two rules
* **Rule 1**: Keep Heater On if Window is Open and Temp < 20°C
* **Rule 2**: Raise Temperature to 21°C When Window is Closed
To implement these rules, we define two JSON objects within the rules array as follow:
**Rule 1**
```
{
"id": "heater_temperature",
"name": "Heater on when the thermostat is below 20",
"precondition": [
{
"type": "Device",
"device": "window",
"condition": {
"name": "Open",
"operator": "==",
"value": true
}
},
{
"type": "Device",
"device": "thermostat",
"condition": {
"name": "Temperature",
"operator": "<=",
"value": 20
}
}
],
"action": [
{
"type": "Device_Interaction",
"device": "heater",
"interaction": {
"name": "Power",
"value": true
}
}
]
}
```
Here, we define the ID, description, and preconditions which can be based on Device variables (through device id and interaction id), time or context (environment variables, task or user variables of base64 encoded JSON). If all preconditions apply (using `AND`), then the action(s) will be triggered. An action can be a device interaction or can issue an explanation (if using integrated explanation engine - see later). See [Rules](https://exmartlab.github.io/SHiNE-Framework/SHiNE-Framework/game-config/game_schema/rules.md)for more detailed description.
**Rule 2**
```
{
"id": "window_thermostat",
"name": "Heater on when the window is open",
"precondition": [
{
"type": "Device",
"device": "window",
"condition": {
"name": "Open",
"operator": "==",
"value": false
}
}
],
"action": [
{
"type": "Device_Interaction",
"device": "thermostat",
"interaction": {
"name": "Temperature",
"value": 21
}
}
]
}
```
In this rule, we define that the temperature of the thermostat increases to 21 if the window gets closed (Open = false).
## Step 4- Configuring the Explanation Engine Schema[](#step-4--configuring-the-explanation-engine-schema "Direct link to Step 4- Configuring the Explanation Engine Schema")
To simulate the explanations described in the CIRCE study, we configure an explanation engine within our platform. The engine is configured via the 'explanation.json' file, located in the same directory as 'game.json'. For a full description of the explanation configuration schema, see [Explanation Schema Documentation](https://exmartlab.github.io/SHiNE-Framework/SHiNE-Framework/game-config/explanation_engine.md).
For the **CIRCE scenario**, it is important to note that our implementation is intended as a demonstration and showcase rather than a full reproduction of the original CIRCE explanation engine.
Accordingly, we implemented a lightweight external explanation engine, powered by an LLM, that mimics the core behavior of CIRCE by returning predefined causal explanations. The responses are based on the **expected explanations reported in the original paper** during their evaluation.
This approach allows us to simulate realistic user-system interactions without re-implementing CIRCE’s internal mechanics. Instead, we focus on showcasing how such explanations could be integrated into an interactive, explainable smart home simulation environment.
> 💡 **In a real use case**, for instance if the authors of the CIRCE paper (or any other researchers) wish to adapt our framework, they would simply need to configure the framework to communicate with their own REST or WebSocket API that generates explanations using their implementation. No changes to the simulation platform would be required beyond the explanation.json configuration.
Therefore, our explanation.json is configured as following
```
{
"explanation_trigger": "pull",
"explanation_engine": "external",
"external_explanation_engine": {
"external_engine_type": "rest",
"external_explanation_engine_api": "http://127.0.0.1:5001/engine"
},
}
```
> The REST API at should be implemented separately. It receives user input and returns an explanation as a JSON response.
## Step 5- Task[](#step-5--task "Direct link to Step 5- Task")
To complete the scenario, we configure a user task that defines the goal of the simulation, the initial device state, and any contextual information displayed to the user.
We modify the existing base task and replace it with a task where the users turn off the heater, mirroring Situation 1 in the CIRCE paper. We begin by updating the basic task information:
```
{
"id": "heater_off",
"description": "Turn off the heater"
}
```
**Environment Variables (Optional)**
We can optionally define environment variables to provide additional contextual information to the user during the task. These variables are displayed in a status bar at the bottom of the screen and are intended solely for informational purposes.
For this scenario, we define a single environment variable indicating that the outdoor temperature is 10 °C:
```
{
"environment": [
{ "name": "Outdoor Temperature", "value": "10 °C" }
]
}
```

**Default Device Properties**
To ensure consistent device states at the beginning of the task (especially important in multi-task sessions), we define default device properties:
```
{
"defaultDeviceProperties": [
{
"device": "heater",
"properties": [
{
"name": "Power",
"value": true
}
]
},
{
"device": "thermostat",
"properties": [
{
"name": "Temperature",
"value": 13
}
]
},
{
"device": "window",
"properties": [
{
"name": "Open",
"value": true
}
]
}
]
}
```
This sets:
* The heater to On
* The thermostat to 13°C
* The window to Open (the 'Open' property is set to 'true')
These properties override any previous states and ensure a controlled starting point for the scenario.
**Defining the Task Goal**
The final step is to define the goal of the task—that is, to specify the exact condition under which the task is considered **successfully completed**.
In our scenario, as described earlier, the objective is to have the heater turned off. This is expressed using a condition on the device’s state:
```
{
"goals": [
{
"device": "heater",
"condition": {
"name": "Power",
"operator": "==",
"value": false
}
}
]
}
```
This means the task will be marked as complete when the Power property of the heater device is set to false.
## 6- Final Result[](#6--final-result "Direct link to 6- Final Result")
### 6.1- Complete JSON Files Overview[](#61--complete-json-files-overview "Direct link to 6.1- Complete JSON Files Overview")
Below are the complete configuration files used in this scenario:
**game.json**
```
{
"environment": {
"time": {
"startTime": {
"hour": 8,
"minute": 0
},
"speed": 10
}
},
"rules": [
{
"id": "heater_temperature",
"name": "Heater on when the thermostat is below 20",
"precondition": [
{
"type": "Device",
"device": "window",
"condition": {
"name": "Open",
"operator": "==",
"value": true
}
},
{
"type": "Device",
"device": "thermostat",
"condition": {
"name": "Temperature",
"operator": "<=",
"value": 20
}
}
],
"action": [
{
"type": "Device_Interaction",
"device": "heater",
"interaction": {
"name": "Power",
"value": true
}
}
]
},
{
"id": "window_thermostat",
"name": "Heater on when the window is open",
"precondition": [
{
"type": "Device",
"device": "window",
"condition": {
"name": "Open",
"operator": "==",
"value": false
}
}
],
"action": [
{
"type": "Device_Interaction",
"device": "thermostat",
"interaction": {
"name": "Temperature",
"value": 21
}
}
]
}
],
"tasks": {
"tasks": [
{
"id": "heater_off",
"description": "Turn off the heater",
"timer": 600,
"abortable": false,
"environment": [
{ "name": "Outdoor Temperature", "value": "10 °C" }
],
"defaultDeviceProperties": [
{
"device": "heater",
"properties": [
{ "name": "Power", "value": true }
]
},
{
"device": "thermostat",
"properties": [
{ "name": "Temperature", "value": 13 }
]
},
{
"device": "window",
"properties": [
{ "name": "Open", "value": true }
]
}
],
"goals": [
{
"device": "heater",
"condition": {
"name": "Power",
"operator": "==",
"value": false
}
}
]
}
]
},
"rooms": [
{
"name": "Base Room",
"walls": [
{
"image": "assets/images/room/wall1/wall1.webp",
"default": true,
"devices": [
{
"name": "Window",
"id": "window",
"position": {
"x": 500,
"y": 313,
"scale": 1.5,
"origin": 1
},
"interactions": [
{
"InteractionType": "Boolean_Action",
"name": "Open",
"inputData": {
"valueType": ["PrimitiveType", "Boolean"],
"unitOfMeasure": null,
"type": {
"True": "Yes",
"False": "No"
}
},
"currentState": {
"visible": null,
"value": true
}
}
],
"visualState": [
{ "default": true, "image": "assets/images/room/wall1/devices/window_closed.png" },
{
"image": "assets/images/room/wall1/devices/window_open.png",
"conditions": [
{
"name": "Open", "value": true
}
]
}
]
}
]
},
{
"image": "assets/images/room/wall2/wall2.webp",
"default": false,
"devices": [
{
"name": "Heater",
"id": "heater",
"position": {
"x": 510,
"y": 393,
"scale": 0.5,
"origin": 1
},
"interactions": [
{
"InteractionType": "Boolean_Action",
"name": "Power",
"inputData": {
"valueType": ["PrimitiveType", "Boolean"],
"unitOfMeasure": null,
"type": {
"True": "On",
"False": "Off"
}
},
"currentState": {
"visible": null,
"value": true
}
}
],
"visualState": [
{ "default": true, "image": "assets/images/room/wall2/devices/heater.png" }
]
},
{
"name": "Thermostat",
"id": "thermostat",
"position": {
"x": 280,
"y": 270,
"scale": 0.35,
"origin": 1
},
"interactions": [
{
"InteractionType": "Numerical_Action",
"name": "Temperature",
"inputData": {
"valueType": ["PrimitiveType", "Integer"],
"unitOfMeasure": "°C",
"type": {
"Range": [13,21],
"Interval": [8]
}
},
"currentState": {
"visible": false,
"value": 13
}
}
],
"visualState": [
{ "default": true, "image": "assets/images/room/wall2/devices/thermostat-13.png" },
{
"image": "assets/images/room/wall2/devices/thermostat-21.png",
"conditions": [
{
"name": "Temperature",
"value": 21
}
]
}
]
}
]
},
{
"image": "assets/images/room/wall3/wall3.webp"
},
{
"image": "assets/images/room/wall4/wall4.webp"
}
]
}
]
}
```
**explanation.json**
```
{
"explanation_trigger": "pull",
"explanation_engine": "external",
"external_explanation_engine": {
"external_engine_type": "rest",
"external_explanation_engine_api": "http://127.0.0.1:5001/engine"
},
}
```
### 6.2- Running the Simulation[](#62--running-the-simulation "Direct link to 6.2- Running the Simulation")
With all components of the scenario now in place (environment, devices, rules, tasks, and explanation engine), you can restart the development server and launch the simulation.
**Running the Simulation**
To start the platform with your configured scenario: 'npm run dev'
Then open the simulation in your browser:
This will load the environment as defined in your game.json and explanation.json files
**Screenshots & Walkthrough**
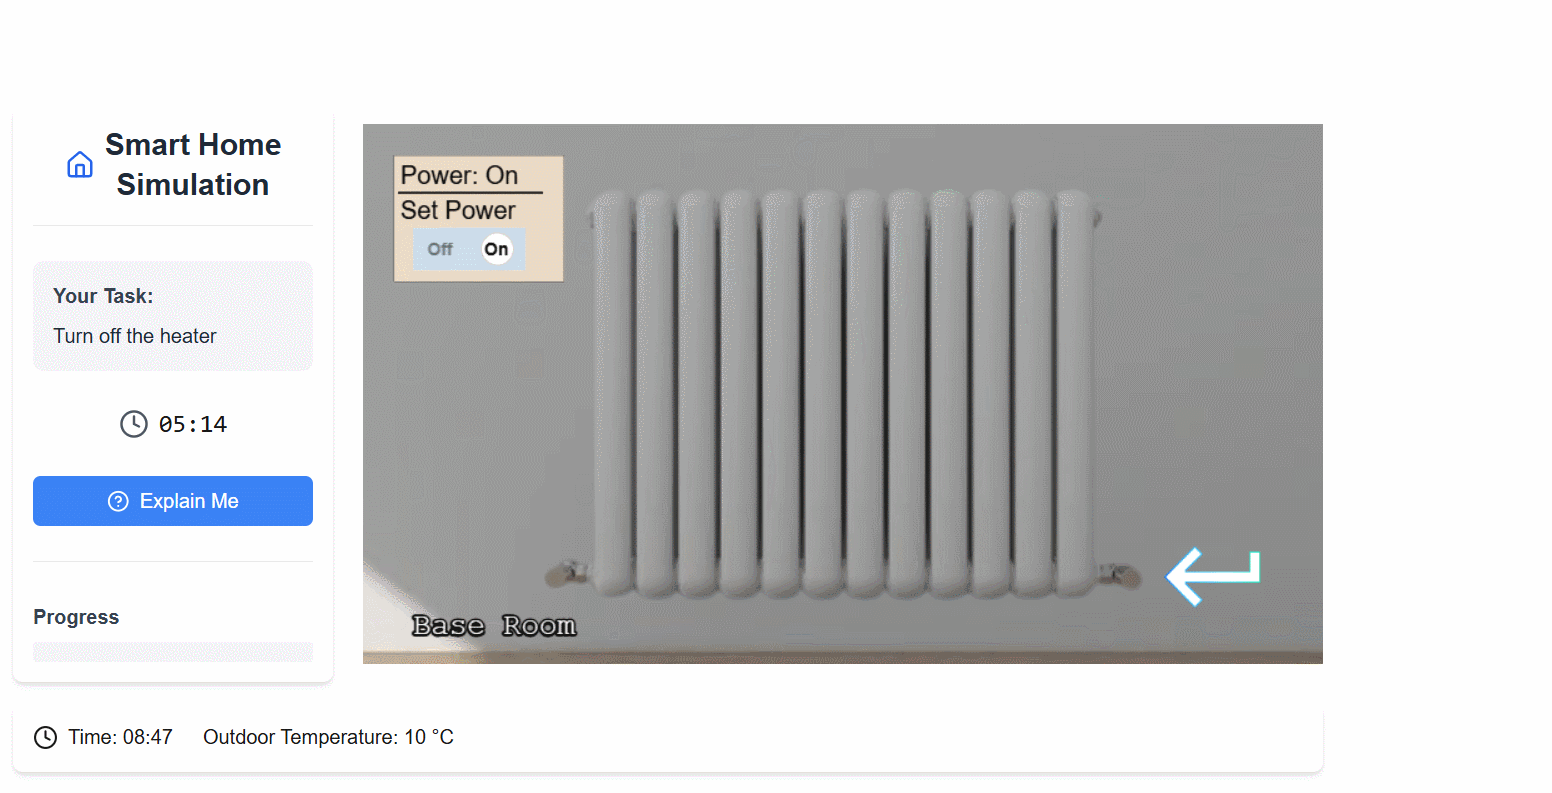
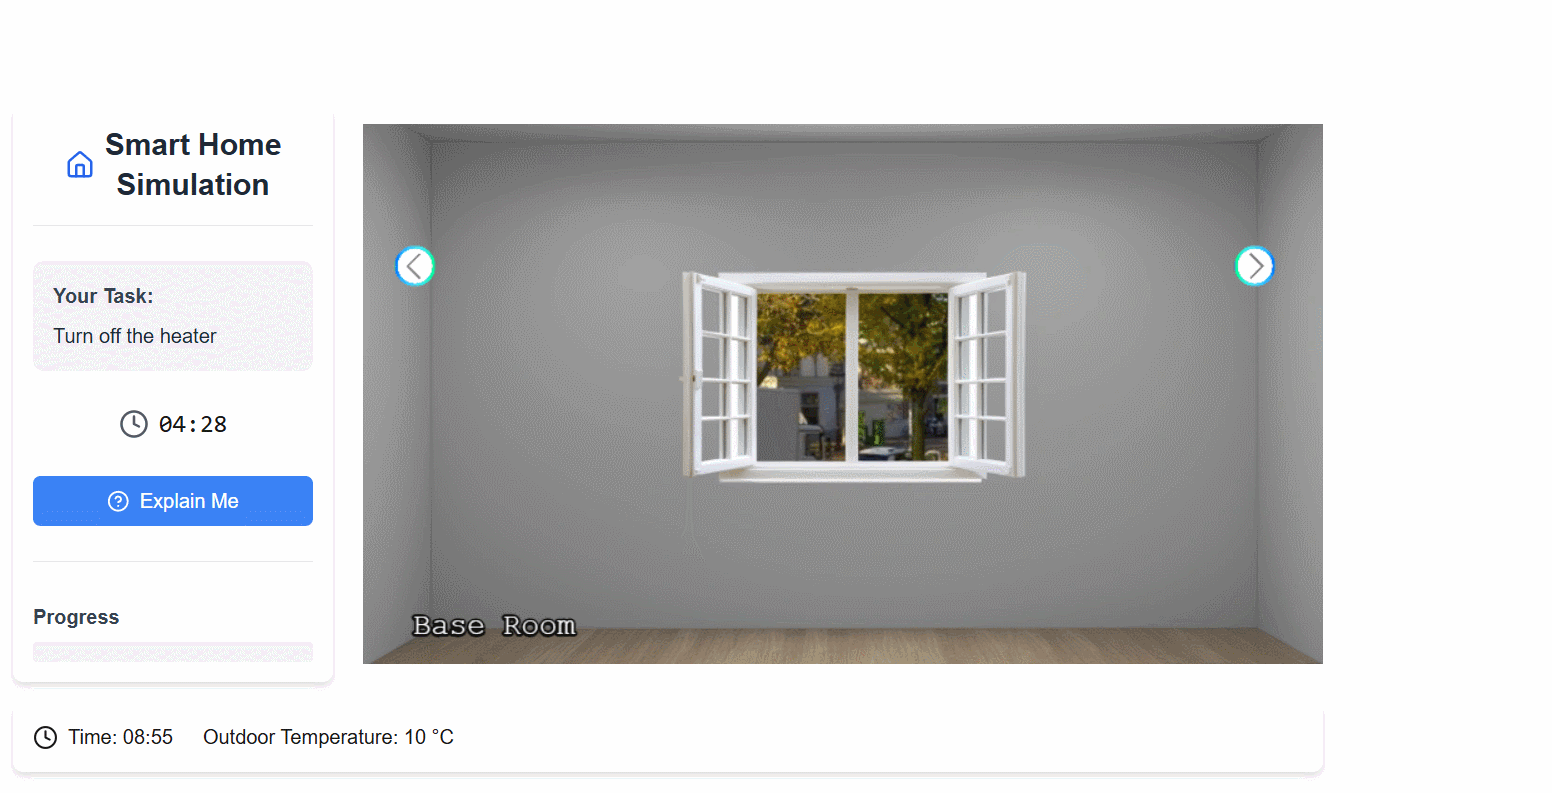
---
# Test Suite Documentation
The V-SHINE Study Platform employs a comprehensive test suite built with **Vitest** to ensure reliability across all critical components of the smart home simulation platform.
## Overview[](#overview "Direct link to Overview")
Our testing strategy combines unit tests for API endpoints with comprehensive integration tests for socket-based workflows, plus configuration validation - ensuring reliable research studies through robust backend testing.
### Test Framework Configuration[](#test-framework-configuration "Direct link to Test Framework Configuration")
* **Framework**: Vitest with Node.js environment
* **Coverage Target**: 70% minimum across branches, functions, lines, and statements
* **Test Files**: 21 test files with \~493 individual test cases
* **Execution**: `npm test` (platform directory)
## Test Architecture[](#test-architecture "Direct link to Test Architecture")
```
┌─────────────────────────────────────────────────────────────────┐
│ V-SHINE Test Suite │
├─────────────────────────────────────────────────────────────────┤
│ │
│ ┌─────────────────┐ ┌─────────────────┐ ┌─────────────────┐ │
│ │ Unit Tests │ │Integration Tests│ │ Config Tests │ │
│ │ (4 files) │ │ (15 files) │ │ (2 files) │ │
│ │ │ │ │ │ │ │
│ │ • API Routes │ │ • Multi-Service │ │ • Game Schema │ │
│ │ • HTTP Endpoints│ │ • Socket Events │ │ • Explanation │ │
│ │ • CRUD Ops │ │ • Workflows │ │ Schema │ │
│ │ │ │ • Rules Engine │ │ │ │
│ └─────────────────┘ └─────────────────┘ └─────────────────┘ │
│ │ │ │ │
│ └─────────────────────┼─────────────────────┘ │
│ │ │
│ ┌───────────────────────────────────────────────────────────┐ │
│ │ Test Utilities & Mocks │ │
│ │ │ │
│ │ MongoDB Mock Socket Harness Test Data Fixtures │ │
│ │ • Collections • Server/Client • Sessions │ │
│ │ • CRUD Ops • Event Testing • Tasks │ │
│ │ • Queries • Real-time Sim • Devices │ │
│ └───────────────────────────────────────────────────────────┘ │
└─────────────────────────────────────────────────────────────────┘
```
## Test Categories[](#test-categories "Direct link to Test Categories")
### 🔌 Unit Tests - API Routes[](#-unit-tests---api-routes "Direct link to 🔌 Unit Tests - API Routes")
**Location**: `test/backend_api/`
**Coverage**: Next.js API endpoints for HTTP-based interactions
| Test File | Purpose | Key Test Cases |
| ------------------------ | ---------------------- | ---------------------------------------- |
| `create-session.test.js` | Session initialization | Session creation, validation, task setup |
| `verify-session.test.js` | Session validation | Active session check, timeout handling |
| `game-data.test.js` | Game state retrieval | Configuration loading, device states |
| `complete-study.test.js` | Study completion | Final data collection, cleanup |
**Sample Test Pattern**:
```
describe('POST /api/create-session', () => {
it('should create new session with tasks and devices', async () => {
// Mock MongoDB operations
mockSessionsCollection.findOne.mockResolvedValue(null)
mockSessionsCollection.insertOne.mockResolvedValue({ insertedId: 'session-123' })
// Test API endpoint
const response = await POST(mockRequest)
expect(response.status).toBe(201)
})
})
```
### ⚡ Integration Tests - Socket Event Handlers[](#-integration-tests---socket-event-handlers "Direct link to ⚡ Integration Tests - Socket Event Handlers")
**Location**: `test/backend_socket/`
**Coverage**: Complete workflows testing multiple services and cross-component interactions
| Component | Test Coverage | Integration Flow |
| ----------------------- | ------------------------------------------------------------------------------- | ------------------------- |
| **Device Interactions** | Session validation → Device updates → Rule evaluation → Database persistence | Multi-service workflow |
| **Task Management** | Task state → Progress tracking → Completion logic → Metadata logging | End-to-end task lifecycle |
| **Game Flow** | Session setup → Environment initialization → Real-time state sync | Complete game startup |
| **Explanations** | Request validation → AI service calls → Response handling → Rating system | Full explanation pipeline |
| **Rules Engine** | Rule evaluation → Cascading updates → Device state changes → Event broadcasting | Complex rule processing |
**Integration Test Example**:
```
it('should handle complete device interaction workflow', async () => {
// Tests entire flow: validation → update → rules → persistence → broadcast
await handleDeviceInteraction(socket, db, interactionData, gameConfig, explanationConfig)
// Verifies integration across multiple services
expect(validateSession).toHaveBeenCalled() // Session service
expect(updateDeviceInteraction).toHaveBeenCalled() // Device service
expect(evaluateRules).toHaveBeenCalled() // Rules engine
expect(mockDb.collection).toHaveBeenCalled() // Database layer
})
```
### 📋 Configuration Validation Tests[](#-configuration-validation-tests "Direct link to 📋 Configuration Validation Tests")
**Location**: `test/` (root level)
**Coverage**: JSON schema validation for game configurations
* **`game-config-validation.test.js`**: Validates game.json structure (environment, devices, tasks, rules)
* **`explanation-config-validation.test.js`**: Validates explanation.json templates and metadata
## Platform Coverage Analysis[](#platform-coverage-analysis "Direct link to Platform Coverage Analysis")
### ✅ Tested Components[](#-tested-components "Direct link to ✅ Tested Components")
| Component Path | Test Coverage | Notes |
| ---------------------------- | ----------------- | ---------------------------------------------------- |
| `/src/app/api/*` | **Complete** | All 4 API routes have dedicated test suites |
| `/src/lib/server/socket/*` | **Comprehensive** | 8/8 socket handlers tested with real-time simulation |
| `/src/lib/server/services/*` | **Thorough** | Common services, rules engine fully covered |
| `/src/lib/server/logger/*` | **Complete** | Logging and metadata utilities tested |
| Configuration Files | **Validated** | JSON schema validation for all config files |
### ⚠️ Limited/No Test Coverage[](#️-limitedno-test-coverage "Direct link to ⚠️ Limited/No Test Coverage")
| Component Path | Coverage Gap | Impact |
| ----------------------------- | --------------- | ----------------------------------------------------- |
| `/src/app/study/game/*` | **No tests** | Frontend Phaser game logic (visual/interaction layer) |
| `/src/app/study/components/*` | **No tests** | React UI components |
| `/src/lib/mongodb.ts` | **Mocked only** | Database connection logic not integration tested |
| `/src/types/*` | **No tests** | TypeScript type definitions |
Frontend Testing Strategy
The frontend game components using Phaser 3 are not currently tested due to their visual and interactive nature. Testing these would require specialized tools like Cypress or Playwright for end-to-end testing.
## Test Utilities & Mocking Strategy[](#test-utilities--mocking-strategy "Direct link to Test Utilities & Mocking Strategy")
### MongoDB Mocking[](#mongodb-mocking "Direct link to MongoDB Mocking")
```
// test/backend_api/apiTestUtils.js
export function createMockDb() {
return {
mockDb: {
collection: vi.fn((name) => {
switch (name) {
case 'sessions': return mockSessionsCollection
case 'tasks': return mockTasksCollection
case 'devices': return mockDevicesCollection
}
})
}
}
}
```
### Socket.IO Testing Harness[](#socketio-testing-harness "Direct link to Socket.IO Testing Harness")
```
// test/backend_socket/socketTestUtils.js
export class SocketTestHarness {
async setup() {
this.httpServer = createServer()
this.io = new Server(this.httpServer)
this.clientSocket = Client(`http://localhost:${this.port}`)
// Provides isolated server/client pair for testing
}
}
```
### Test Data Fixtures[](#test-data-fixtures "Direct link to Test Data Fixtures")
Standardized test data includes:
* **Sessions**: Valid/completed sessions with metadata
* **Tasks**: Task definitions with completion states
* **Devices**: Device configurations with interaction history
* **API Payloads**: Request/response examples
## Running the Test Suite[](#running-the-test-suite "Direct link to Running the Test Suite")
### Development Commands[](#development-commands "Direct link to Development Commands")
```
cd platform/
# Run all tests
npm test
# Run with UI (interactive)
npm run test:ui
# Run with coverage report
npm test -- --coverage
# Run specific test file
npm test -- deviceInteractionHandler.test.js
# Watch mode for development
npm test -- --watch
```
### Test Environment Setup[](#test-environment-setup "Direct link to Test Environment Setup")
```
// test/setup.js - Global test configuration
process.env.MONGODB_URI = 'mongodb://localhost:27017/test-db'
process.env.MONGODB_DB = 'test-db'
// Global mocks for MongoDB and logger
vi.mock('../src/lib/mongodb.js')
vi.mock('../src/lib/server/logger/logger.js')
```
## Coverage Reports[](#coverage-reports "Direct link to Coverage Reports")
The test suite generates comprehensive coverage reports:
```
# Coverage thresholds (vitest.config.js)
thresholds: {
global: {
branches: 70,
functions: 70,
lines: 70,
statements: 70
}
}
```
Reports are available in multiple formats:
* **Text**: Console output during test runs
* **HTML**: Interactive coverage browser (`coverage/index.html`)
* **JSON**: Machine-readable format for CI/CD
* **Cobertura**: XML format for external tools
## Adding New Tests[](#adding-new-tests "Direct link to Adding New Tests")
### API Route Tests[](#api-route-tests "Direct link to API Route Tests")
1. Create test file in `test/backend_api/`
2. Use `createMockDb()` and `createMockRequest()` utilities
3. Mock external dependencies (MongoDB, logger)
4. Test both success and error scenarios
### Socket Handler Tests[](#socket-handler-tests "Direct link to Socket Handler Tests")
1. Create test file in `test/backend_socket/`
2. Use `SocketTestHarness` for isolated testing
3. Mock all external services and database operations
4. Test event emission, reception, and error handling
### Configuration Tests[](#configuration-tests "Direct link to Configuration Tests")
1. Add validation tests to existing config test files
2. Test schema compliance and error cases
3. Validate all required properties and constraints
Testing Best Practices
* **Isolation**: Each test should be independent and not rely on other tests
* **Mocking**: Mock all external dependencies (database, network, file system)
* **Coverage**: Aim for both positive and negative test cases
* **Real-time**: Use Socket.IO test harness for event-driven testing
* **Integration**: Socket tests verify complete workflows across multiple services
---
# Introduction
Welcome to **V-SHiNE: Virtual Smart Home with iNtelligent and Explainability Features**!
The **V-SHiNE** framework provides a powerful and flexible platform for researchers to design, configure, and deploy **simulated explainable smart home environments**. The core contribution of our work lies in offering a **versatile, customizable, and replicable testbed** that enables the **systematic evaluation of explainability aspects** under controlled conditions.
By integrating configurable explanations and comprehensive logging mechanisms, V-SHiNE supports a broad range of experimental setups, making it particularly suitable for advancing research in **explainable smart environments**, **cyber-physical systems**, and **human-computer interaction**.
For a LLM-friendly documentation, visit [llms.txt](https://exmartlab.github.io/SHiNE-Framework/llms.txt) or [llms-full.txt](https://exmartlab.github.io/SHiNE-Framework/llms-full.txt).
---